• Datsun Forums
  • Datsun Heritage
  • Datsun Tech Articles
  • Datsun Service Manuals
  • Datsun Advertisements
    • 240Z, 260Z, 280Z, 280ZX
    • Roadster / Fairlady Sports
    • Pickups and Trucks
    • Datsun 310 / 312 & 410 / 411
    • Datsun 510 / Bluebird
    • Other Datsun Models
    • Datsun-branded Ads
  • About

Datsun Discussion Forum

A forum for restorers, collectors, drivers and enthusiasts!

A 1976 Datsun F10 Graces Datsun Ranch for the Winter

March 11, 2020 by Greg

As easy as it would be to make this article about me and about the cool stuff we do at Datsun Ranch, this one really needs to be about this car… this very special car, with a neat backstory.

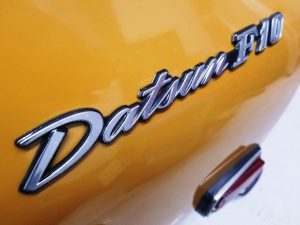
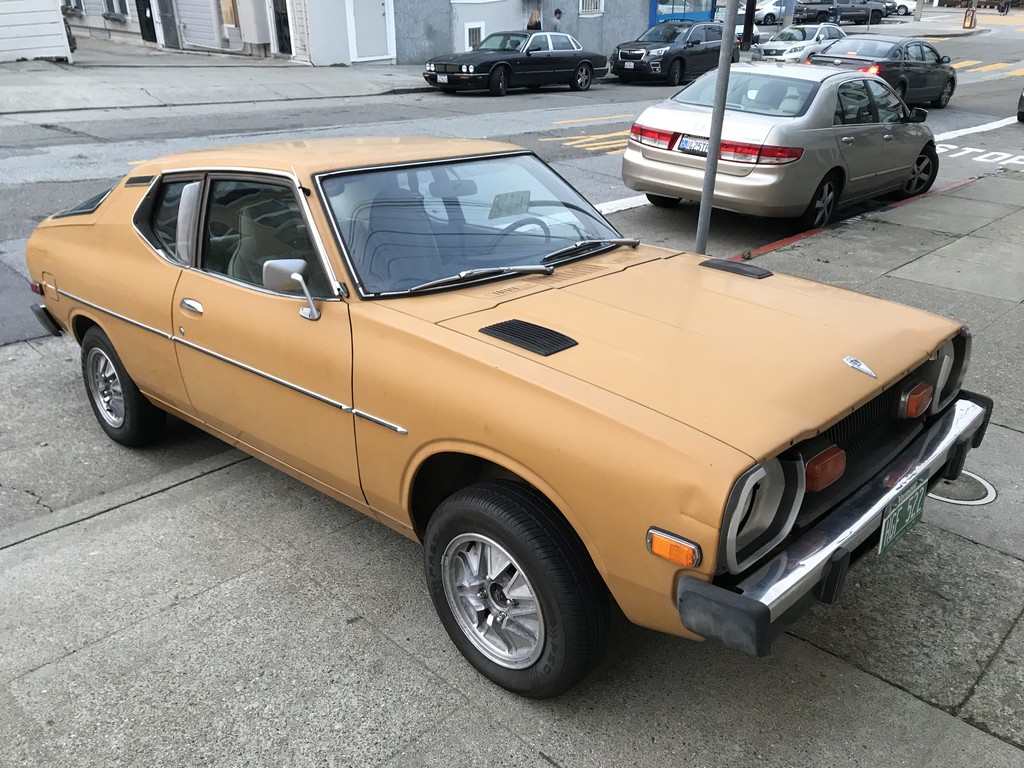
A quick Google search for Datsun F10 reveals words like “quirky, odd, ugly, lemon, and bizarre.” And yes, let’s be honest – each one applies. Styling in 1976 wasn’t Datsun’s claim to fame, but cheap reliability was. CAFE standards had taken their toll on American cars, and to be fair, the list of visually-attractive 1976 cars is painfully short.

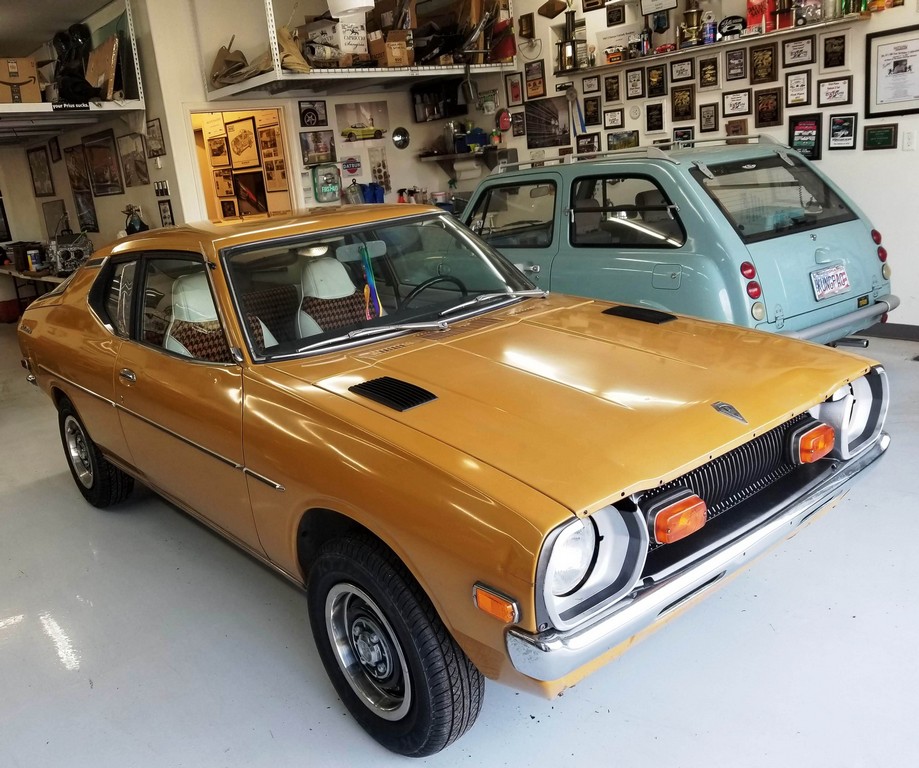
This car represents Datsun’s first foray into front-wheel drive in America. A 78hp A-14 engine backed up by a dogleg five-speed meant this little anomaly could reach 60mph in a mind-numbing 16 seconds. The cheapest car in the lineup, it weighed in at just over 2300 lbs, was a bit nose-heavy, and was remarkably devoid of even the simplest of creature comforts – more on that later.

So, how did this ugly duckling wind up at Datsun Ranch? Well, let’s go back a bit.

The original owner’s name is lost to history, but sometime in the 80’s, a gentleman in Arizona named Bryan Thompson ran across this car in a trailer park in Prescott Valley, Arizona. According to Bryan, “It had 53,000 miles and not a spot of rust anywhere. It was sitting under a tree behind a double-wide mobile home, covered in filth. I had a lot of fun rescuing and restoring it, and her name is Arnelle.” Bryan [@bryansthompson] is a designer and actually worked for Nissan in the past.

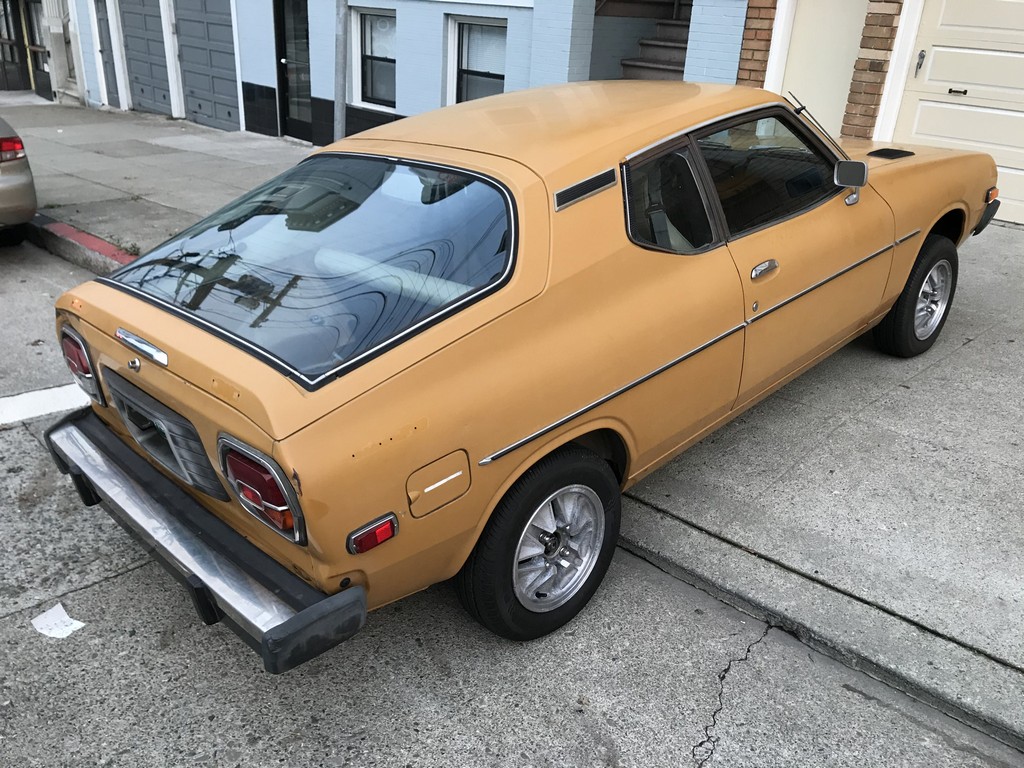
Some time later, Bryan sold Arnelle to an older gentleman who, not long after, passed away. Bryan adds: “For years, I thought the car was probably sold to a wrecker after an estate auction failed to find a home for it.”

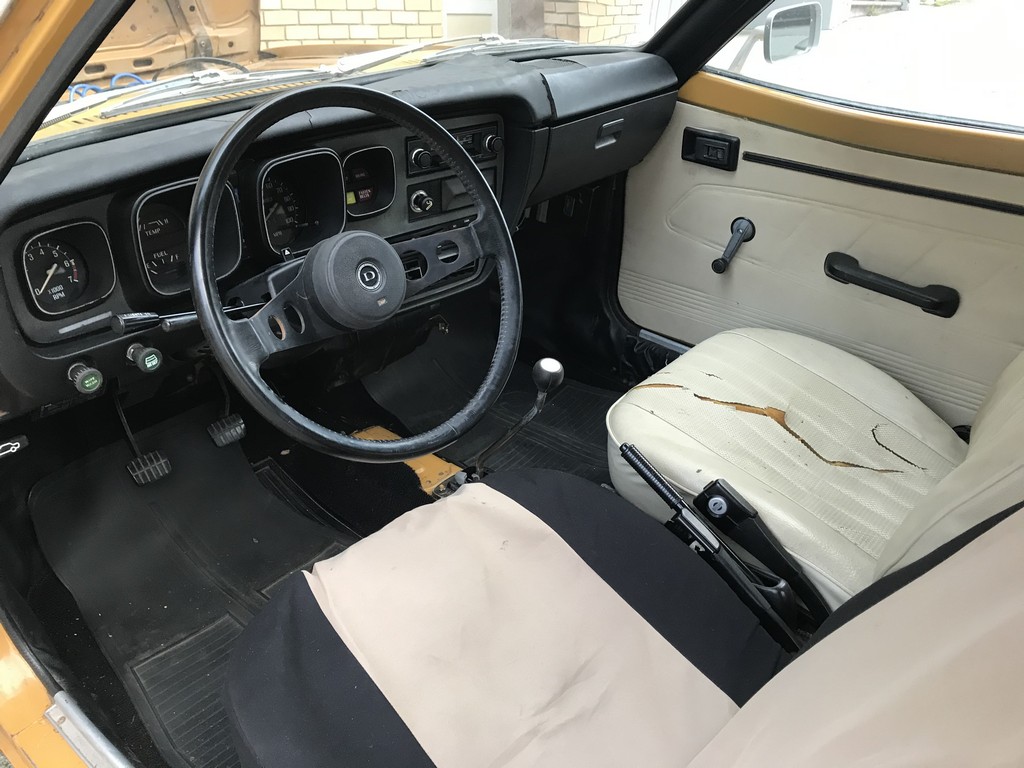
As it turns out, this wasn’t the case. An old college friend of Bryan’s spotted a familiar-looking car on Craigslist, and messaged Bryan to ask if it was indeed his F10. The car had been in storage all these years, and Bryan’s friend once again rescued Arnelle.

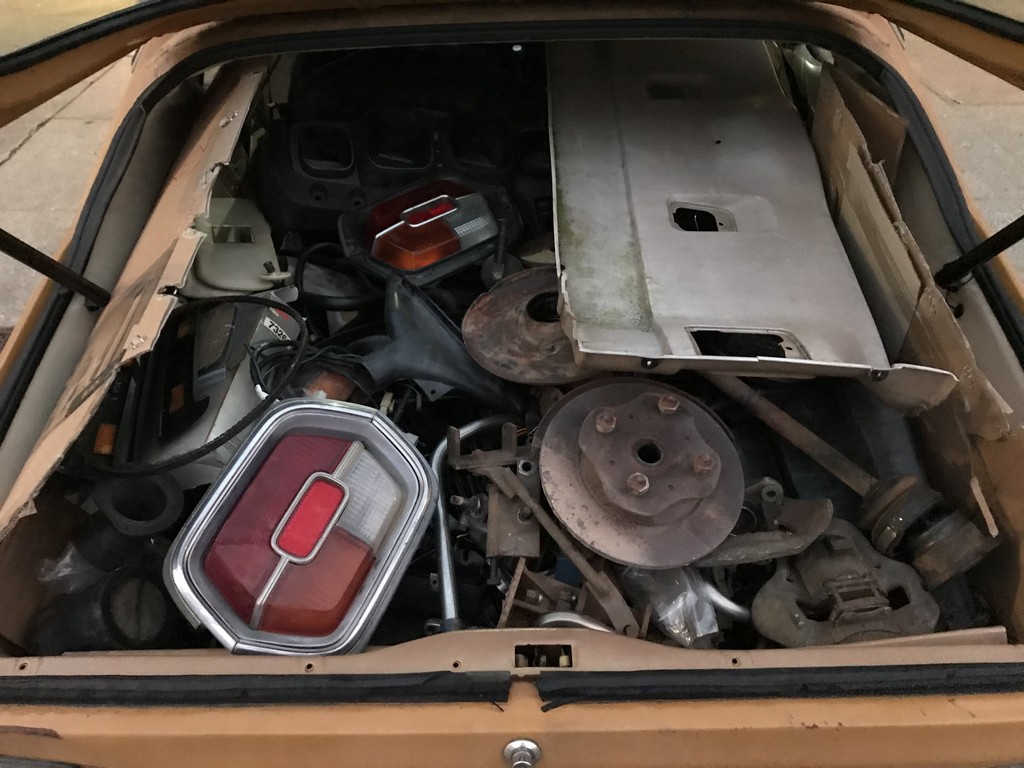
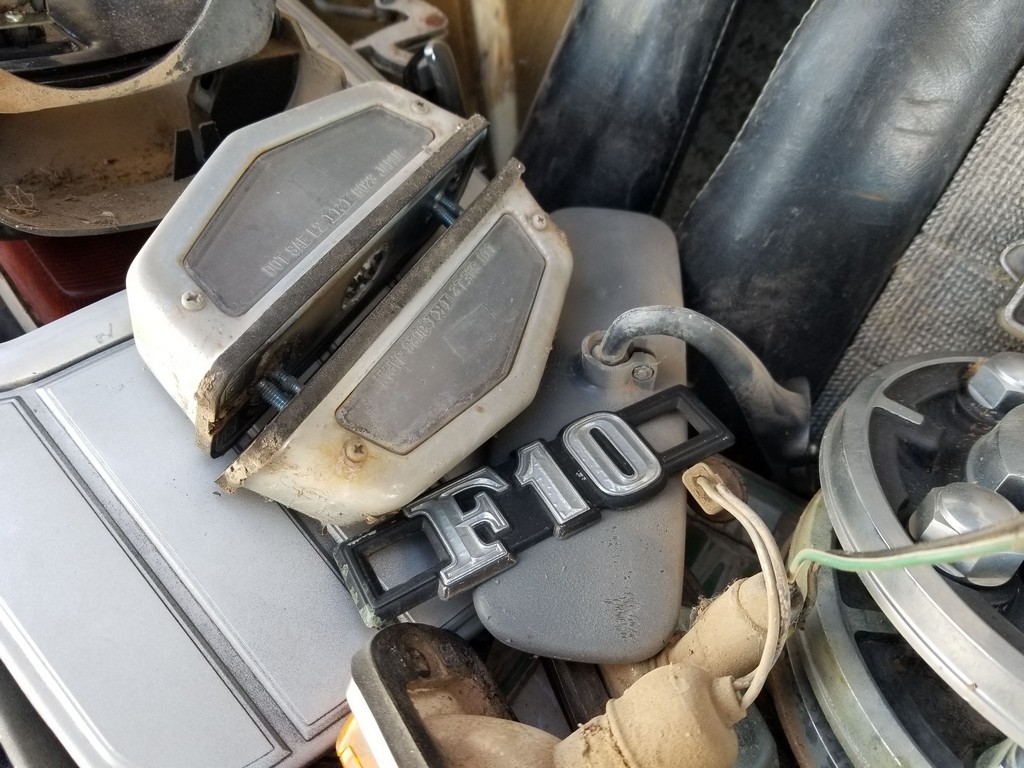
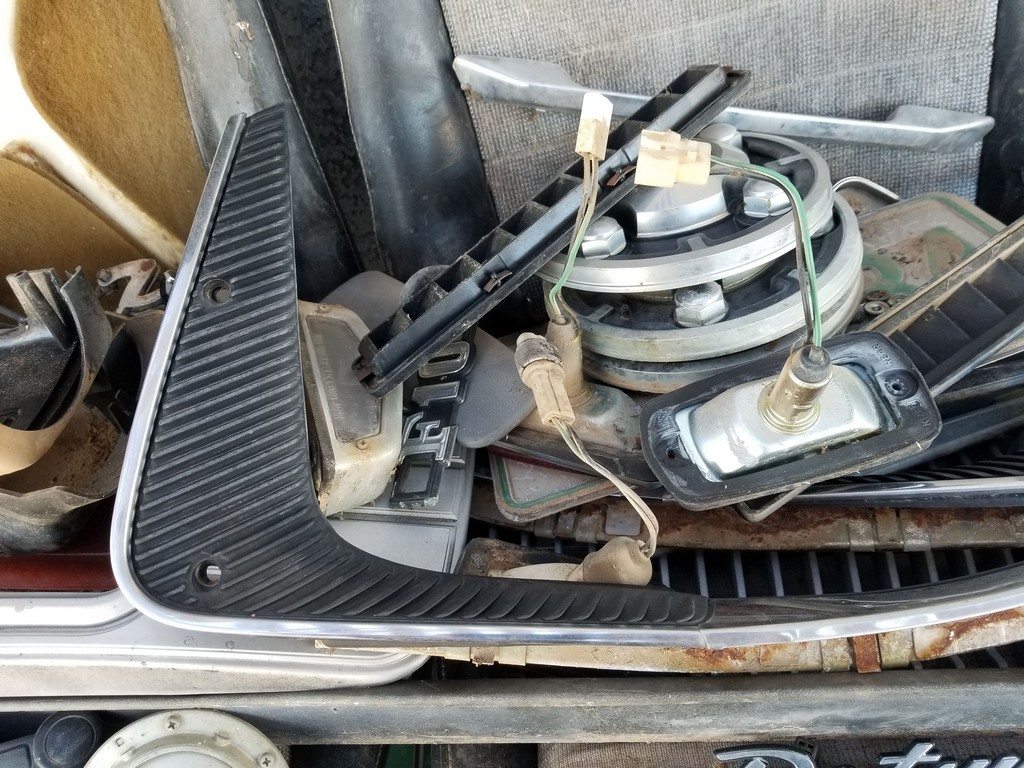
Over the next few years, the new owner collected F10 parts. And when we say collected, we mean ‘hoarded.’ Again, we’ll revisit that later in the story.

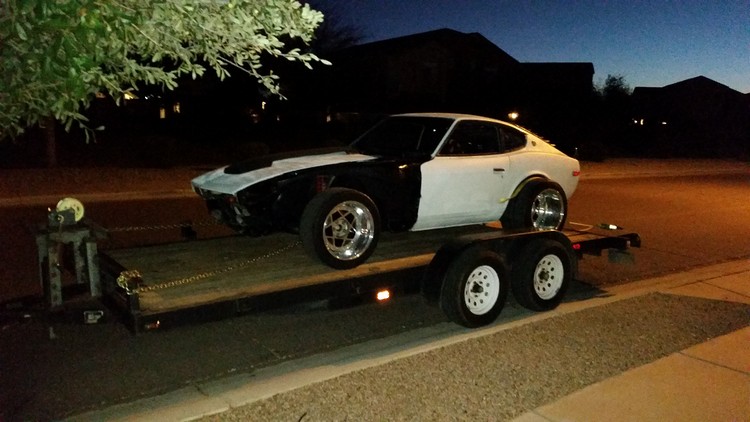
Through some turn of events, whether lack of time, lack of space, or lack of motivation, Arnelle found herself once more in need of a home. Along comes Ross Parks of Z Sport Canada and annual Datsun Ranch snowbird, and Arnelle was headed from NorCal to her new temporary home in sunny Arizona.

Arnelle arrived with no fanfare, but elicited a chorus of groans and sideways glances from the folks that frequent Datsun Ranch… I can only imagine the muttering from the collectible Datsuns inside as Arnelle spent her first night parked among such rarities as a pristine ’63 Bluebird and a SR-powered ’68 510.

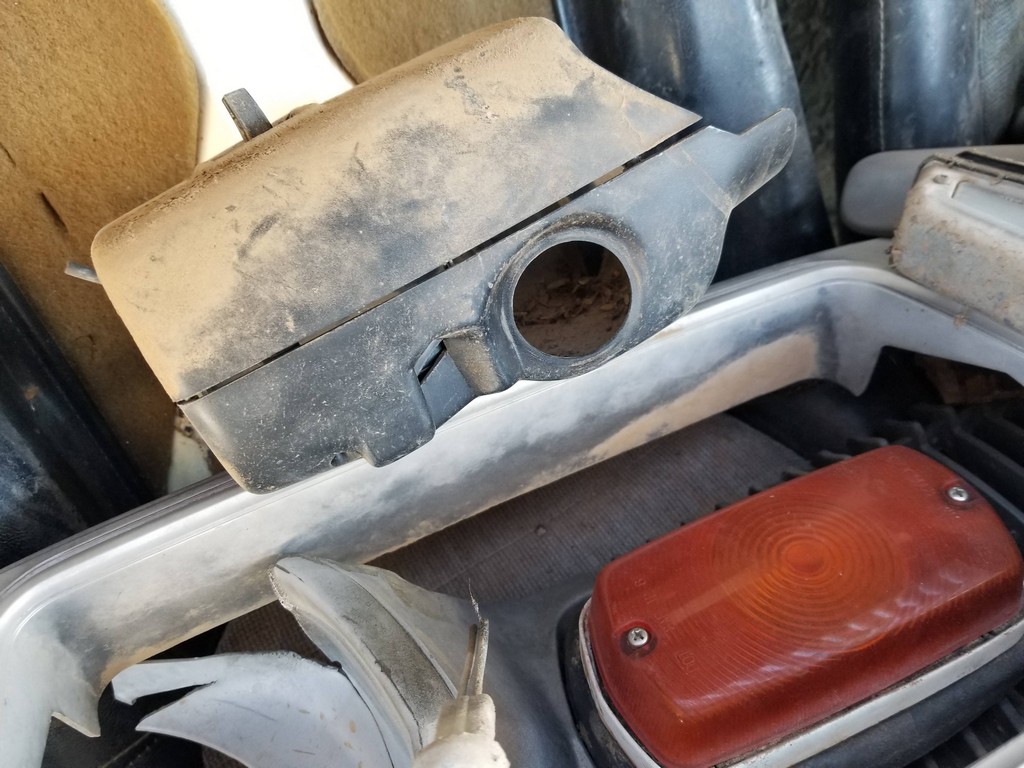
Now is a great time to mention that inside the F10 was packed EASILY another nearly-complete F10. Seriously, the number of spare parts shoved inside this car for the trip to AZ was astounding, and left only enough space for a small pilot. Floorboards to headliner, packed. There were even parts stuffed under the seats and up under the dash.

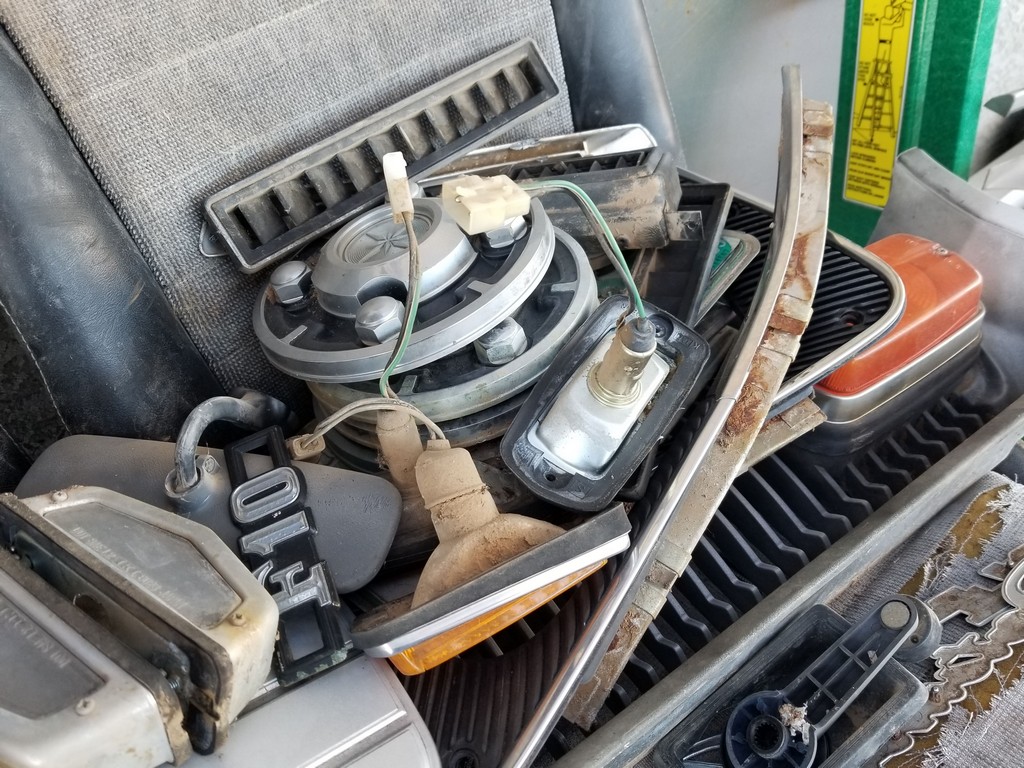
As if that weren’t enough, somehow Ross procured ANOTHER derelict F10 for spare parts. That one got immediately stripped of anything remotely useful, and was unceremoniously shipped off to the crusher.

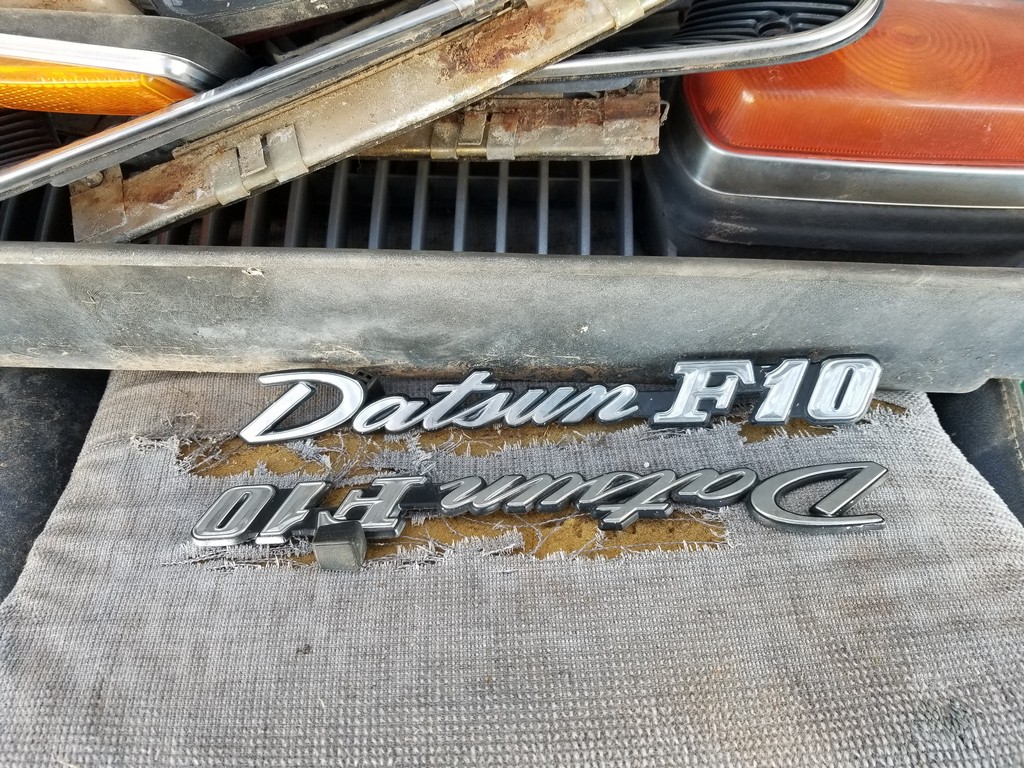
Not long after Arnelle’s arrival, Ross enlisted me to “go through her.” In Canadian-speak, this really means, “Work on my car, because I’m busy doing snowbird stuff.” My initial resistance was overcome by promises of coffee, occasional lunches, and eternal gratitude.

With that began a three-week journey down into a rabbit hole of mid-70’s Japanese malaise. The interior of the car was emptied, parts sorted and catalogued, anything needing attention was documented, a plan of attack was formulated, and a very mild “rolling resto” was started.

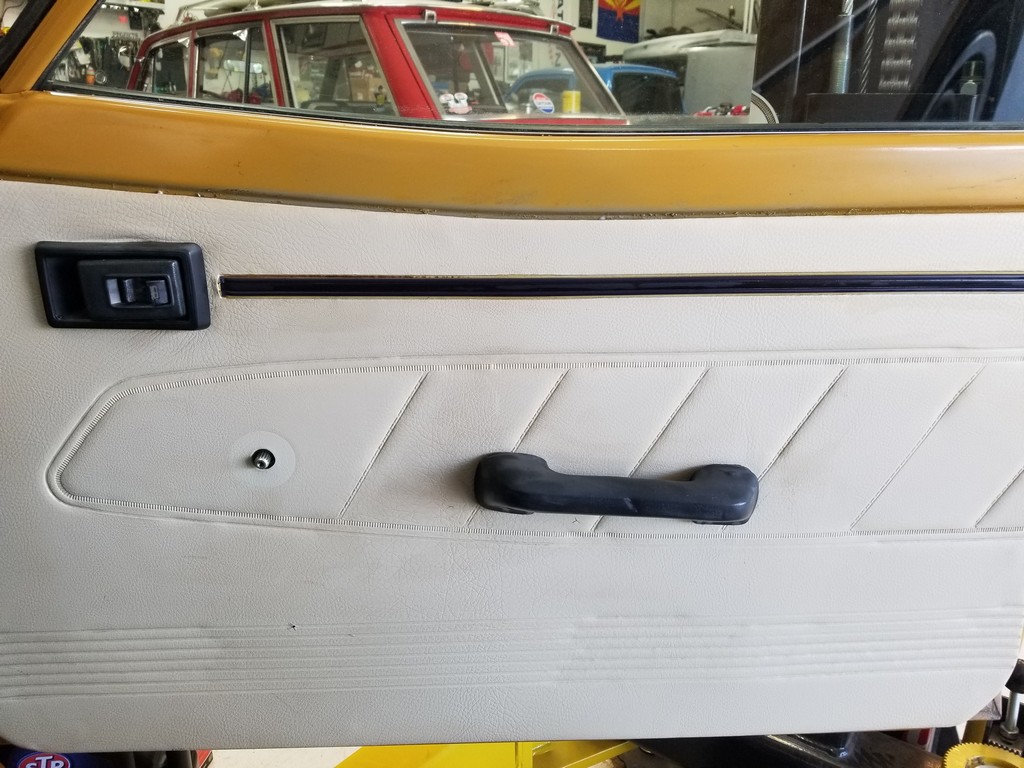
Within hours, the depths of Datsun’s cost-cutting were slowly revealed. Sure, this car had manual windows, a single-speaker AM radio and no climate control, that’s to be expected. But this was TRUE minimalism: No sound deadening under the carpet – not even the fuzzy recycled shredded mattress pads that Nissan has used for decades. Nope, nothing. Atop the spare tire? A thin layer of carpet. No fiberboard, no panel. Carpet. The plastic panels that make up the rear interior? Easily the thinnest plastic I’ve seen in a car interior. Not exaggerating: Holding it up to the light, you can see through it. So, as you can imagine, this project would require caution, care, and a delicate touch (none of which are words commonly associated with yours truly).

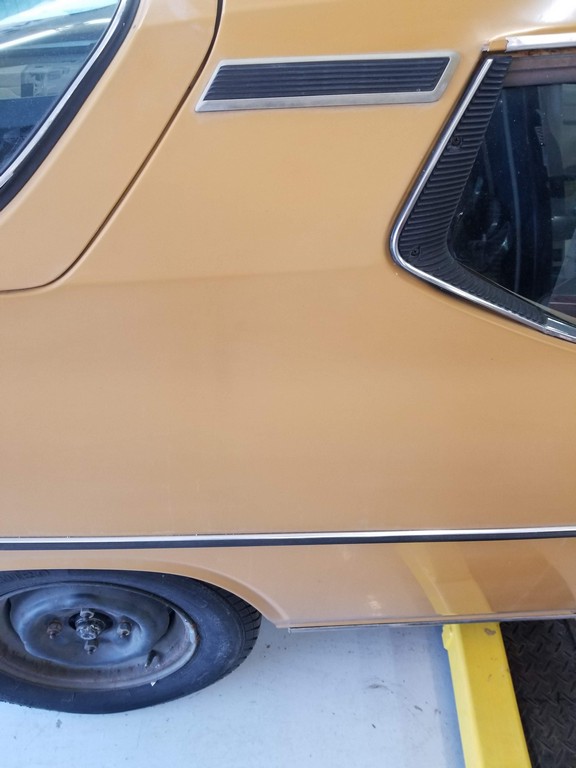
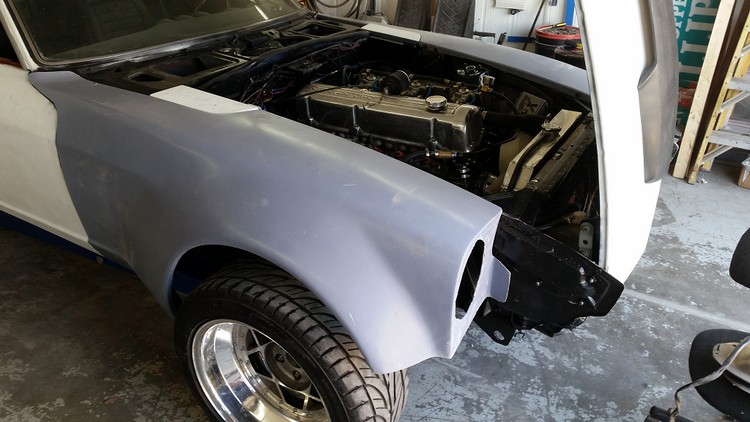
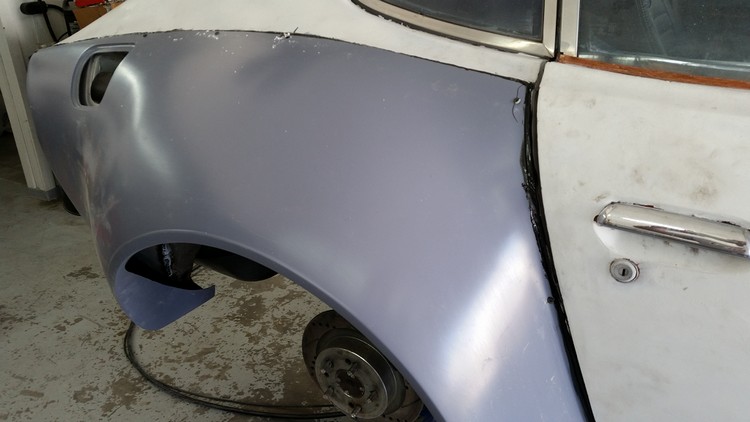
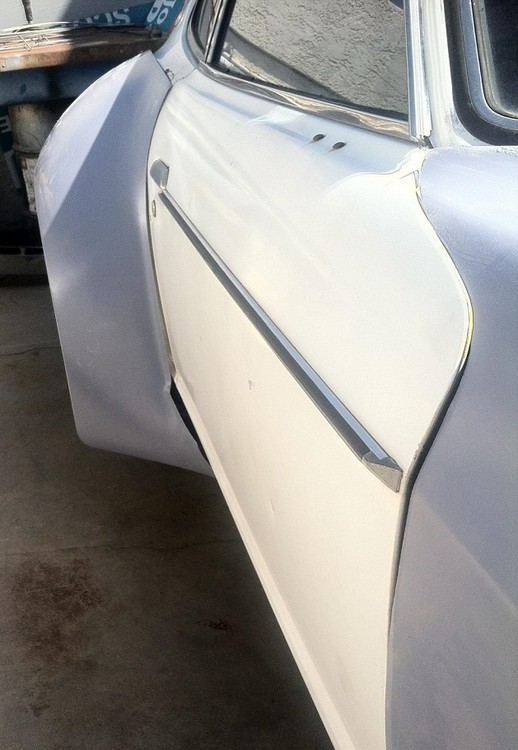
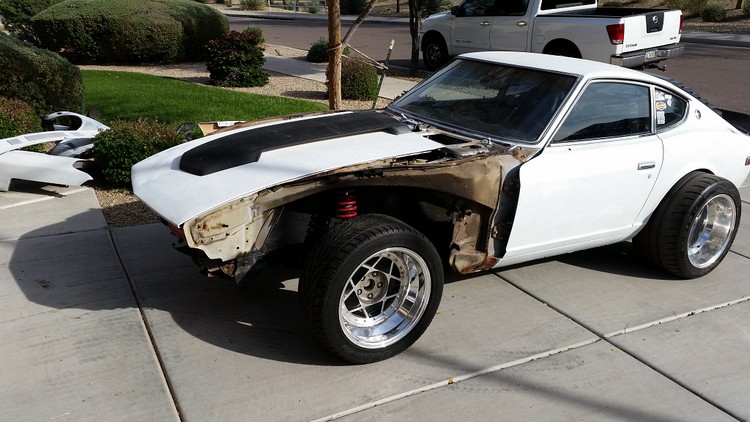
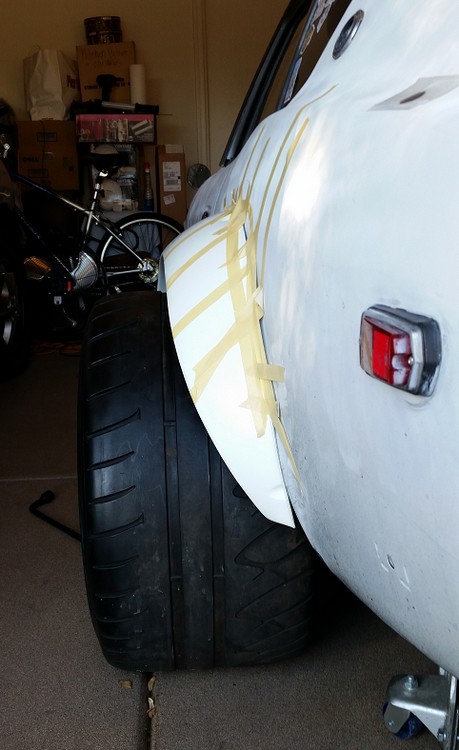
Since this one wouldn’t be getting repainted, there was no reason to do a full-scale disassembly. The first order of business was to assess the body and determine if there was any hidden rust or secrets that might make this a fool’s errand. Fortunately, there were no bugaboos to be found aside from a few dents. An original-paint car is always, always, always more appealing (value and appearance-wise) than a respray, so the goal here was to retain as much of the original paint as possible. The few dents that were accessible were worked back into straightness, and the one big nasty one on the driver side will be left to a professional. Believe it or not, the rear side windows on the F10 actually roll down, so the window mechanism and associated bracing precluded too much behind-the-scenes massaging of the metal. A good paintless dent repair person can straighten the metal, and a good painter can blend in to match the original paint.

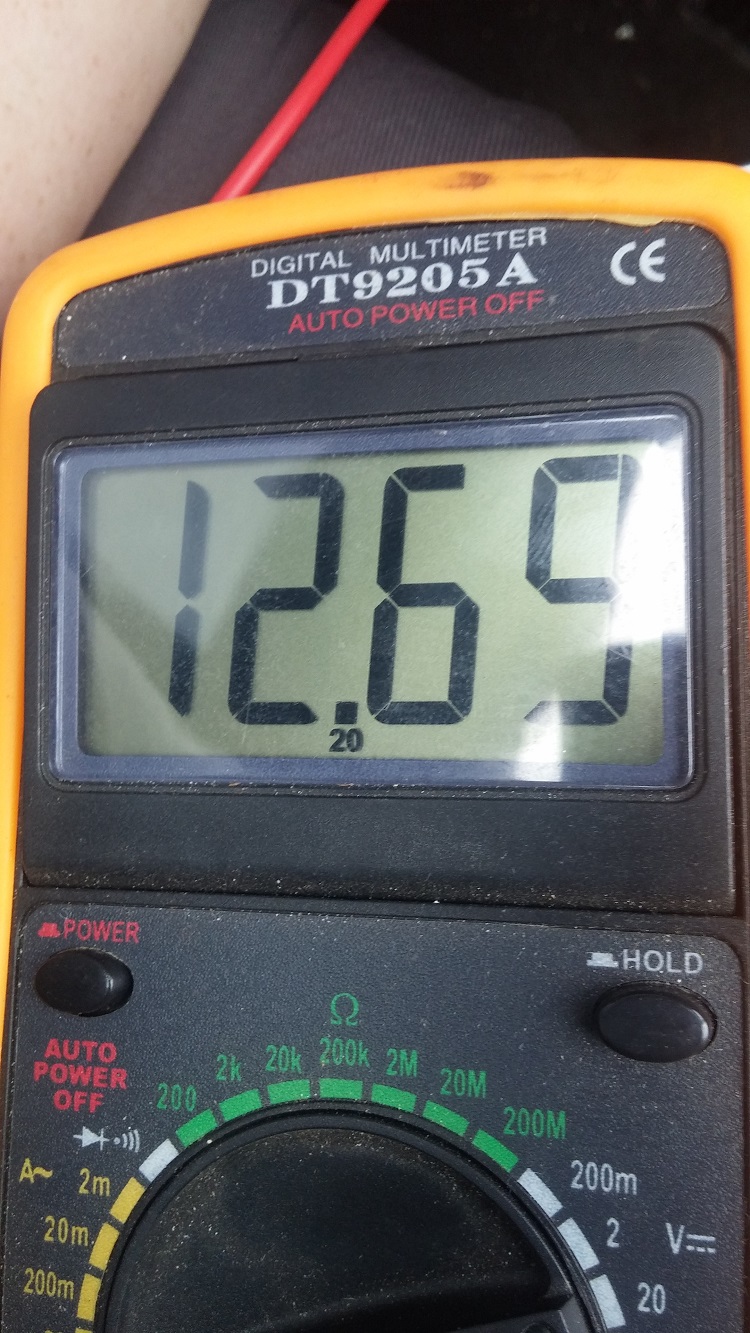
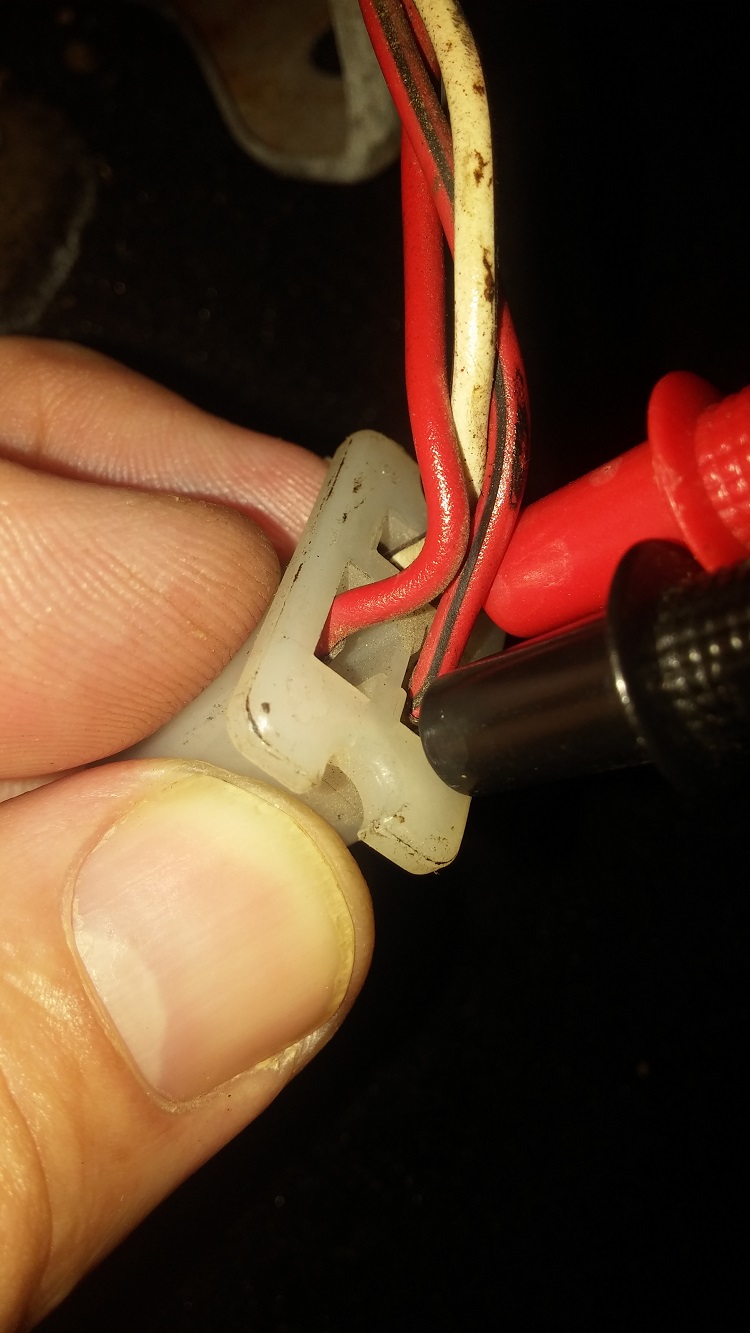
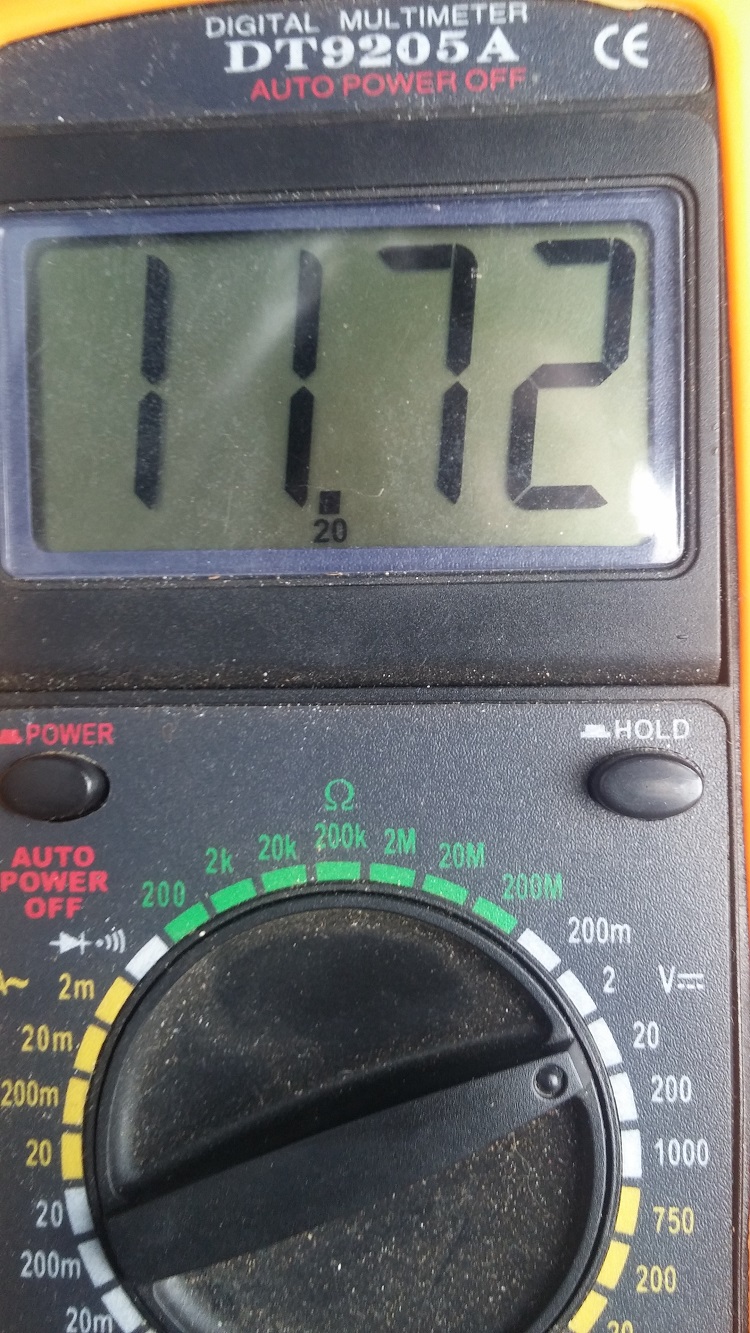
A full day of light cutting and buffing on the paint followed. A digital paint thickness gauge is a must-have when working with old Datsun paint, as it tells you if there’s enough to cut aggressively. This car would be getting a gentle touch, as the factory paint was thin and poorly-applied, another cost-saving measure for sure. At the end of the day, the butterscotch color was a little richer and the majority of the car was a little bit glossier than it was.

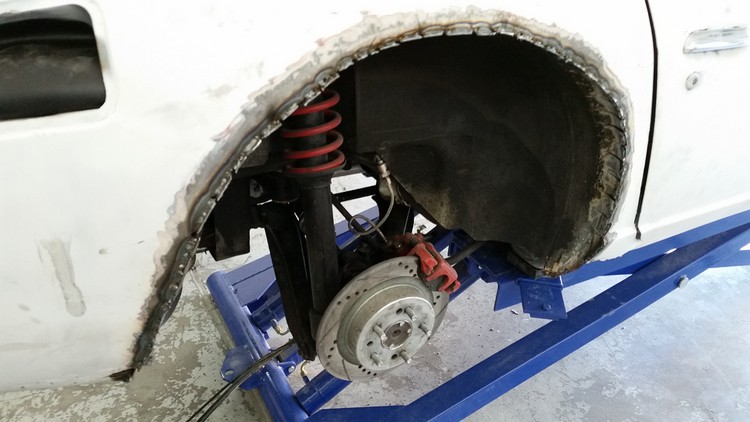
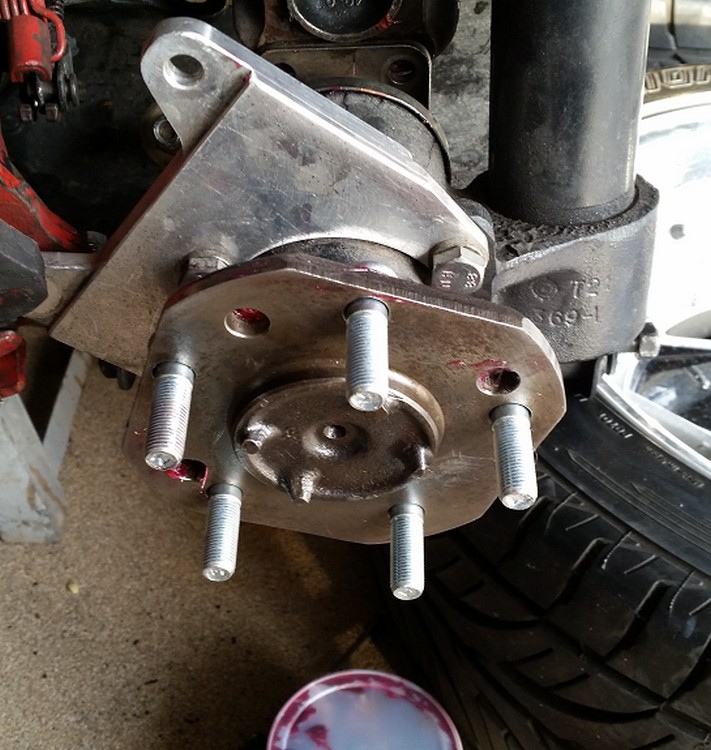
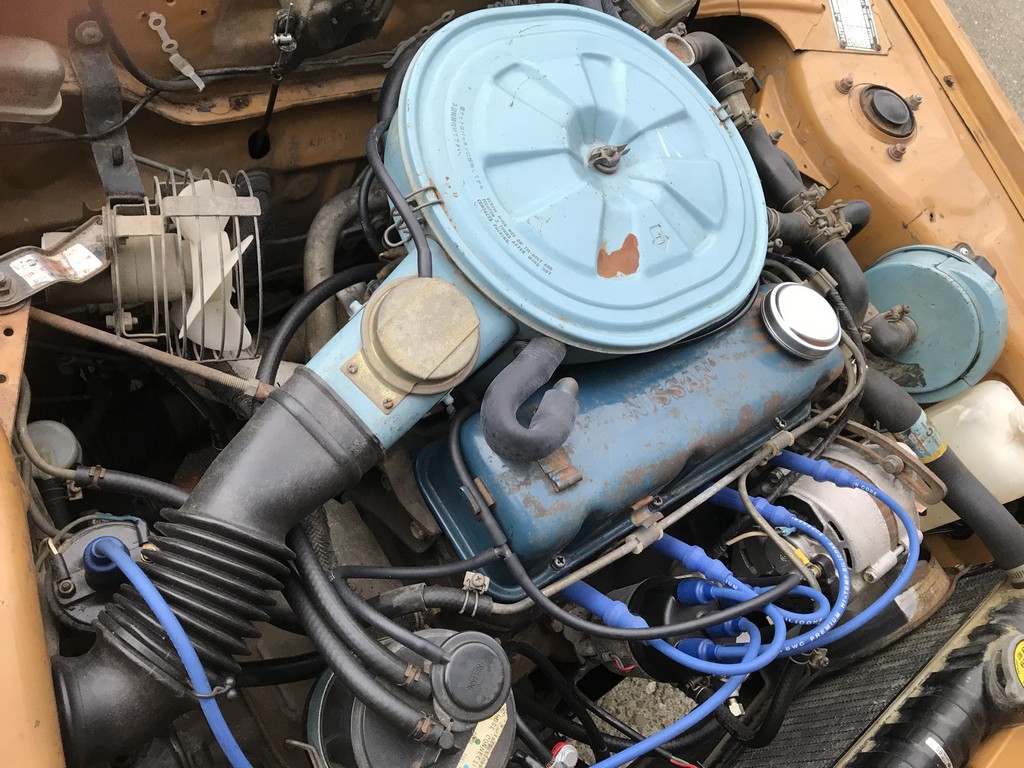
Inspecting the little car on the lift, there wasn’t much needed in the way of mechanical refurbishment. All fluids were changed, the tension rod bushings were swapped out, a fresh set of plugs and a cursory tune-up would suffice here. Thankfully, the little A-series engine in the F10 is a tried-and-true design that just keeps plugging along with minimal care.

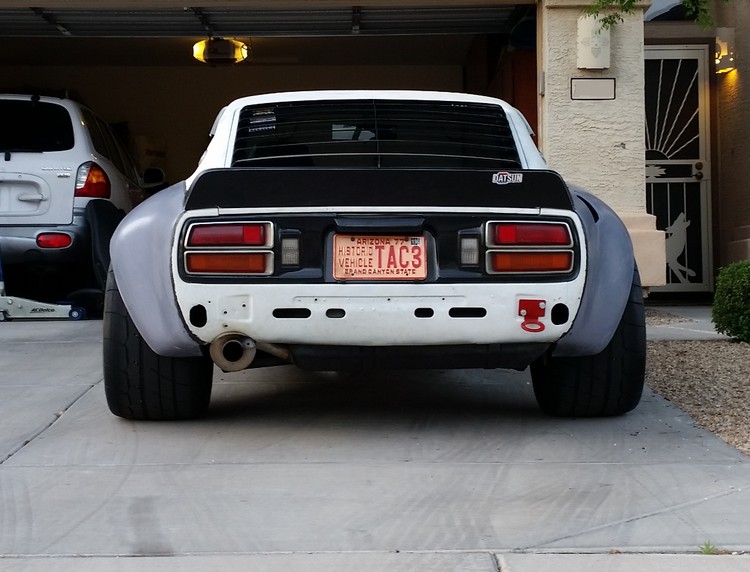
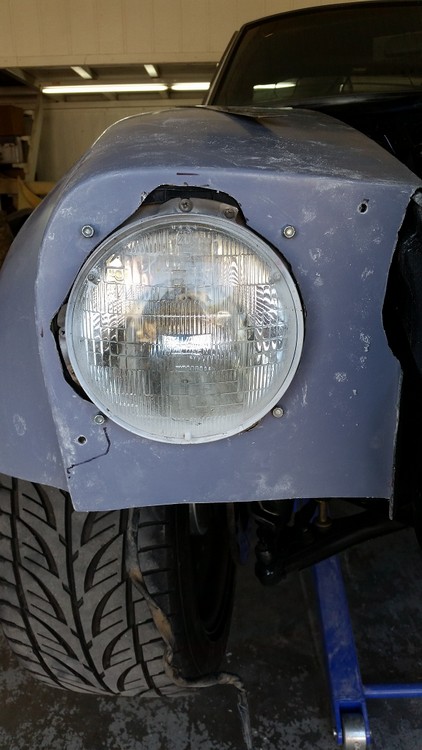
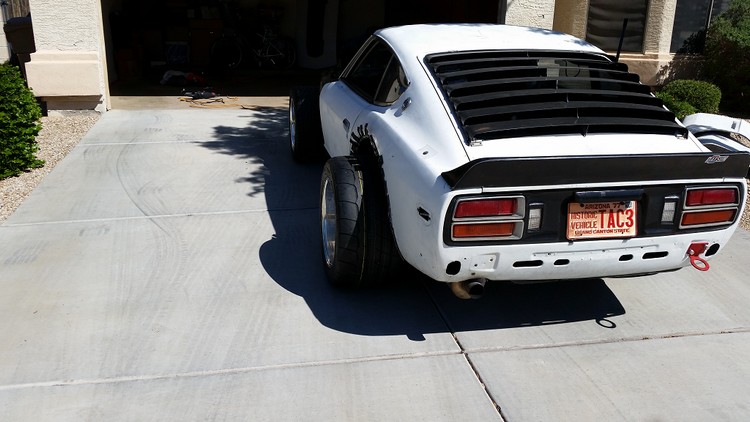
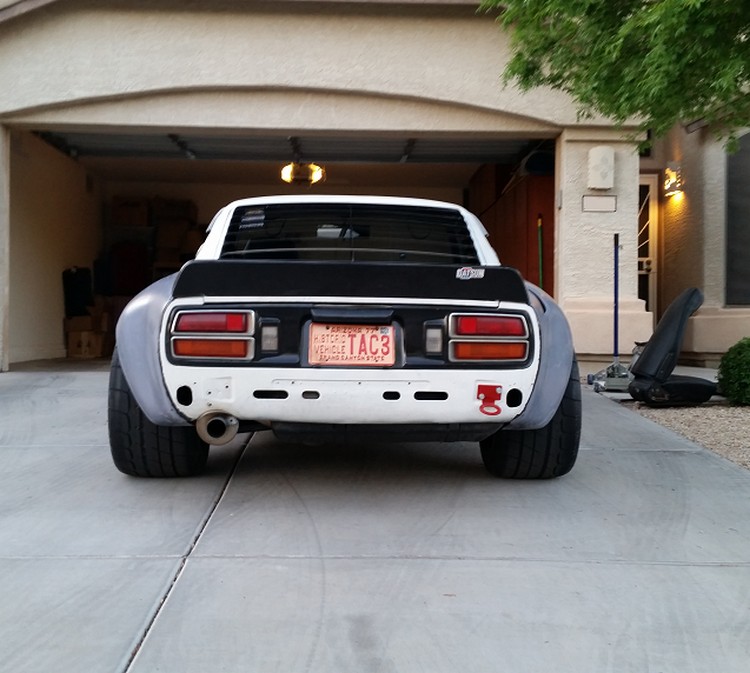
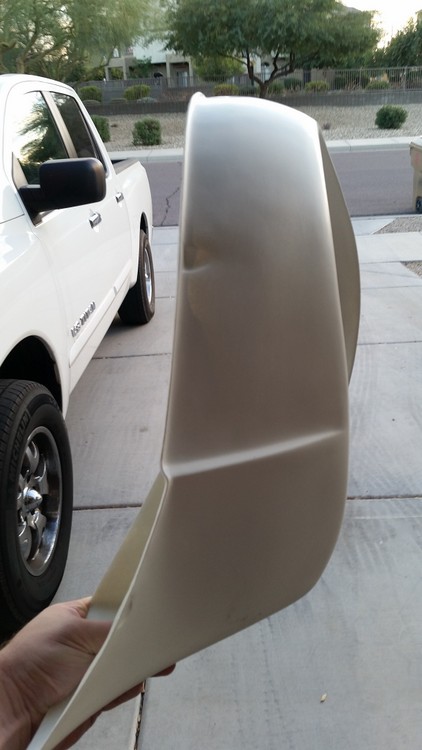
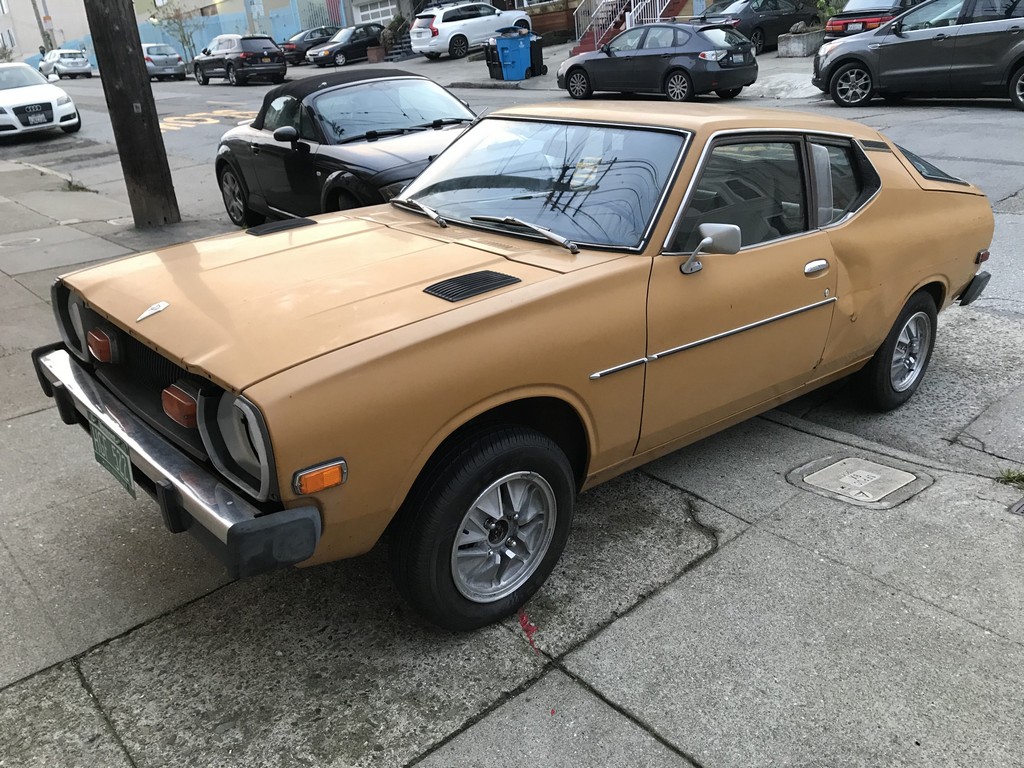
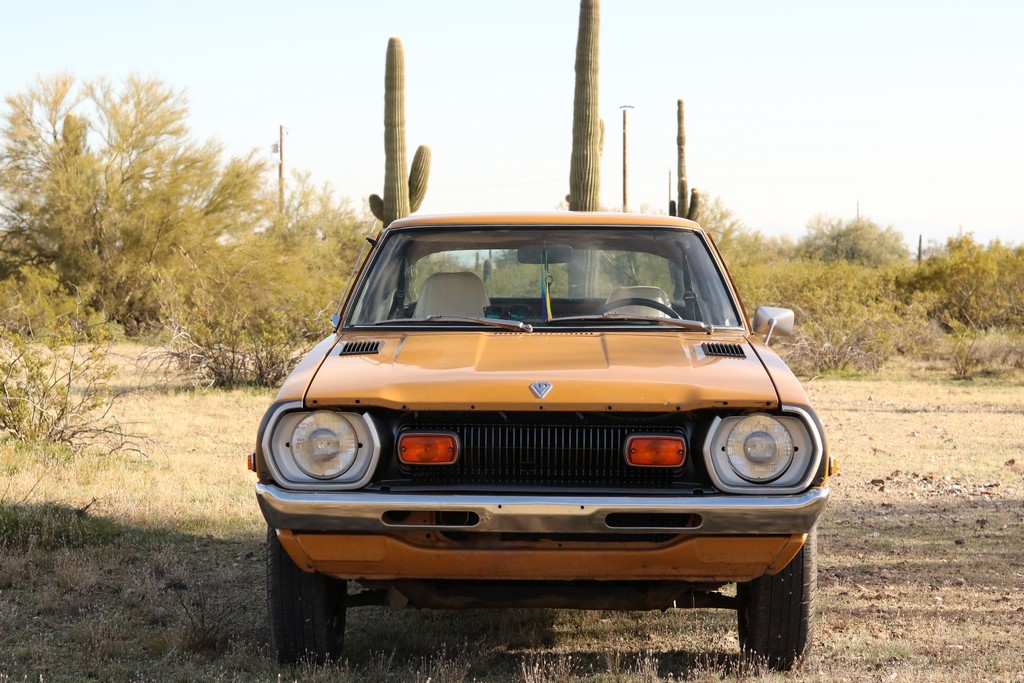
Next step was to do something about the wretched 5mph bumpers. In the early days of Federal Motor Vehicle Safety Standards (FMVSS), due to rapidly increasing repair costs, the 5 mile bumper was mandated in 1974. The rule basically required that no damage to the car’s lights, safety equipment and engine could result from an angled 5mph impact. Considering the lack of understanding of energy dissipation and crash absorption that existed in 1976, it was no surprise that big park-bench bumpers were slapped on in a hurried attempt to comply with the new regulations.

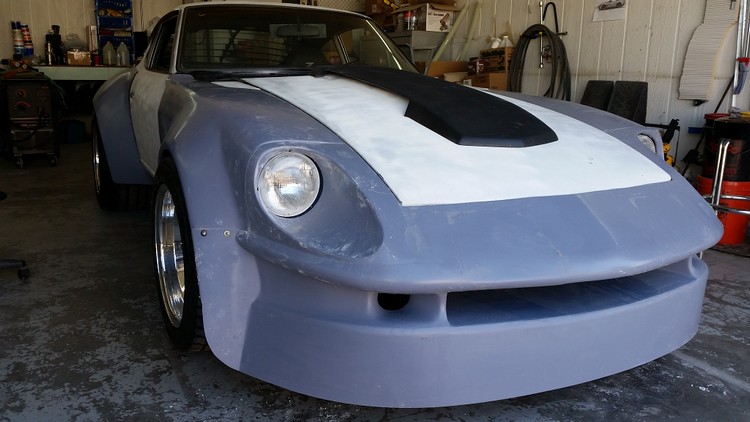
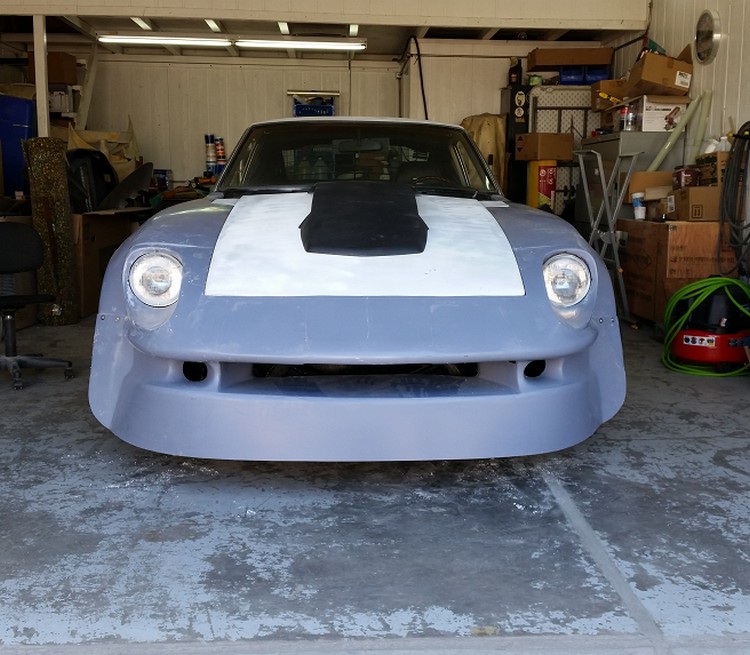
Well, in America, we prefer freedom, and those 5mph bumpers represent the oppression of an overreaching government mandate. Therefore, off they go, to be replaced by a set of European bumpers that were procured by the prior owner. Not only do they shave 110 unnecessary pounds off the overall weight of the car, but the appearance is actually improved.

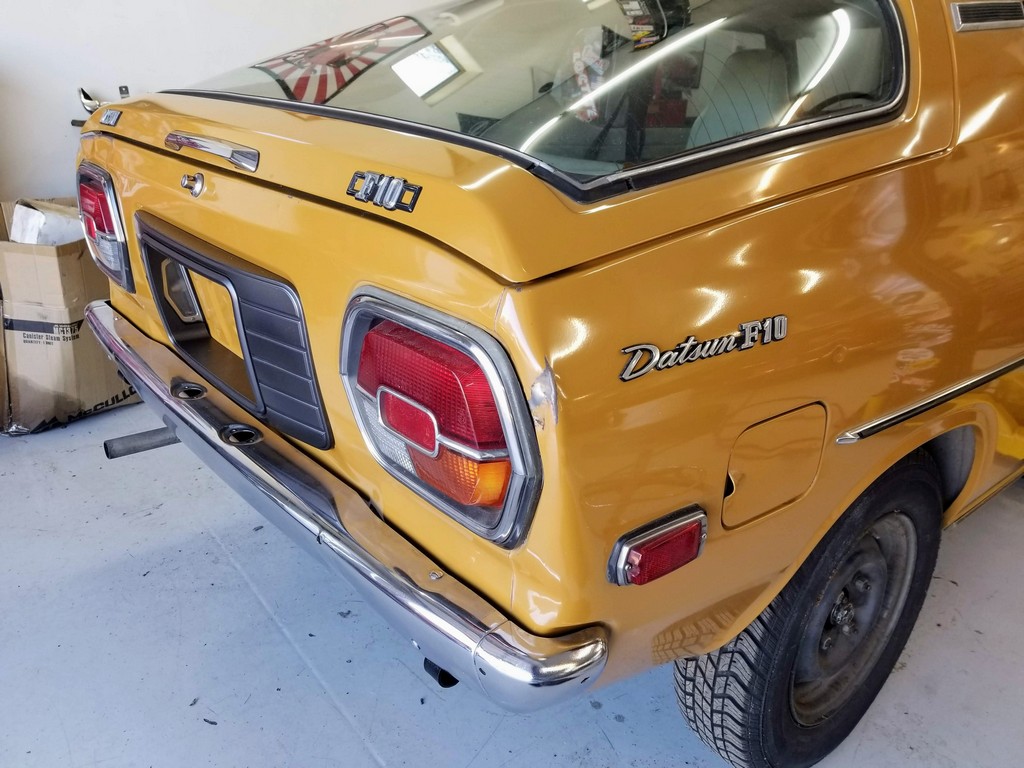
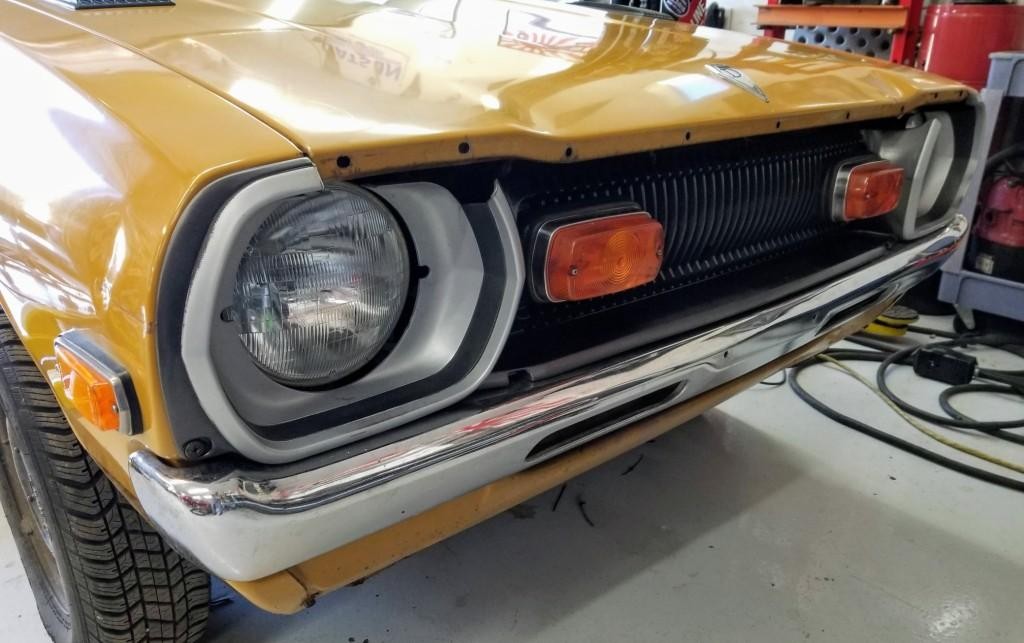
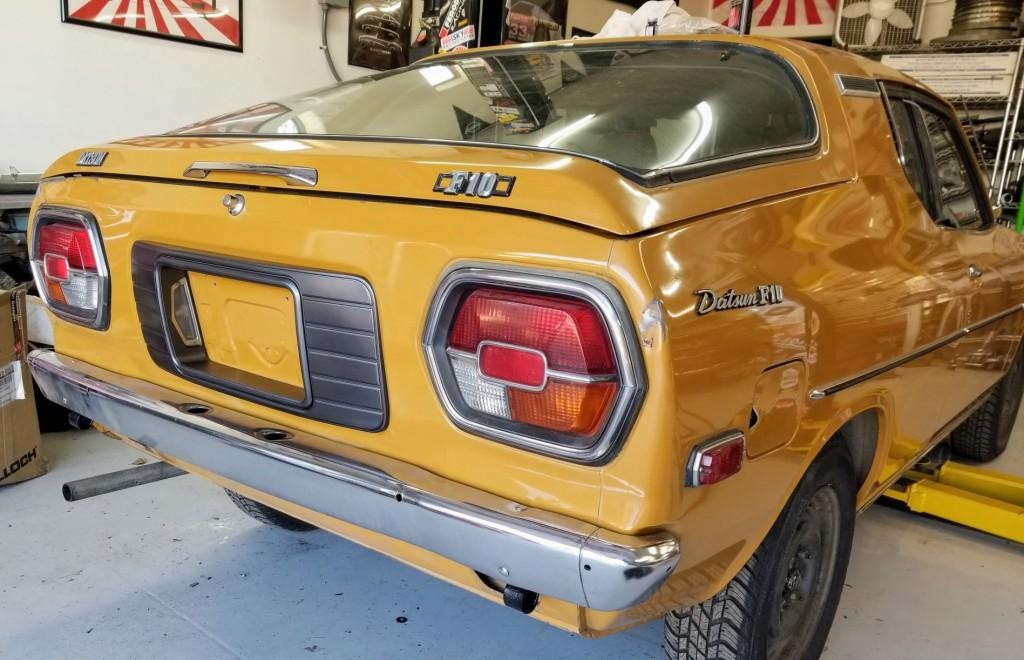
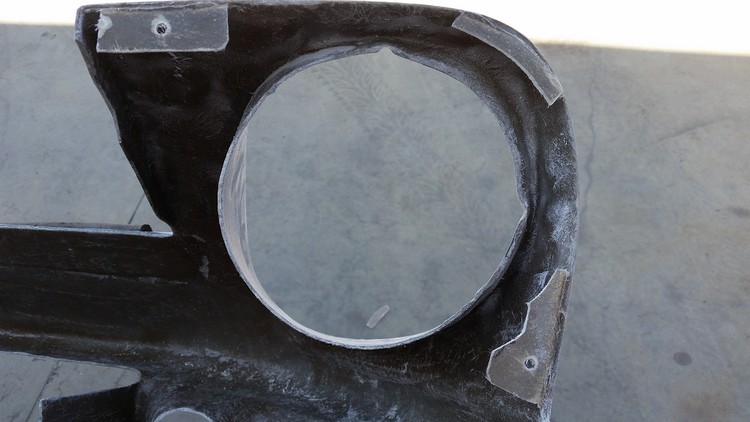
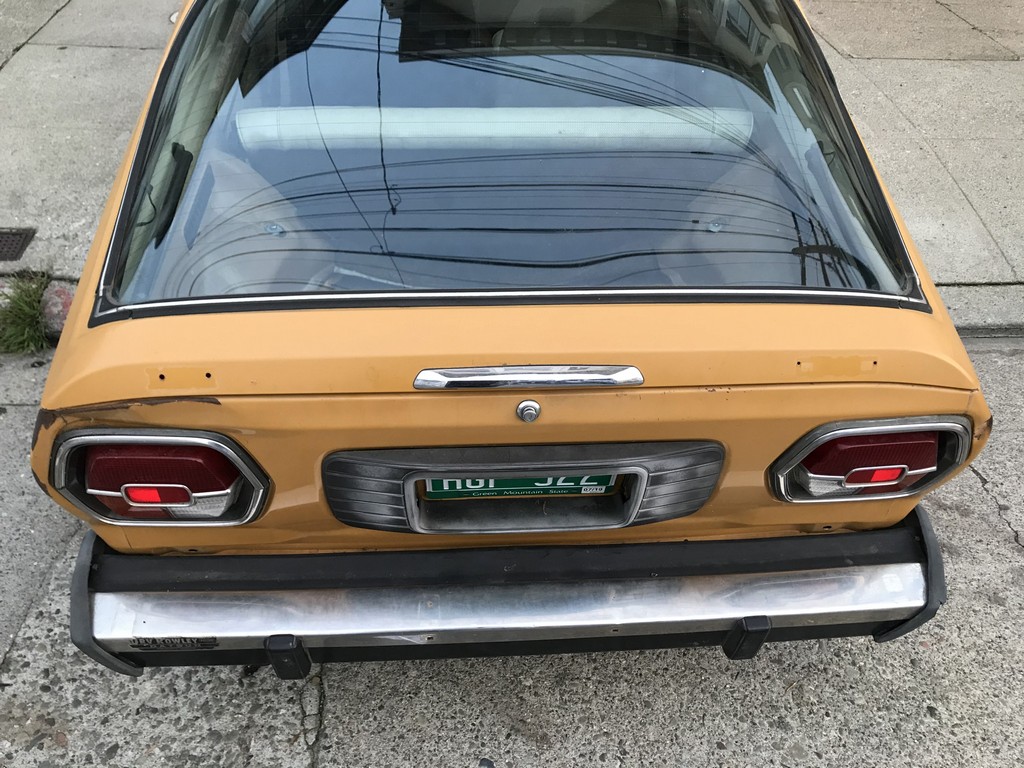
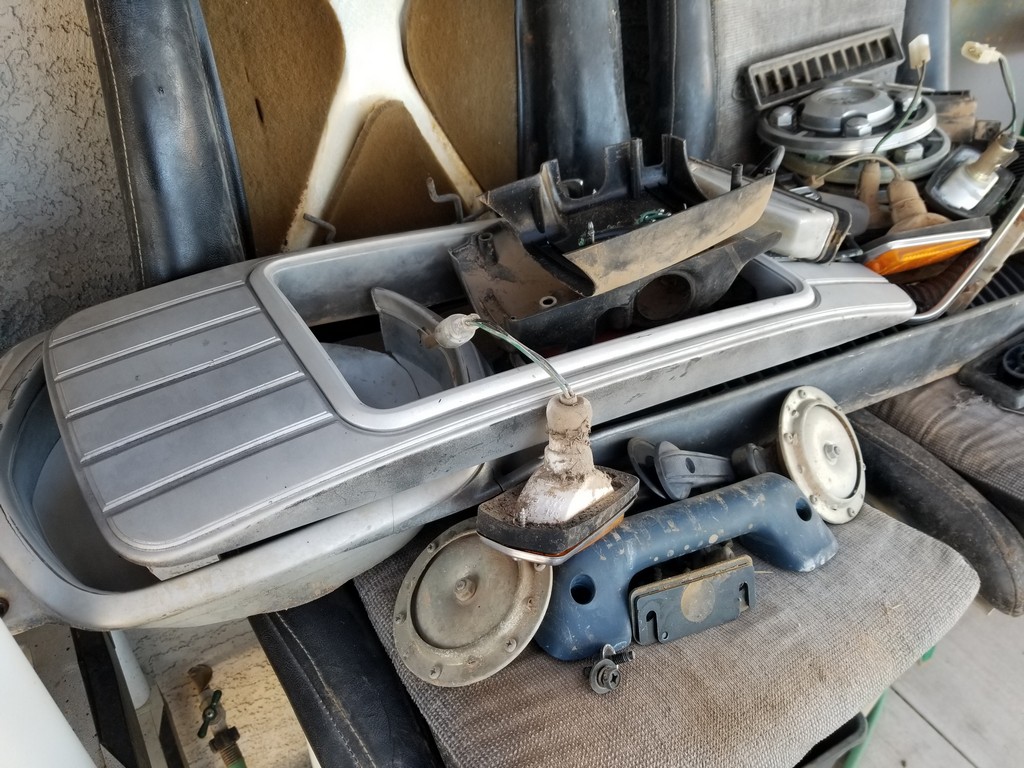
The grille and rear tail panels needed some refurbishing, and with three grilles to choose from, I was able to assemble the best parts from each, restore the lenses, refinish the plastic, and repair some mounting tabs. Interestingly, the plastic cover on the rear valance encloses the same chrome license plate lights that are seen on the European Datsun Cherry model. Again, more cost-cutting.

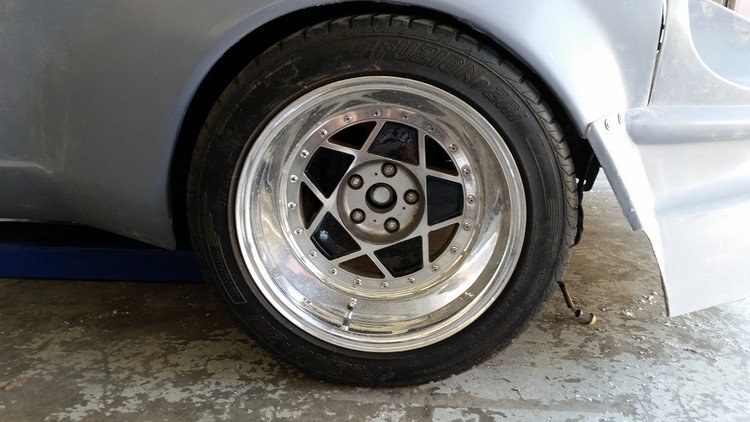
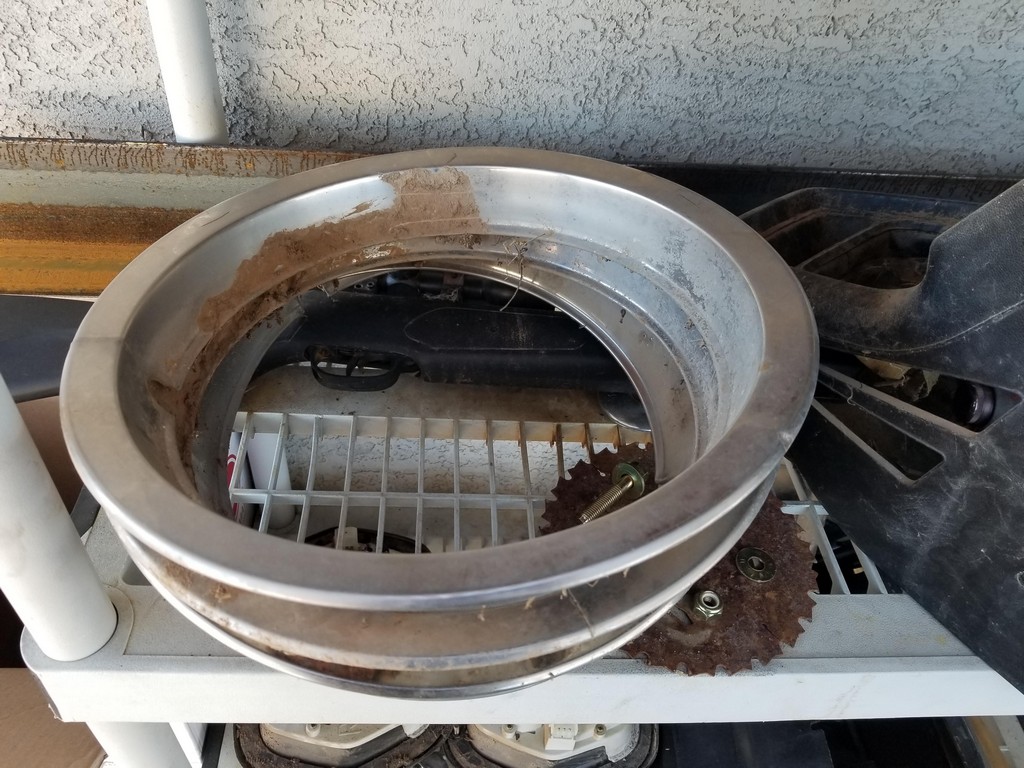
The four steel wheels were loaded up in my coarse media blaster to be stripped of their original finish and re-primered and re-painted While most of the wheel would be covered by stainless trim rings and hubcaps, it’s still nice to have everything clean and uniform before reassembly.

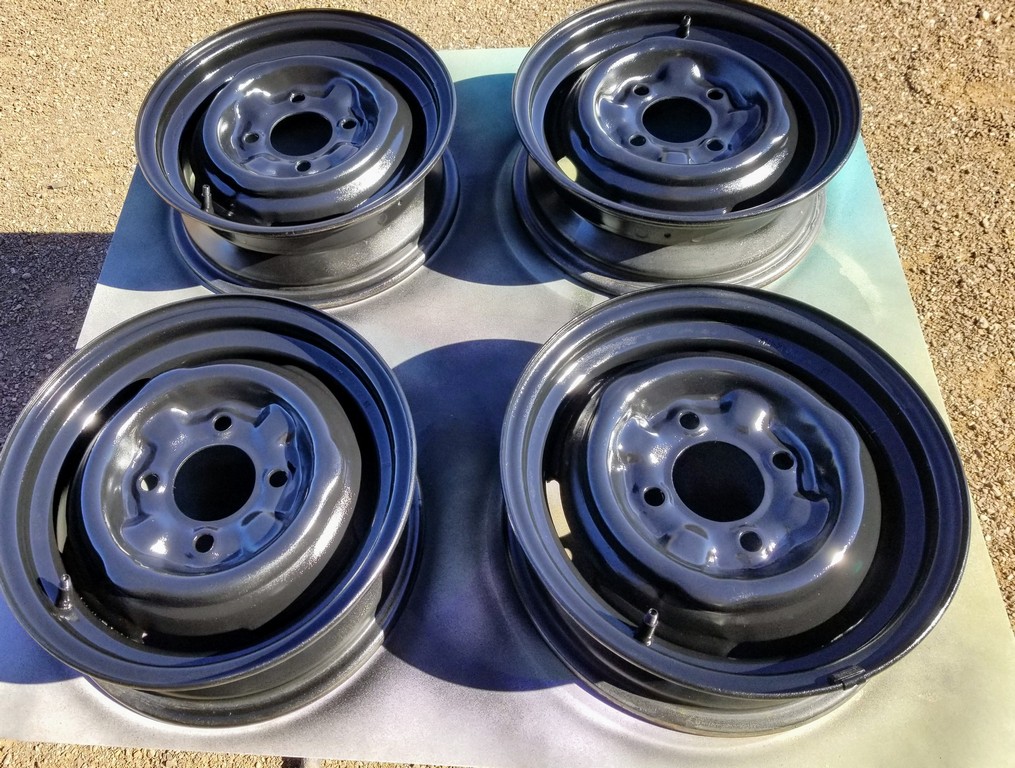
Moving on to the interior, it was time to address the rear cargo area. Removing all of the seats and carpet took exactly 30 minutes, and the space under the spare tire was as pristine as when the car was built.

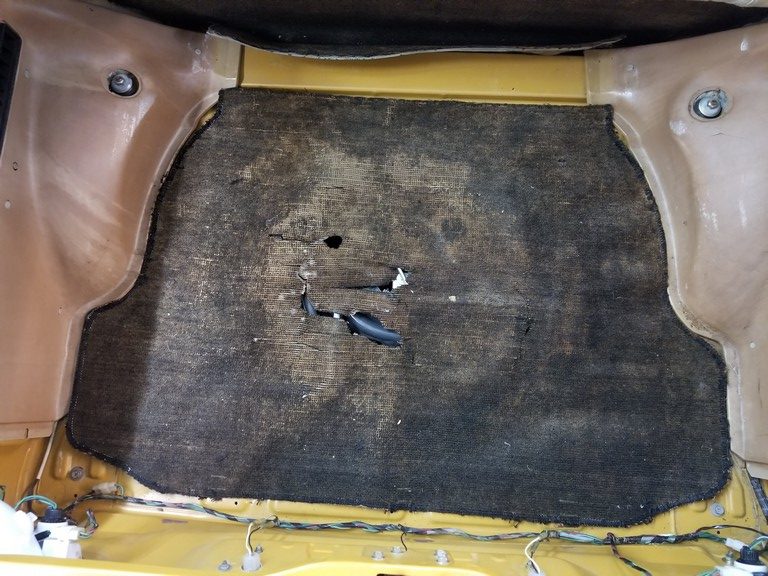
With that established, the spare tire was checked, inflated, cleaned and returned to its space.

A pattern was made and a period-correct fiberboard panel was made to cover the spare tire, and carpeted with Datsun-style loop carpeting.

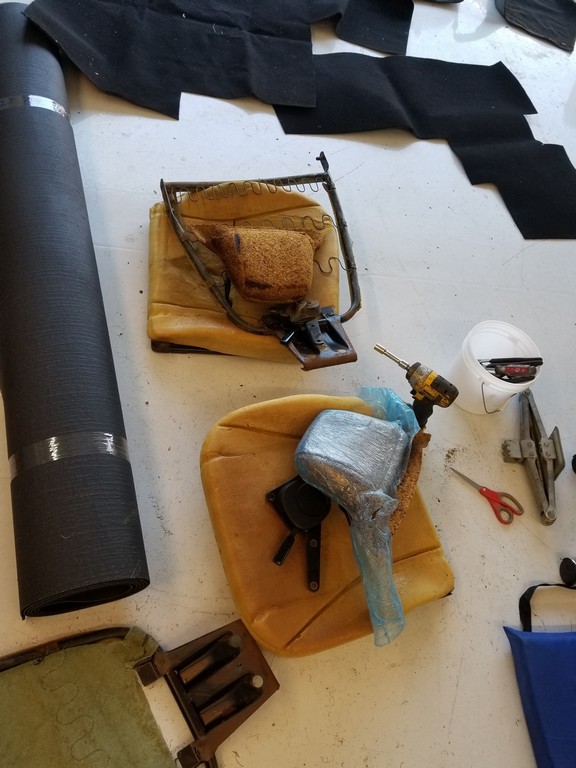
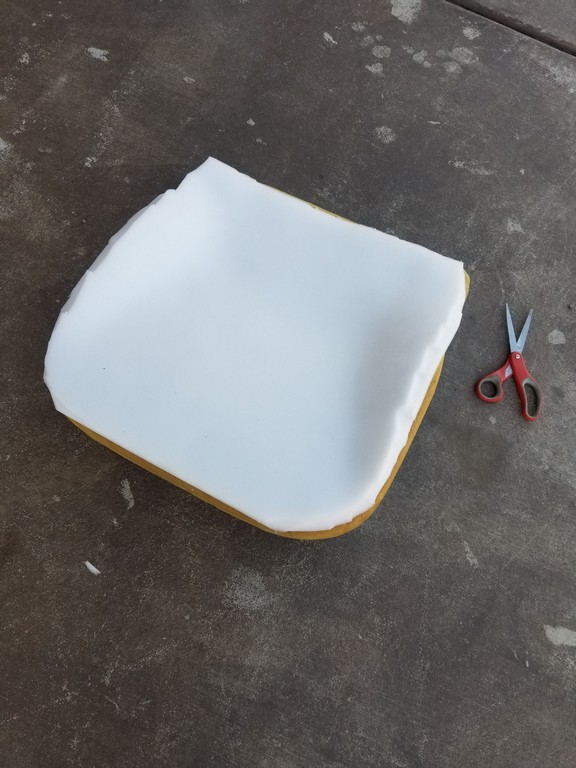
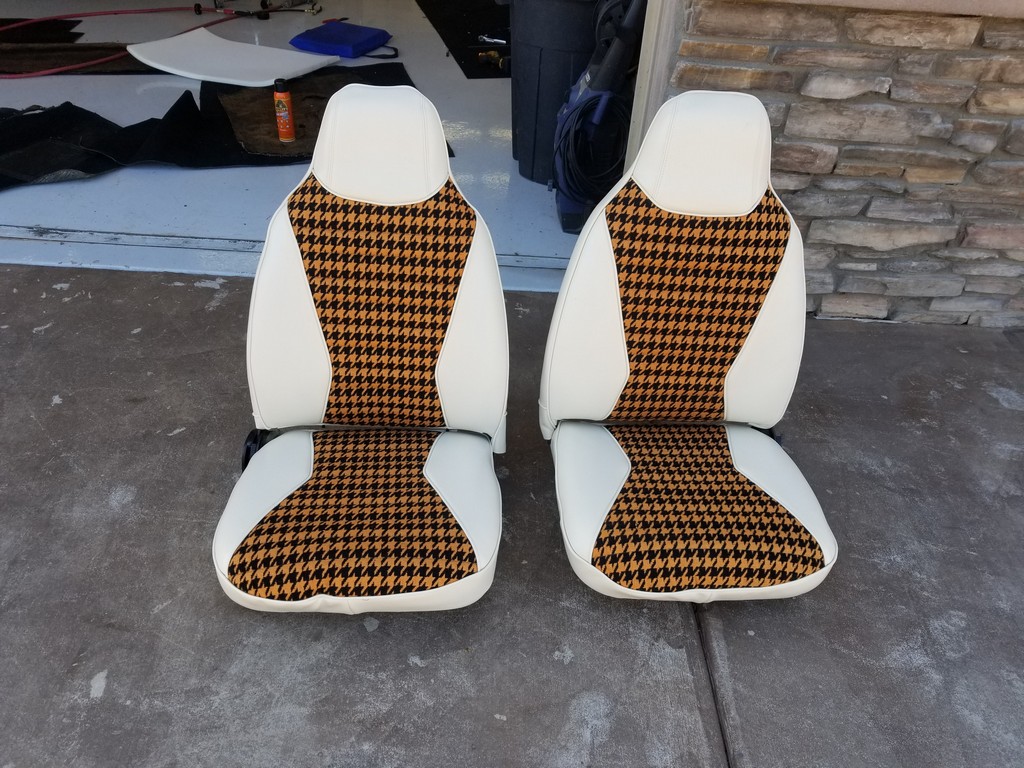
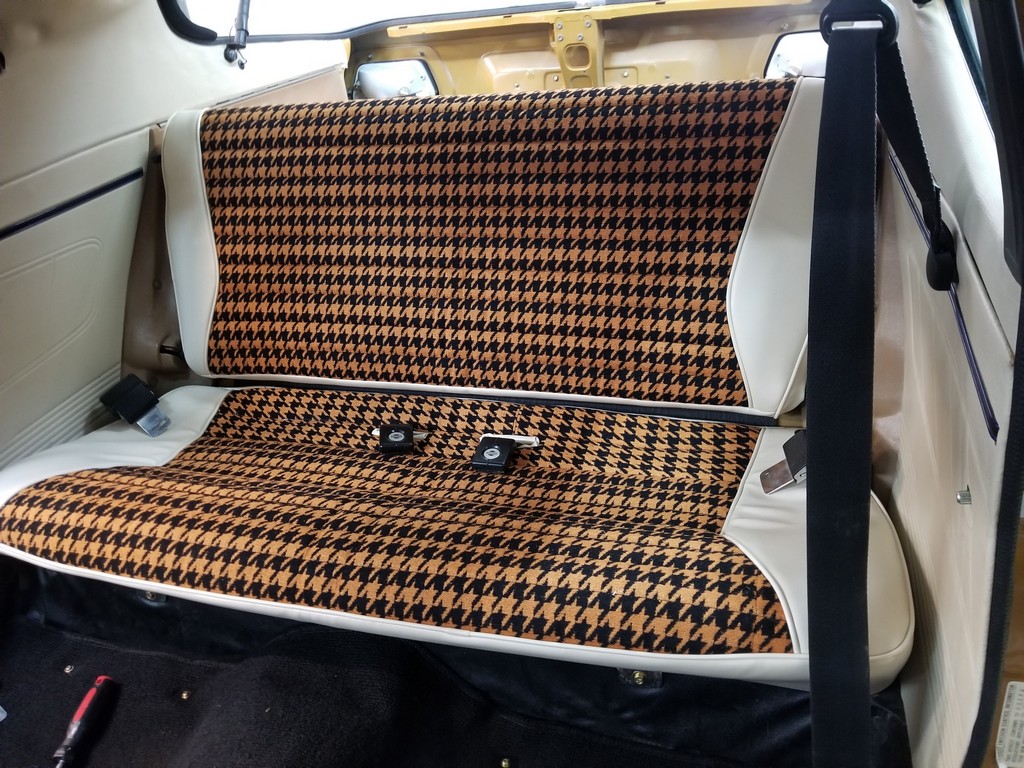
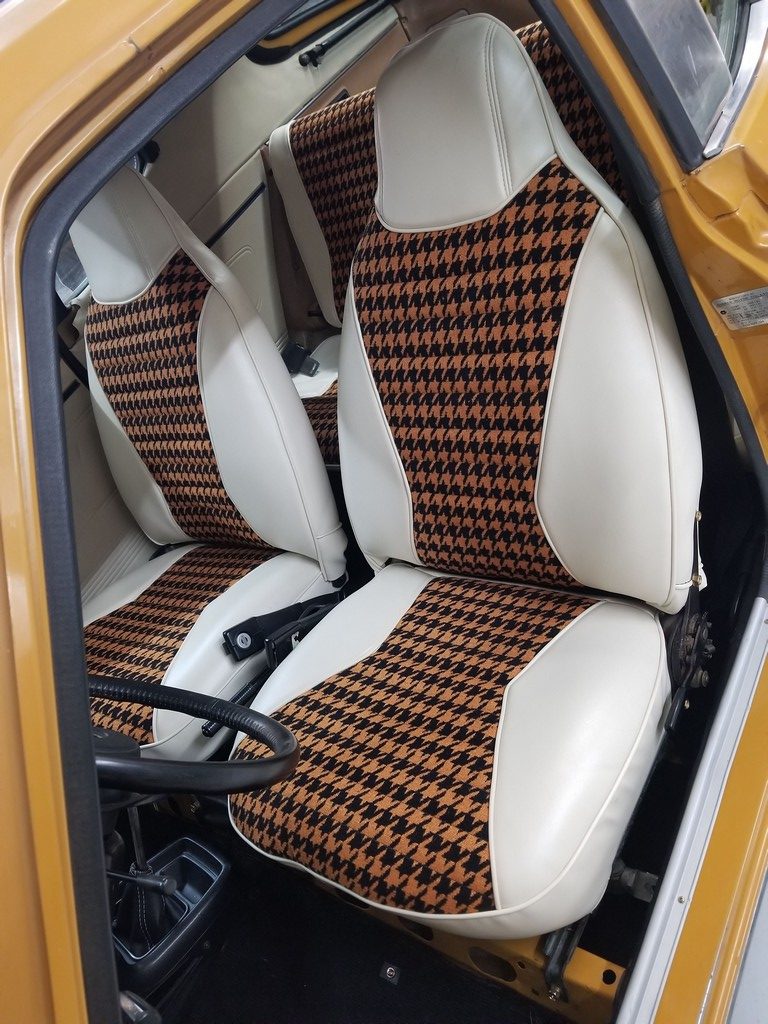
Now, on to the hardest (but most rewarding and fun) part of this refurbishment: Somewhere along this car’s lifetime, a set of replacement seat covers were custom-made, and found neatly bagged among the spare parts. Since the front seats were well-worn and in poor condition, now was a great time to redo all the seating surfaces. The front and rear seat frames were stripped of all upholstery, horsehair and foam, fully cleaned and repainted gloss black. A foam kit for a 240Z was modified to match the contours of the F10 seats, and the new covers were installed.


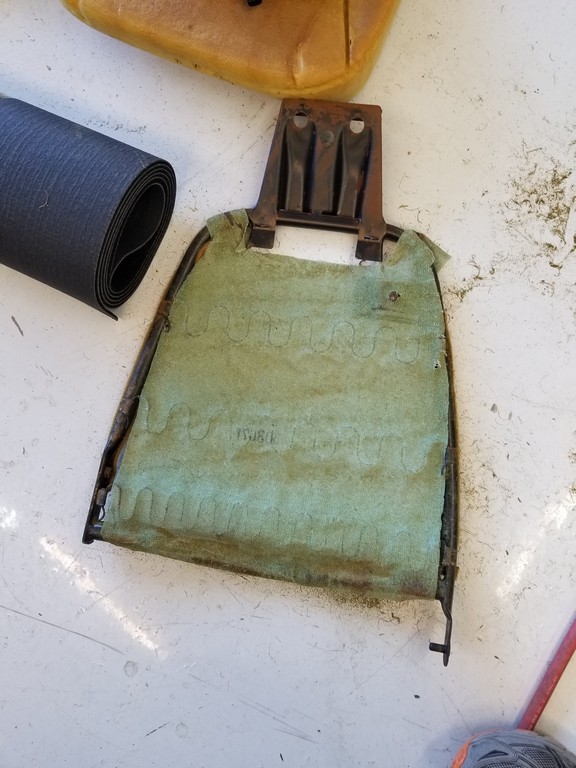
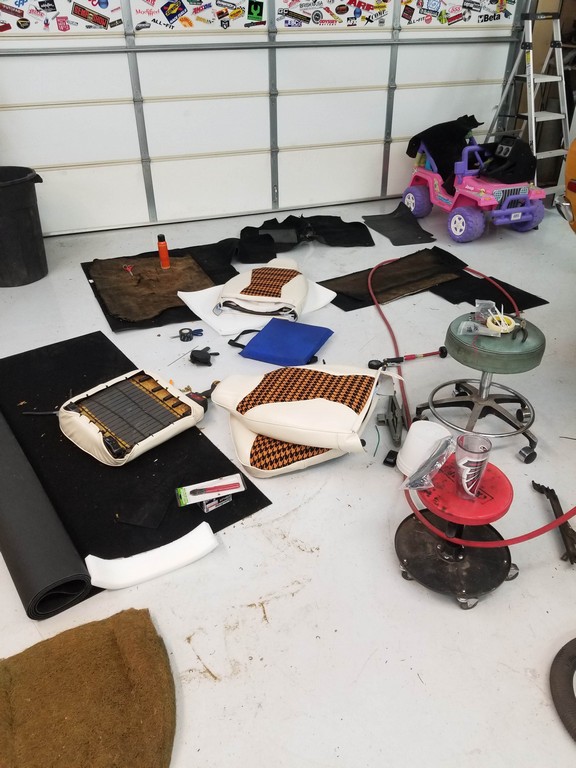
To call these covers unique or eye-catching would be doing them a disservice. White marine-grade vinyl with butterscotch and black houndstooth-patterned inserts is simply not something you see every day. However, it totally works in this car! Once the seats were completed, the tracks were cleaned, lubricated and reinstalled, and my attention turned to the rest of the interior.

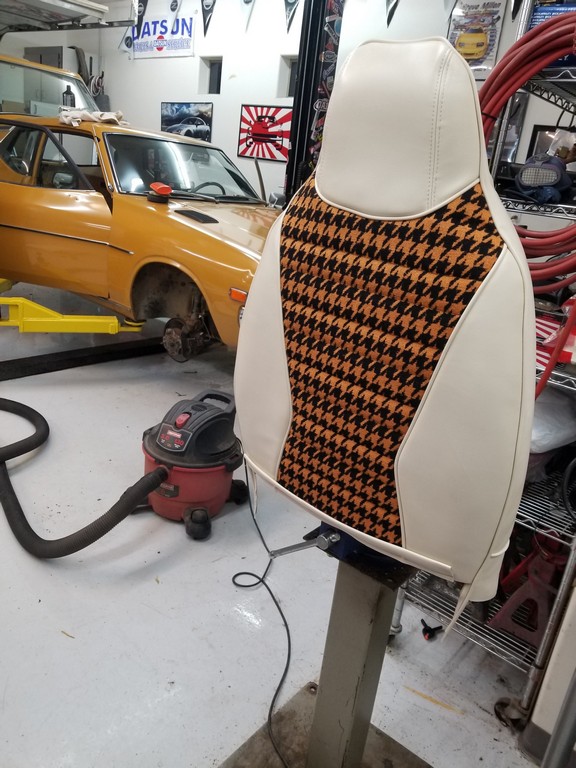
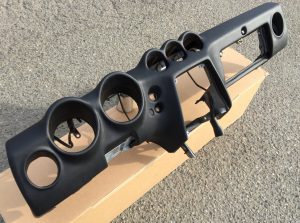
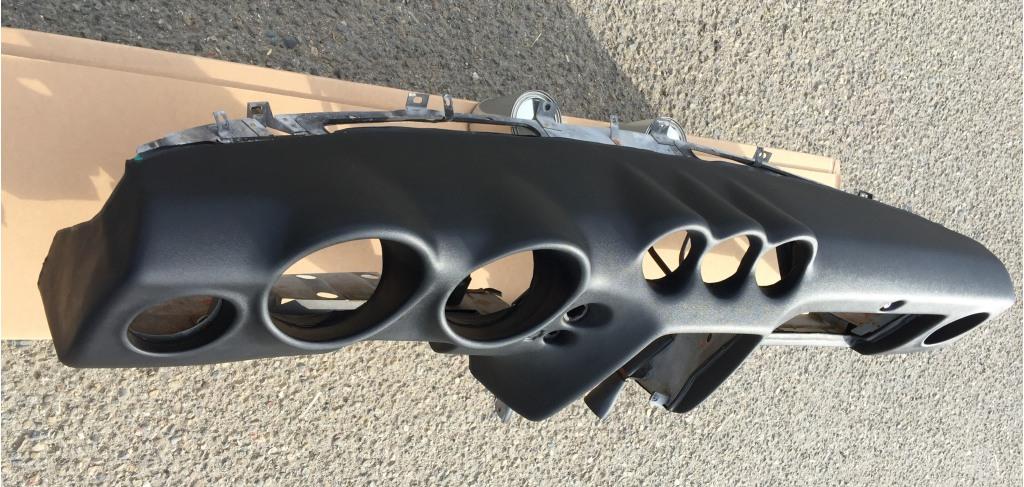
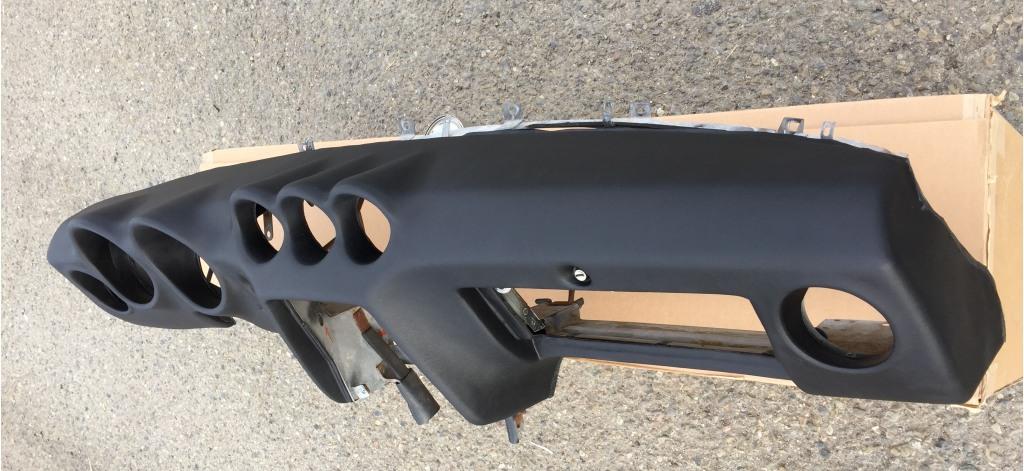
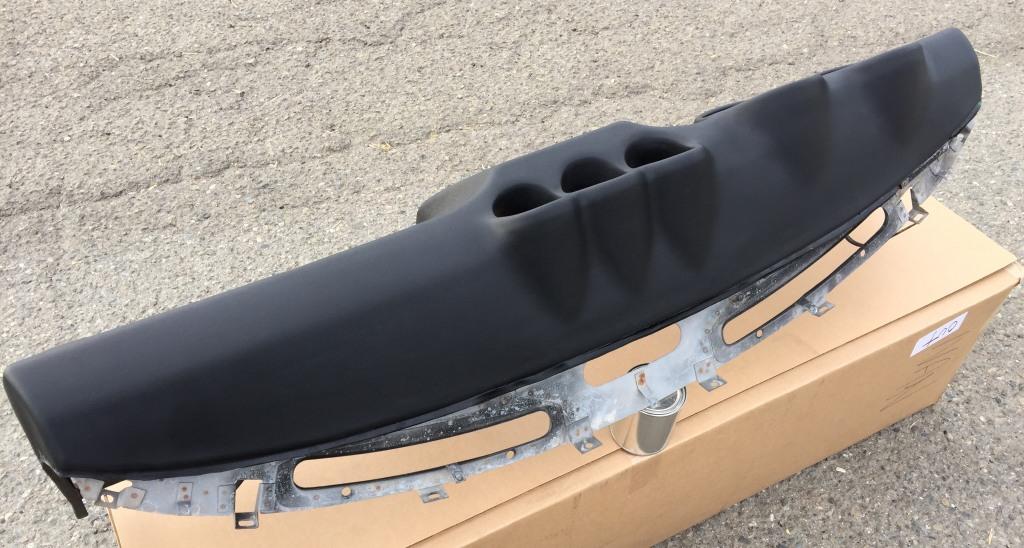
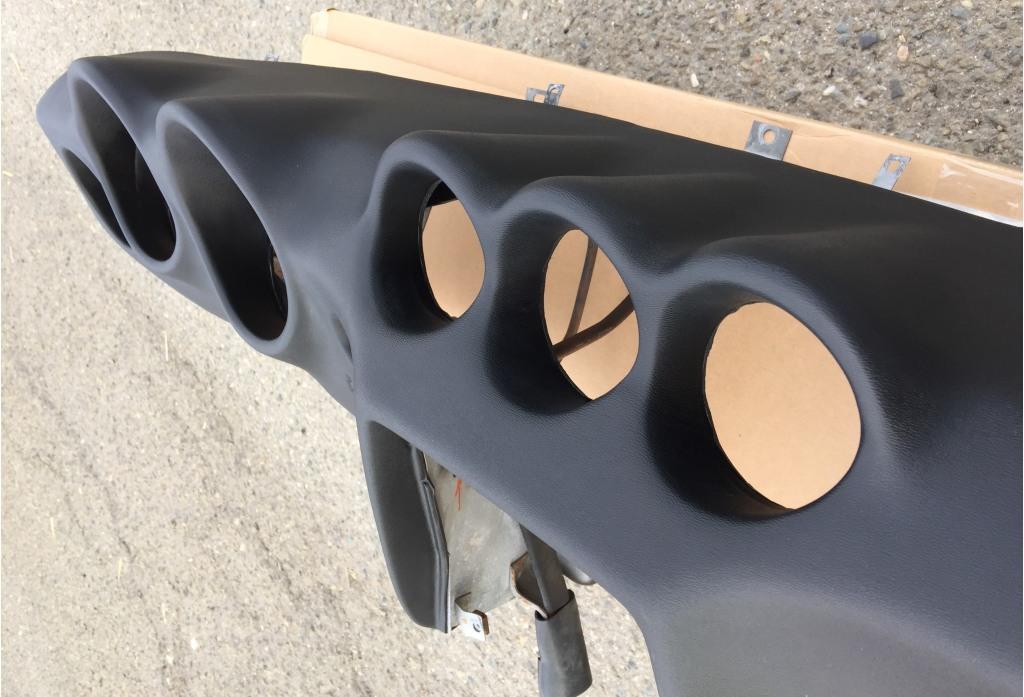
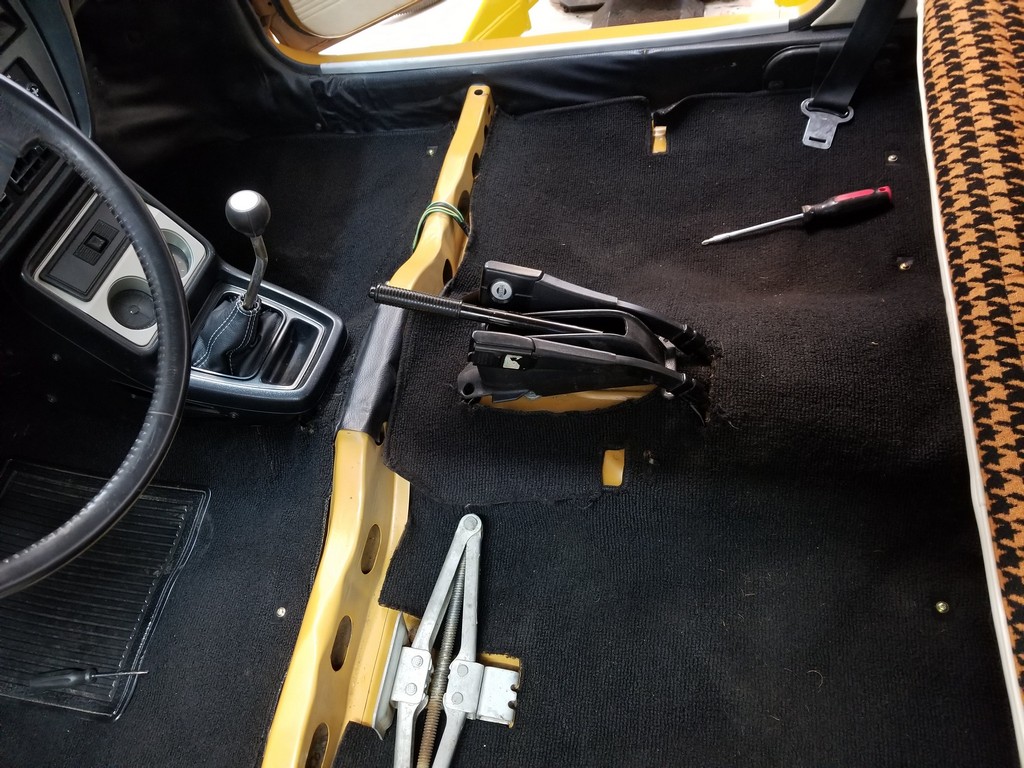
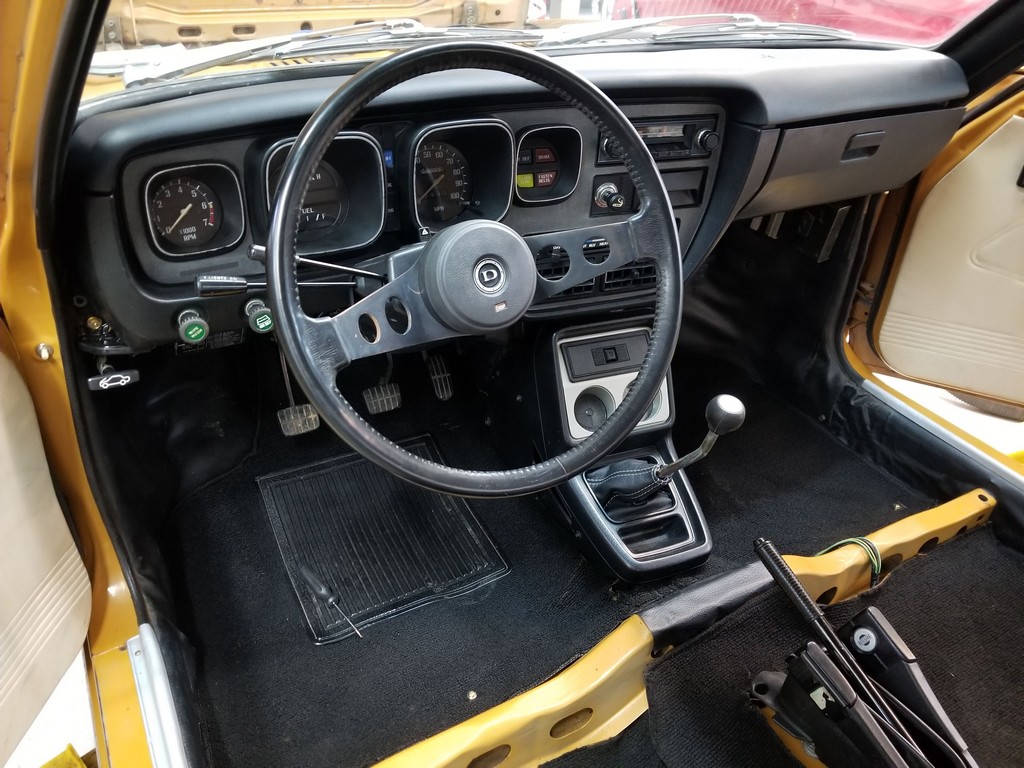
Since a carpet kit isn’t exactly an off-the-shelf available replacement item for a ’76 F10, and this one was in decent condition, I steam-cleaned it and re-dyed it black. While the carpet was out, the floor got scrubbed and a light coat of exterior wax, and I prepared for removing the cracked dash.

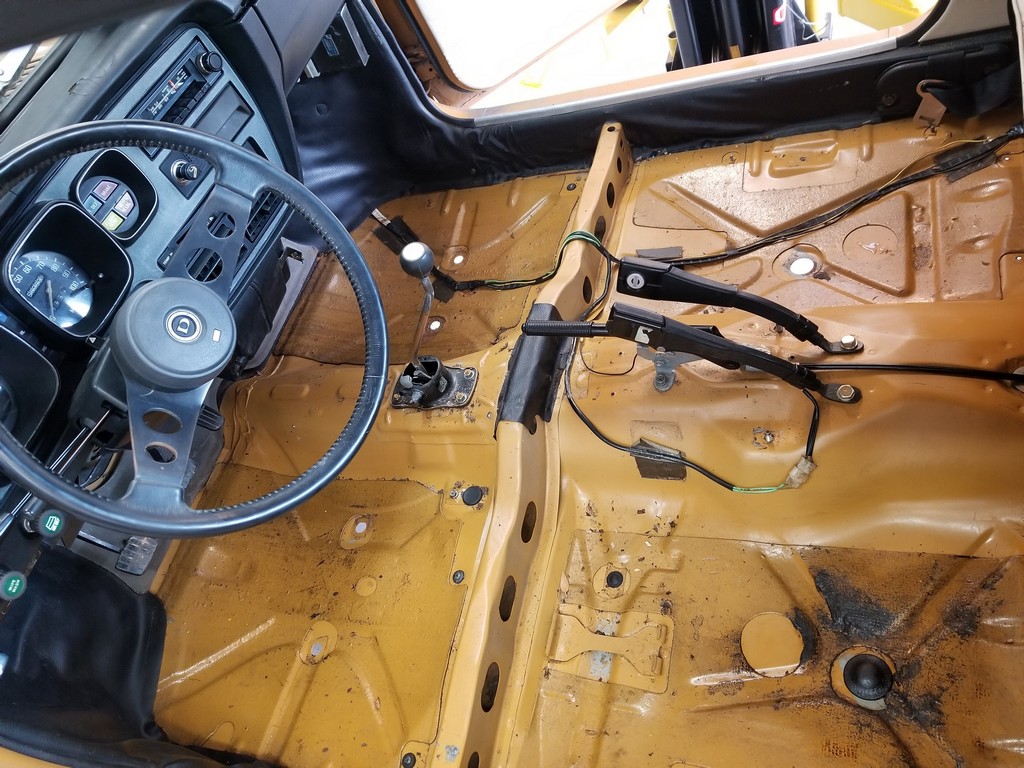
Four bolts. Four bolts secure the dashboard in place, and the entire assembly weighs less than a 13″ steel wheel. The good news is that Nissan’s cost-cutting measures made the dash removal and repair a fairly simple (albeit time-consuming) job. If I could fold my old 6′ 1″ frame into the footwell for a couple hours at a time, it would have gone more smoothly.

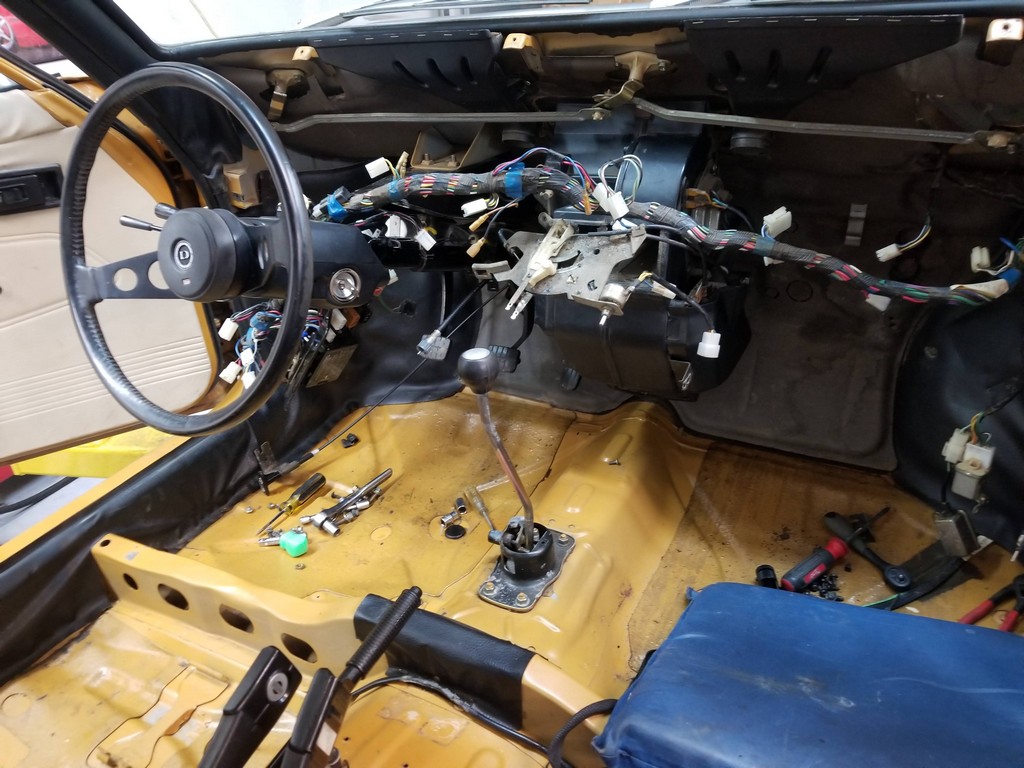
The door sill plates went on a date with my glass bead blaster, followed by a coat of semi-gloss clear from Eastwood.

Now for the fun! Reassembly time goes by so much faster – all the fasteners are new and freshly-plated, all the parts are clean, and the excitement of seeing it come together means fewer coffee / snack breaks.


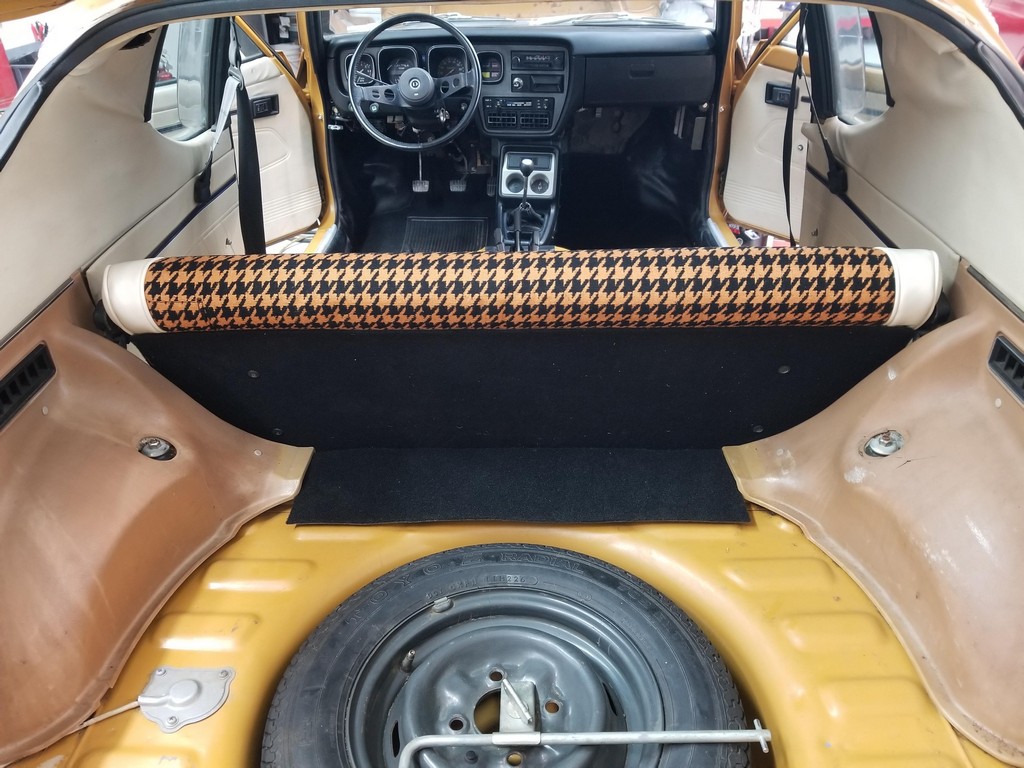
With the carpet and seats installed, the otherwise-clean interior panels looked a little dingy. Mr. Clean Magic Eraser is one of my favorite products to clean light-colored vinyl and plastic, and didn’t disappoint in this case.

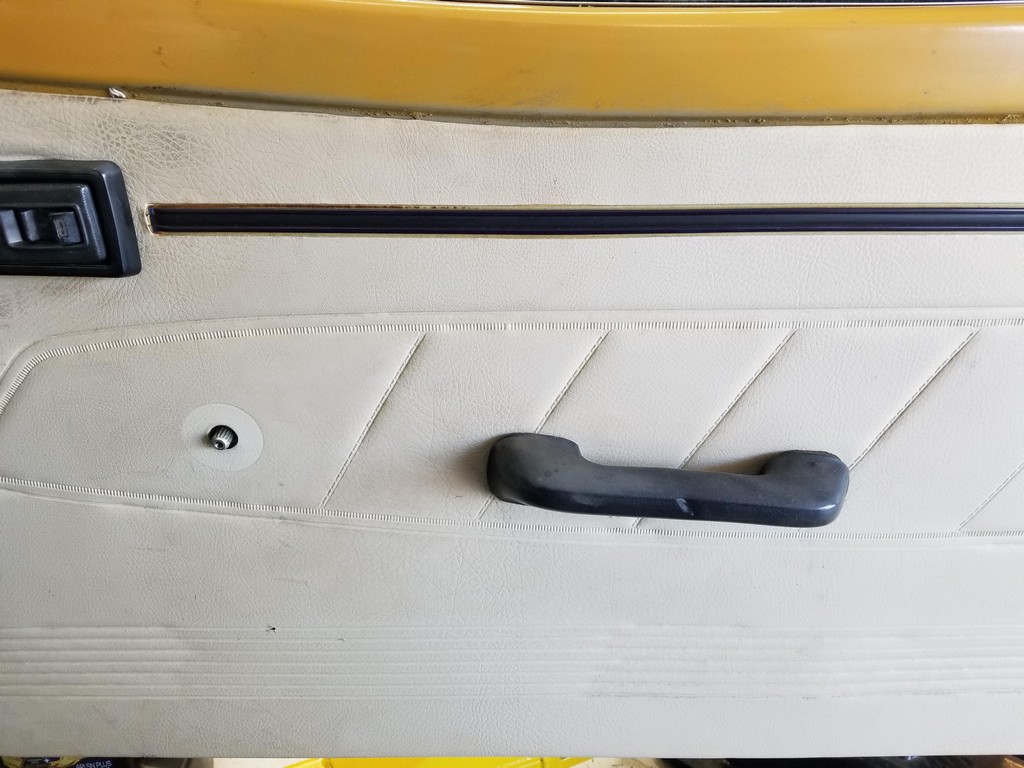
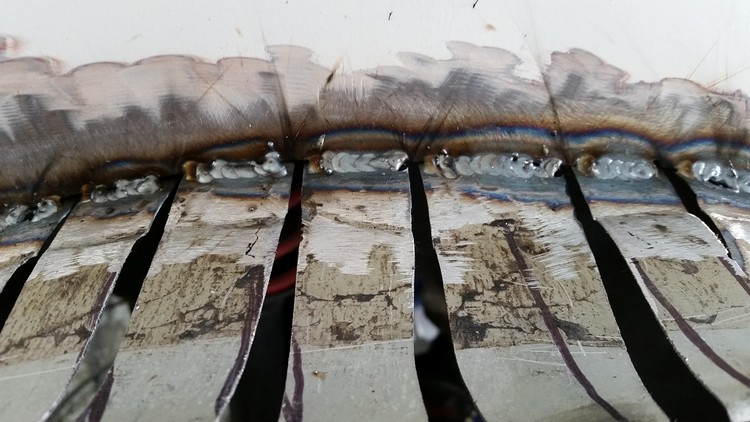
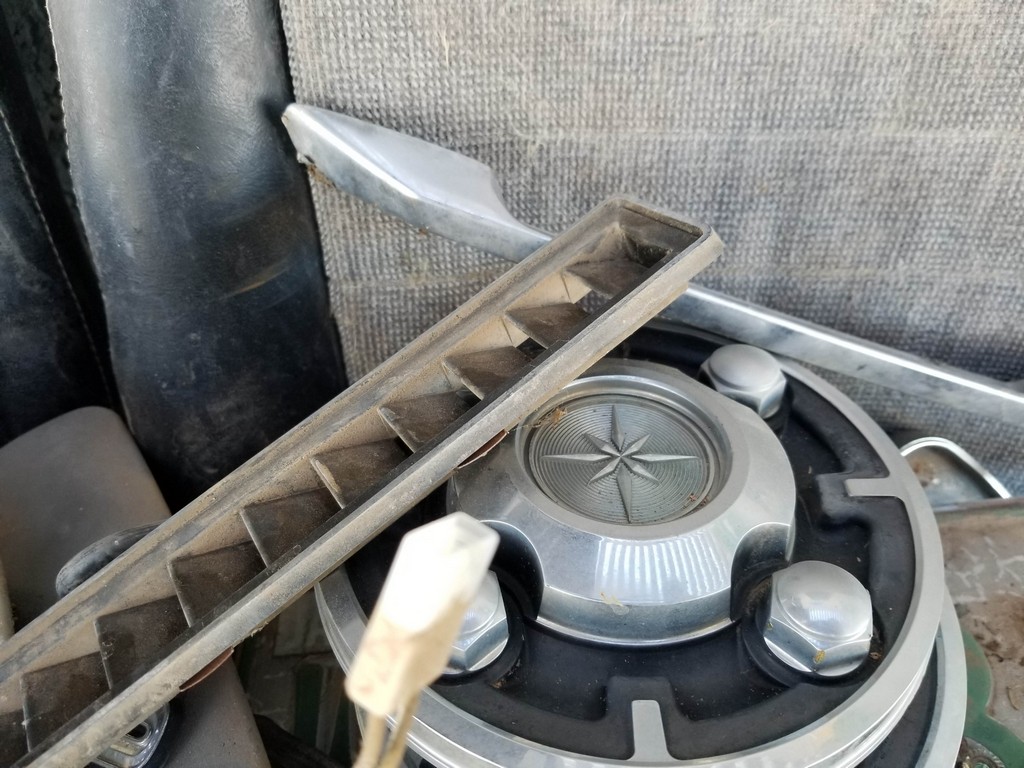
As I put this article together, I realized that the very last step didn’t get pictures, and if you’re sharp, you’ve already noticed what’s missing. The plastic trim on the leading edge of the hood. Now, this was probably one of Nissan’s worst design decisions. A delicate, flimsy plastic trim piece, made of black material with painted silver accents, exposed to 60mph road debris. What could go wrong? Further, the attachment design was simply asinine, and clearly didn’t last long.

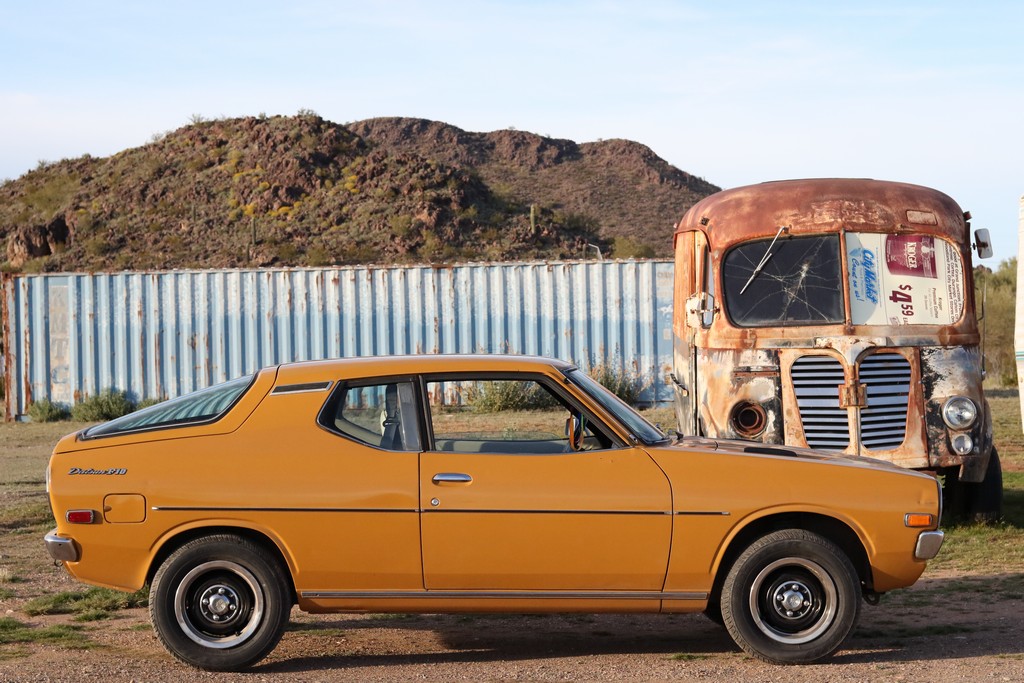
At any rate, it’s my job to fix things, not critique some long-retired engineer’s work, so here’s a side-story on how that happened: While at SEMA last year, I met the guys from Sanloz Group, distributors of the Koverbond Plastic and Fiberglass Repair System, and brought home a sample to test. Five 6 x 1.0 metric bolts should hold this piece in place nicely, so I modified the heads to fit inside the bevel of the trim piece. Then, I used the Koverbond kit to secure them to the plastic… This product is amazing, and basically allows you to ‘weld’ any material to plastic, and my five bolts are now permanently attached to the trim (which didn’t get photographed).


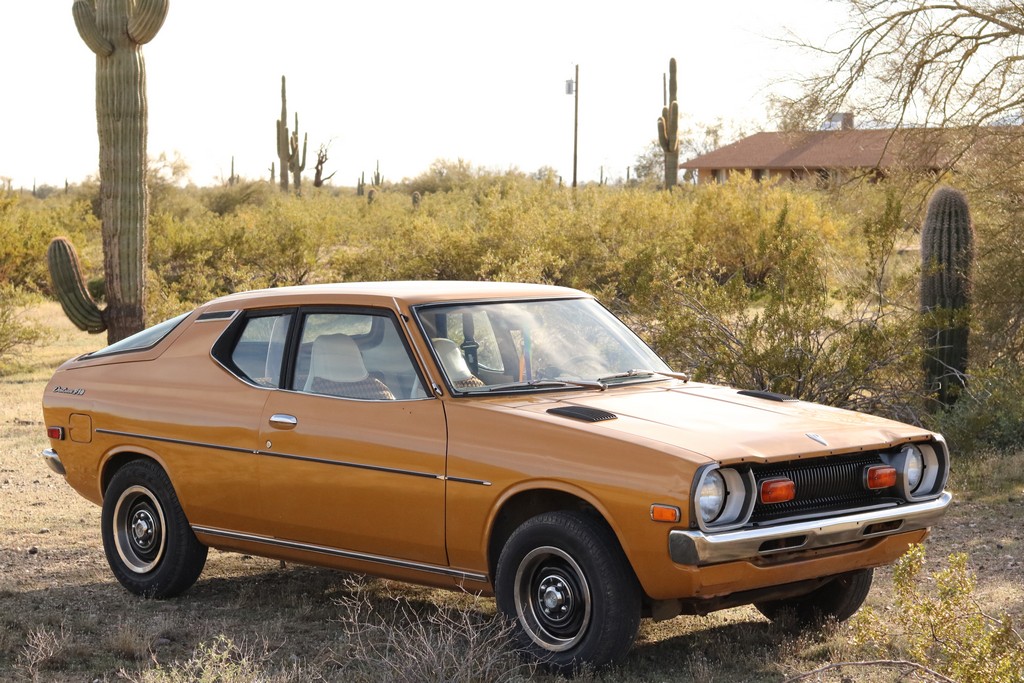
At any rate, this weird, wonky, mostly-unloved little survivor is now ready for a date with a skilled paintless dent repair practitioner, some careful paint blending (to retain originality), and possibly a new owner… If you’d like to put this one in your collection, and are a serious buyer, contact me at [email protected] and I’ll place you in touch with her current curator.

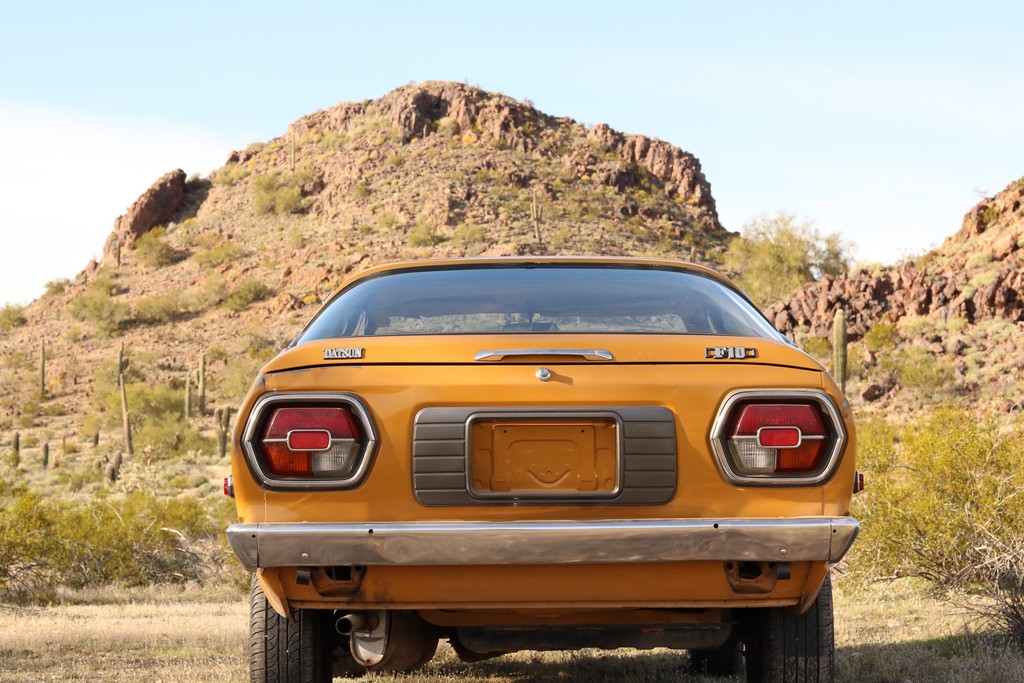
Thanks for joining me for this refurbishment, and pop in on the Datsun forums to tell us about YOUR rare Datsun projects!

[Special thanks to @toywagon for the great pics and Ross Parks for letting us be a part of this great project.]

Filed Under: Other Datsuns, Restoration

240Z Reproduction Dashboards are HERE!

January 22, 2018 by Greg


If you’re restoring an early Z, you know that the dashes are typically cracked. Repairs require removal of the dash, and simply won’t hold up for very long. With early Z cars commanding premium prices these days, why would you even consider a cheap plastic dash cap or a carpet mat covering the damage?

Today, we spent some time chatting with Ivan and Hung from Vintage Dashes about their newly-released reproduction dashes for the early Z cars.

The reproduction dashes fit all 1969-1973 240z models, using the same manufacturing process as the original – injection molded foam and vacuum formed vinyl… and best of all, NO CORE is needed! All dashes have the hazard and cigarette lighter holes covered exactly as they came from the factory, AND you can order your new dash for either a Series 1 (without the indent) or Series 2 (with the indent).

The grain texture on the Vintage Dashes reproductions is nearly identical to OEM

We asked about the 1973 Z – Ivan explained that although there are very slight cosmetic differences in the 73 dash, this unit will fit just like your original – and is virtually indistinguishable from the factory unit.

The Vintage Dashes reproductions are made in the USA and can be shipped worldwide. The first batch will be shipping in early February, so get your orders in now! The Zpowersteering.com Z will be getting a Vintage Dashes reproduction soon, as we’ll do a full article on the installation for you guys.

To order yours, please e-mail: [email protected] to request an invoice for payment. If you have any other questions, you can email or call the team at Vintage Dashes:
Ivan Jaramillo: 1-510-779-8153
Hung Vu: 1-408-603-5922

Filed Under: Restoration, Z cars

Datsun Electrical Service Training Manual

August 23, 2017 by Greg

This factory technician training manual covers the finer points of testing, diagnosing, and troubleshooting common Datsun electrical issues for the 1968-1976 model year vehicles.

Bookmark and save it as a reference, or print it out to keep in your shop!

Continue to the next 30 pages on Part 2!

Filed Under: Restoration

How to Repair your Datsun’s Jeco Analog Clock

September 21, 2016 by Greg

By Andy Sola (Ozzie)

So, do you have an old Datsun?

It’s likely that it has an analog dash clock made by Jeco (Japan). It’s also likely that your Jeco clock has stopped working. It seems to be a common problem with these older clocks, but there might be hope of saving it rather than trying to track down an expensive working replacement!

Things you will need to perform a successful resurrection of your Jeco:
– Screwdrivers
– Multimeter or test light
– WD40 or PB Blaster

All these photos are of the Jeco clock from my 1st-gen Celica, so may differ slightly in design and mounting location compared to yours, but the steps needed to get the clock running again should be similar.

Here we have the clock, as mounted in the center console.
1
To remove this particular style, the adjustment knob (bottom right of picture) will need to come off before the clock can be removed from the console.
There are 2 screws holding the clock in place on the back. Undo these first so you can manipulate the clock out further into a position where you can grab the adjustment shaft (to prevent it from turning) while undoing the small screw that holds the adjustment knob in place.
Once you have the clock removed, you will be able to unplug it from the loom.
2
With the clock now unplugged, we will test the plug on the loom with our multimeter/test light to see if we are still getting power to the clock.
3
One wire will be the earth / ground (in my case, the singular horizontal pin across the top).
The other 2 pins (vertical) are a constant 12 volt supply to run the clock, and a switchable power source for the light.
With the ignition and lights off, You should be able to get a reading (or get the test light to come on) if the fuse is ok.
4
In this case, we are getting a reading of 12.69 volts. This is good, as we know that the wiring is still ok, and it is definitely a problem with the clock. If you aren’t getting a reading, then check your fuses and wiring for any issues before continuing.

If the light is also not working in your clock, move the probe to the other vertical pin.
5
At this stage, it should read zero (or your test light should not be illuminated). Turn your parking lights on, and hopefully you will now have a reading on the multimeter.
6
In this case, another successful test for the wiring. This indicates that bulb in my particular clock has blown.

Now we move on to pulling the clock apart. There are 3 screws holding the 2 metal halves of the casing together (yours may have more or less)
7
Undo these, and separate the case. Don’t worry about cogs and springs flying everywhere when pulling these apart, as this is only a protective case and isn’t responsible for holding any of the inner workings in place. Once it’s apart, it should look something like this
8
Now we move outside, and grab our WD40 or PB blaster. (make sure it has a nozzle, to get to the hard to reach places).
9
Now we simply SOAK the internals (don’t be shy), down below where the spring weight for the second hand is.
10
And also the drive gears closer to the underside of the face.
11
Spray the adjuster gears too.
12
And then use the adjuster shaft to turn the hands, as if setting the correct time. This will work the lubricant into all the gear faces and teeth, and help clean out the 40+ years of dust and gunk. Be careful when doing this as the casing isn’t there to support the shaft and you may be able to move it away from the other meshing gears.

Tip the clock up so that the excess fluid can run out, and test the spring weight movement by applying light pressure to the second hand to drive it around the clock (in the correct/clockwise direction).

If it appears to be moving quite freely, then place the clock on a paper towel or rag at an angle so that any leftover excess fluid can run out of the clock body. Leaving it for 30 minutes should be enough.
14
If it’s still not moving freely, spray the clock again and leave it to soak for a while. Hopefully the internals will be freed up enough that the motor can drive the gears again, and your clock will be alive once more.

Reassemble the clock case and plug the clock in to test it out before reassembling your dash/console!

Filed Under: Restoration

76 Datsun 280Z Widebody Build – “Banzai Runner”

April 5, 2015 by Greg

[Editor’s note: As a long-time Datsun restorer and collector, I get to meet people all over the world who share my affinity for classic Nissan products. Sometimes, however, some of the most interesting people and builds are right in your own neighborhood. I recently got to spend some time with Stuart Jamison, an Arizona resident who’s building a Z that will definitely stand out from the crowd, and should turn heads for decades. I’ll let Stuart tell the rest of the story, but I wanted to give him a proper introduction… Enjoy the build!
-Greg]

My family has never really been a ‘car’ family. I think I just was the odd one out. The day for my affliction with cars came when I went looking for my first car. I remember test driving mainly sports cars of the time, like a Fiero, a Mazda RX7, and then finally a 1979 280ZX. I had no idea on anything about these cars, other than I liked the looks and style of them. All of them ran fine, except the 280ZX. I paid about $1200 for it my senior year in high school. My affinity to cars also increased when I came across Top 3 Best Window Tinting Services in Hamilton, Ontario that transformed every car into a cool vehicle on the road.

widebody z build

It had a 5-speed, and it didn’t run. It needed a new distributor and some other things to get it to work right. Eventually got it going, and fell in love with this model. It started
seeping oil out of the plugs at one point, but continued to run. MAF problems, but still it continued to run. I was amazed at how well this car ran, even though it had problems. Eventually my neighbor and I worked on it, and that’s when I started learning about fixing cars. Clutch change, head work, rings, etc. Everything was done by myself until something came up and no one knew how to fix it, which meant a shop would have to tend to it. These were the pre-internet days, and I had a Japanese car in a predominately American car neighborhood. This car remained in my possession for about two years. It ended due to another guy T-boning me while I went through an intersection. The guy’s response was “I just didn’t see you”. He had no insurance, and it wasn’t even his car. Car was totaled and off it went, never to be seen again.

I drove past a fly-by-night car dealer on 7th Street and Dunlap here in Phoenix every day on my way to work, and ooh’ed and ahh’ed at a Flame Pearl Red 1988 300ZX that was fully loaded. Leather, digital dash, everything a boy could dream of. So with some help from family on a co-loan, the 88 300ZX replaced it, but it was never the same.

300ZX-2

300ZX-1

It was full of luxury and the car practically drove itself, an awesome touring car, whereas in the 280ZX you drove the car. Never really had that feeling with any other car since then, but have always been a Nissan guy since that ZX. In 2000 I bought my first new truck, a Nissan of course, which was an experience in itself. It was a 2000 Solar Yellow Nissan Frontier Desert Runner. 6 years later, I traded in the Frontier and I bought my second truck, a 2006 Titan-SE crew cab, which I still own today.

Things started taking a turn in 2012. I was really getting the bug to have a Z again. I thought about trading in the Titan, but was convinced otherwise not to do so by my wife. I had been on a track for the first time with some super cars, at an event that comes to town every now and then. Got to drive Ferraris, Lamborghinis, Audis, and of course the GTR. I would say that was when the time hit where I wanted something fun to drive again. By now, I was older/wiser and making decent money. I could do the things I always wanted to when I was a teenager with a Z. After thinking long and hard about it, and convincing my wife, I set off to find a project car – something I could work on, and bond with my new father-in-law over, since he was a huge car guy.

Part 2: Project “Banzai Runner” begins.

Questions about this build? Comments? Discussion here: Widebody 280Z discussion

Filed Under: Performance, Restoration, Z cars

76 Datsun 280Z Widebody Build – “Banzai Runner” – Part 17

April 24, 2014 by Greg

Although it’s been a love/hate relationship with this project, I still plan to stay on the path to building it the way I want it. I have loved the idea of building a car that could be enjoyed on the track and on the street. I never plan to win any trophies with it, but love the fact I can drive the car down to the local track, spend the day there, and then drive it back home. The car has never been fully restored as you saw, but it’s got patina and soul. It’s a car that’s been used and a car that’s been driven – and driven hard, enjoyed to the fullest.

I’ve logged just over a thousand miles so far, being driven up to Flagstaff, through the canyons in Sedona, and back through Globe. I have a few loops in town I’ll take and storm back down into the valley over the course of a few hours. This was never fully developed as an outright race car, because I like the idea of being able to drive wherever I want. When I haven’t driven it in a while and start it up, I get the biggest smile and feel a bit giddy. No drivers aids or electronics to help out, just the raw output of the straight-six. It still scares me sometimes when I have my foot down on the pedal. Its really fun to play with, a source of freedom, a total personal satisfaction listening to the sounds, and knowing all the mechanical parts doing their job. The triple Webers have a very unique sound – it’s very exotic and you can feel the instant power behind them. It pulls all the way up to 7000 rpms without giving up and probably would continue if it wasn’t for the cast pistons…. I do get some exhaust fumes into the car, which is inherent in these models when you have the windows down, but it just adds to the overall experience.

So here we are today… with lots still to do. Plenty of lessons learned from just going out and doing it, rather than planning it out. Overspent on parts I didn’t need, just because I thought they would work and they didn’t. It happens, but trying to minimize the cost was still a goal which unfortunately didn’t happen exactly the way I wanted it. When you have to buy two engines within a year, that’s not good at all for anyone’s budget.
widebody 280z build (120)
For the near future, the plans are to get the body prepped and find someone who can paint it or do a wrap… Get some turn signals back onto the car and get the interior put back together. Seam seal the rear inner fenders, and put some sound deadening and insulation down in the rear of the car to help prevent some of the fumes from coming in to the car from the exhaust. Redo the body wiring on the car as well at some point and under the hood. Reroute a few plumbing items and clean up the engine bay… and finally figure out how I’m going to re-do the front hubs. The center bore on the HRE wheels is 58mm, and the center bore on the hubs are 73mm on the car. So they will need to be opened up a bit on the wheels. Maybe a spacer or two will help offset some of that bore on the hubs so they can fit. Time will tell… What does the future hold? Maybe a 3.2L with ITB’s… but that will be way down the road unless I win the lottery or something!
widebody 280z build (121)
A final lesson that was quickly learned was with these big tires… burnouts just dont happen anymore. Already broke a u-joint. Luckily I was right outside my house when it happened, and was easily able to fix it.

MOD LIST
Rebello P90 Head work Street Ported with supertech valvetrain
Rebello Camshaft (63DE) .487 lift 279 duration
Rebello 3.0L Stroker 297hp @ 6700RPM (Engine Dyno / Car Dyno 225hp)
Champion 3 Row Aluminum Radiator
Electromotive XDI Ignition with CAS
NGK Spark Plugs
Accel 7048 8.8mm 300+ Spark Plug Wires
Kameari 50mm Intake Manifold
Triple Weber DCOE45
MSA 2.5″ Coated Header 3-2-1
JDM Heatshield
Godspeed 10 Row Oil Cooler
Reduction Gear Starter
1983 ZX Alternator Mod
Energy Suspension Polyurethan Bushing Kit
Tokico Illumina Struts/Springs
5 Speed Close Ratio Transmission
Competition Clutch Stage 2
Competition Clutch Lightweight flywheel 10lb
Custom SS Exhaust
Magnaflow XL #12616 Straight through muffler
Toyota Front Caliper Mod with Cross drilled rotors
Maxima Rear Caliper Mod with Cross drilled rotors
Earls Stainless Brake lines and fittings
Vintage 3 Piece Hayashi Racing HRE 505 wheels 17×10.5 Front and 17×14 in Rear (-63.5 offset)
KUHMO 275/40/17 up front and 335/35/17 in rear
Ebay GT Fender Mirrors
JDM Tail lights
Datsun Competition Hood Scoop
MSA Victory Spoiler
Ztrix Street IMSA Body kit
Custom Upholstered

DCOE 45 jet settings:
38 choke
145 main
160 air
65f7 idle
f11 tube
00 Pump Bleeds
45 pump jet

Lastly, here’s my spreadsheet for the build, including costs and details:
widebody 280z build (123)

Questions about this build? Comments? Discussion here: Widebody 280Z discussion

Stay tuned – I’ll be updating this build article as the project progresses. I hope you’ve enjoyed it so far, and I’m looking forward to seeing you all at an event soon.
-Stuart

Filed Under: Performance, Restoration, Z cars

76 Datsun 280Z Widebody Build – “Banzai Runner” – Part 16

April 24, 2014 by Greg

Sunday morning at 7 am, I was headed back to John’s shop in Scottsdale, this time to get the front fenders and the IMSA G-nose installed. Again, lots of trimming, sanding, and fitting for a good fitment. The fiberglass parts aren’t perfect, as they’re made for race cars who don’t care about fitment. We just cut away enough to get it close, and I will need to do all the detail work on my own at home now.
widebody 280z build (115)
The biggest challenge we had was getting the headlights mounted. John had never mounted these pieces before, because he had never had a request for it. So this was all new territory. The issue was to make sure the headlight was mounted in the center of the fender as well as on the headlight bucket on the G-nose. It took several hours to get this down right with lots of measuring and fitment testing again. As you can see, the stock hinges were converted to work with a G-nose front end. The stock 280Z turn signal lights also had to be removed.
widebody 280z build (114) widebody 280z build (113)
Finally… everything came together, and we bolted it all up.
widebody 280z build (112) widebody 280z build (117)
The front lip measures 5.5″ off the ground. We would need to do some more testing with the front wheels now, and this is where we ran into another issue. That spacer is causing problems again, pushing the wheel out too far. I was not able to turn the wheel very far without it hitting the fenders. We thought about trimming the fenders, but I’ll just have to get the front hubs converted like I did on the rears. So I made a call to my wife, who brought me out my old 16×8 XXRs and they were put on instead. I was able to drive home on those without any issues.
widebody 280z build (118)
At this point, there is still a lot to be done: Front hubs with 5 lug conversion, more body work, paint, and I have to put the interior all back together again. We took everything out of the interior during the welding so we could watch for fires. It’s not done by a long shot, but it’s close enough to where I can drive it again, and have some fun with it in the meantime.
widebody 280z build (110) widebody 280z build (119) widebody 280z build (116)
Planning ahead was definitely not optimal, especially with the wheels. I spent a lot, but learned a lot along the way. Such is life when you start hot rodding and going outside the boundaries of what’s considered “normal” off-the-shelf parts. The flares were sold as well as the front air dam to help pay down some of the added cost. The $400 hub adapters might wind up as expensive paperweights, unless someone wants to buy them down the line.

In the next episode, we’ll pause and assess where the car stands now, and plan for the rest of the restoration / modification.

Questions about this build? Comments? Discussion here: Widebody 280Z discussion

Filed Under: Performance, Restoration, Z cars

76 Datsun 280Z Widebody Build – “Banzai Runner” – Part 15

April 23, 2014 by Greg

Once the roughed-in fenders were sent off, three weeks passed when John texted me, and said to start thinking about getting another date ready to come over and get the new rear panels mounted. Along with that text, was a picture of the final product test-mounted on his parts testing/fitting Z.
widebody 280z build (109)
One of the things I did do while I was waiting was to get the rear tires replaced. They don’t make 335/35/18 anymore. I found another Z owner running 345/45/18s on a hot rod open-wheeled Z just like I had done. So I went with the 345s. Ordered them from TireRack.com and had them drop shipped to Firestone to have them mounted. The Firestone guys were all intrigued as to what kind of car these were going on. When I told them a 76 280Z Datsun, no one believed me. That’s when I took out the pictures and they were all shocked and giddy at the same time!

Checking out the tires before mounting – they’re insanely large! This was possibly a bad idea on my part to change tires. We had measured everything around 335/35, and now I have 345/40. After discussing with John, he was pretty confident there wouldn’t be any issues. Pretty meaty tires – if you’re a vegetarian, I suggest you look away!
widebody 280z build (106)
With the new rubber on the wheels, the car looked quite ridiculous. I had to cut out the inner fender just to make them fit. The inner fender was spaced out in 1″ strips, and cut deep into the fender. There would be no more trailering the car around at this point. I would be driving it over there early on a Saturday morning. Got the car over there, and onto his lift. We worked the tabs a bit, and got them welded up to the body, and then trimmed and rounded a bit – just in case someone was under in the fender, they wouldn’t slice open an artery. Doesn’t need to be too pretty, as no one is going to see this stuff anyways. If anyone has done this before, there is quite a large cable bundle that runs through this fender. We tied a string to the end of the cable that plugs into a harness under the passenger seat. When we pulled it out through the hatch, we could easily pull it back through into the car without any issues. The antenna is on the driver’s side, but I’m not running a radio – No need when you got triple Webers! So I removed it off the car altogether.
widebody 280z build (105) widebody 280z build (107) widebody 280z build (108)
Now the fun could finally start with the fenders. We used a SEM epoxy product, About $35 per 7oz bottle. We drew a line around the fender on the car, and then cleaned up with a grinder to get down to metal. This ensures the epoxy had a strong point on the car to bond to, and not just paint or filler.

The fender was then mounted with drywall screws on the car to hold it into place.
widebody 280z build (110)
Both sides were done, and tires were remounted. We lowered the car, and checked for any rubbing or clearance issues. A solid drive was necessary to make sure it was going to be ok on the road, so I took it for a quick spin around the block, and made sure to hit some bumpy stuff, as well as making it squat. More trimming was needed, and eventually everything was perfect. The fenders added an additional 8 inches from the original stock fender lip location, widening the Z by a full 16 inches!

With no headlights, I had to be home before dark. So we finished up and called it a day. I made it home with plenty of daylight to spare for another picture. I got plenty of thumbs up, honks, and looks while I drove home on the freeway. “Breaking necks” is what I was told this was called…
widebody 280z build (111)
Up next, we tackle the front – Will it be as radical as the rear? Join us to find out!
Questions about this build? Comments? Discussion here: Widebody 280Z discussion

Filed Under: Performance, Restoration, Z cars

76 Datsun 280Z Widebody Build – “Banzai Runner” – Part 14

April 22, 2014 by Greg

I sent John an email and after a lot of measuring and pictures, and more measuring, he was pretty sure he had something that would work. So we set up a date to meet. Got my car all tied down on a trailer and headed over to his place on a Thursday morning out in Scottsdale, AZ. I had to strip the car down as much as possible for the work we were going to be doing. I took off the front fenders and airdam. (I kinda dig the open wheel look!) Did some body prep work, clean up and sanding with the fenders removed as well as some light repair work.
widebody 280z build (102) widebody 280z build (94)
Met up with John, and we went to his fiberglass shop to get the panels and got the small tour. Eventually we found the parts we were looking for, as well as some ‘extra’ stuff as just in case that he had made, and I was introduced to the new addition with the front fenders and airdam. We grabbed all the parts and headed back to his shop and did some light mockup work.
widebody 280z build (95) widebody 280z build (93) widebody 280z build (103)
But it wasnt all high fives… the fenders in the rear, were clearly not wide enough.
widebody 280z build (100)
So John hatched a plan. We could use two of his fenders, and overlay them on top of each other. We could see how well they matched up, and then we could work the shape after that to come up with something new, and custom. Wide wheels have always been “in” and it was a trend that clearly wasnt going to go away. So this would help him, as much as it would help me. So we set down the road with both of us having some interest in this.

We mounted up the two panels and began to work out the shape. This took us 4 DAYS of grueling work to come up with a shape that we were all happy with just for the rears. These would become the ‘plugs’ for which molds could be made from. I later learned that this is just all prep work for the molds. Once you get the molds done from the plug, you pretty much toss it.

Panels screwed to panels screwed to car.
widebody 280z build (99)
widebody 280z build (101) widebody 280z build (96) widebody 280z build (104)
With one side completed in a very rough form, now we had to do the other side. We had to create an identical side now that would need perfect symmetry. Lots and lots of measuring, and about 11pm we finished. widebody 280z build (97)
It came out awesome. It just looked right, like it was meant to be. Strangely it started to also look a bit “Porsche-like” as well with the wide hips. At this point they would need to come off, and be sent over to his fiberglass shop, where they would be fine tuned so that the mold could be made. We unscrewed the panels from the car, and it was the last time I would see these panels.
widebody 280z build (98)

Next episode: With the Banzai Runner at the point of no return, would it stay on track?

Questions about this build? Comments? Discussion here: Widebody 280Z discussion

Filed Under: Performance, Restoration, Z cars

76 Datsun 280Z Widebody Build – “Banzai Runner” – Part 13

April 22, 2014 by Greg

Eventually the cheap XXR wheels were getting to me, and I wanted something with a little more pizzazz. Everyone seems to do Panasports, CCW’s, TE37’s/Volks/Rays Wheels type of setup. I agree they look fantastic on the car, but I was trying to be somewhat different, remain somewhat period-correct, and go against the grain.

That’s when I found a craigslist ad in December of 2014 that was a game changer. Vintage pre-90’s Hyashi Racing Equipment (HRE) 3 piece 505’s. 17×13 in the rear, and 17×10.5 up front.
widebody 280z build (84)
I became so excited when I found these wheels. I had been searching for HRE-505’s for a while, and got extremely lucky finding these. A couple weeks of greyhound bus shipping, and here they are. I didn’t put much thought into this, other than I would ‘make it work’. Somehow, some way, these were going on the Z. That’s what hot rodding is all about, isn’t it?

So the first thing was I searched far and wide on getting the lug pattern changed. No one was willing to redrill these wheels to make a 4×114.3 fit. So I found a company on the internet, and $400 later I had a set of hubcentric wheel adapters. Unfortunately the smallest size they came in was 2″ wide. One side bolted to the hub, the other side bolted to the other half of the adapter.
widebody 280z build (83) widebody 280z build (85)
I got them mounted on the car, and I wasn’t too sure about this… this looked like it was going to be a problem.
widebody 280z build (86)
Next I went looking for the biggest flares I could find. BAMF, ZG, none were big enough. I eventually found the Marugen Shokai Works flares out of Japan. I heard they were some of the biggest flares you could get. I paid a pretty penny to get them, $650 to get them over here from Japan. The flares themselves only ran about $320 if I remember right – the rest was fees and shipping. No one knew the exact width, but they were what I had to go with. Needless to say… they were not big enough.
widebody 280z build (88)

The next month or so January to February of 2015 I spent all my time and energy to rebarrel the wheels. They were 3-piece wheels after all, so that meant I could get new barrels and have the offset changed a bit to make it work under this flare. Nobody, and I mean nobody could do it. Even HRE didn’t have the tooling anymore to do these wheels – too old. That was a pretty common thing I got back from everyone, was they don’t make 3 piece wheels like this anymore (sandwich style).
widebody 280z build (91) widebody 280z build (87)
Defeated, I kept looking for a way to make this happen… I got in contact with Silvermine motors, and got their 5 lug conversion stub axles. This would eliminate the 2″ of extra room taken up by the wheel adapters. Someone also mentioned doing “flares on flares” but I just wasn’t down with that. It seemed a bit ridiculous to me in theory. Lots of work later, and another $200 spent, I had new new 5-lug stub axles in place… But still not enough.
widebody 280z build (92)
It helped, but still, I had 2″ sticking out past the flare. I was OK with this, I guess. It was extra wide, I told myself… [EDITOR’S NOTE: Thank God it didn’t stay this way.]
widebody 280z build (90)
But then I got a break. Through a local high-end tire and wheel company in Tempe, AZ (Wheel Specialists) they mentioned a name. “John Washington” who might be able to help me. Eventually I found ztrix.com and gave John a call…

Up next – Banzai Runner goes to a whole new level.

Questions about this build? Comments? Discussion here: Widebody 280Z discussion

Filed Under: Performance, Restoration, Z cars

  • 1
  • 2
  • 3
  • Next Page »

Datsun_Z power steering Datsun_Z fiberglass fenders Japanese Classic Car Show

Datsun at Barrett-Jackson 2018 – Lot #49

Datsun B310 (210) Rescue and Rehab – Part 2

Datsun at Barrett-Jackson – Lot 453

1968 Datsun 1600 SSS Export Market Brochure

The Rat Bastard: VQ-powered Datsun 620 Drift Truck

76 Datsun 280Z Widebody Build – “Banzai Runner” – Part 5

Datsun at Barrett-Jackson 2018 – Lot #349

EFI Troubleshooting with Kent / Moore J25400 Analyzer

© Copyright 2017 Datsun Forum · All Rights Reserved