• Datsun Forums
  • Datsun Heritage
  • Datsun Tech Articles
  • Datsun Service Manuals
  • Datsun Advertisements
    • 240Z, 260Z, 280Z, 280ZX
    • Roadster / Fairlady Sports
    • Pickups and Trucks
    • Datsun 310 / 312 & 410 / 411
    • Datsun 510 / Bluebird
    • Other Datsun Models
    • Datsun-branded Ads
  • About

Datsun Discussion Forum

A forum for restorers, collectors, drivers and enthusiasts!

Remembering Arthur Hughes and his Datsun 510

July 9, 2014 by Greg

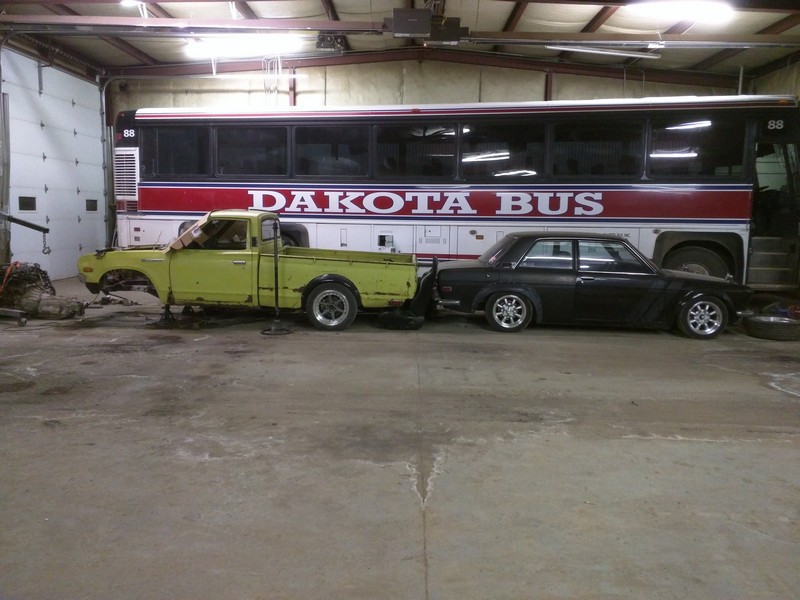
“They don’t make ’em like they used to…”

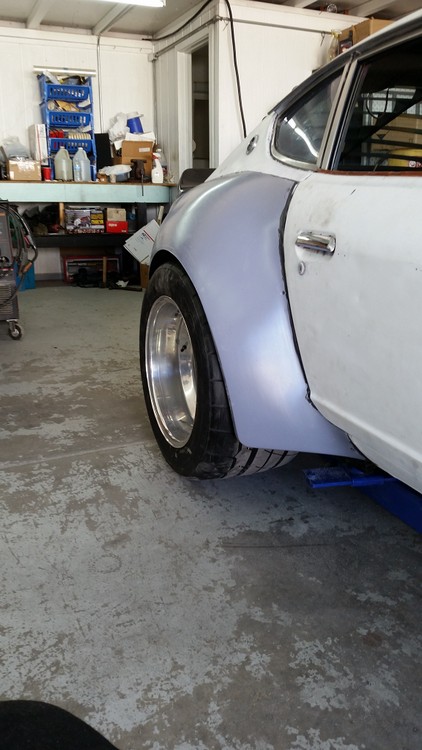
As Datsun enthusiasts, we all know that the chances of finding an early Datsun 510 that is stock and unmolested is usually pretty impossible. While there are several examples of well-preserved stock 510’s in North America, there is one particular car that really stands out. We’d like to tell you more about this amazing car… but more importantly, we’d like to tell you the story that goes along with it.

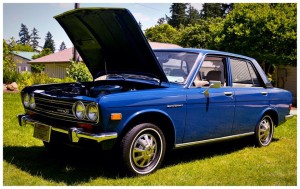
On November 9, 1971, Arthur Hughes purchased a 1972 Datsun 510 4-door sedan from Brasso Datsun in North Vancouver (Canada’s largest Datsun dealer). The car was intended to be driven by his aunt, who, due to her age, could no longer drive a larger car. The 510 came with most of the available options: Automatic transmission, tinted glass, rear window defroster, AM radio, dual side mirrors, engine trouble light, complete undercoating, and radial whitewalls and several other options.

In January 1979, Arthur’s aunt passed away, but bequeathed the 510 to Arthur in her will. At that time, she had only put 7,000 miles on the odometer. Amazingly, even the factory-installed clear protective vinyl was still on the rear door panels.


Filed Under: Uncategorized

The Datsun Fuel Injection Bible – 200SX, 280Z, 280ZX, 810

July 9, 2014 by Greg

This factory-issued manual contains all the information you need to troubleshoot, maintain and service the fuel injection system on your 1975 to 1980 Datsun.

The manual covers fuel injection systems for the Datsun 810, the 200SX, and the 280Z and 280ZX.

The manual is broken up into sections for ease of use – Click the link for the section you wish to view.

Section 1 – Principles of Operation

Datsun EFI Fuel Circuit
Datsun Fuel Injection Air Flow
Sensor Inputs to Control Unit
The Cold Start System
EFI Electrical System

Section 2 – Datsun EFI Troubleshooting

EFI Quick Checks (without special tools)
EFI Multimeter or Volt/Ohm Meter Checks
Wiring Diagrams (All Models) 1975 – 1980
EFI Troubleshooting with Kent/Moore J25400 Analyzer

Section 3 – Adjusting EFI Settings

EFI Adjustments


Filed Under: Uncategorized

Rat Bastard: VQ-powered Datsun 620 Drift Truck (Gallery)

July 1, 2014 by Greg

Here’s a whole pickup bed-load of additional pictures of Zack’s Rat Bastard 620 build – We hope you enjoy it!

datsun_620_VQ35DE_S13_suspension (1) datsun_620_VQ35DE_S13_suspension (2) datsun_620_VQ35DE_S13_suspension (3) datsun_620_VQ35DE_S13_suspension (4) datsun_620_VQ35DE_S13_suspension (5) datsun_620_VQ35DE_S13_suspension (6) datsun_620_VQ35DE_S13_suspension (7) datsun_620_VQ35DE_S13_suspension (8) datsun_620_VQ35DE_S13_suspension (9) datsun_620_VQ35DE_S13_suspension (10) datsun_620_VQ35DE_S13_suspension (11) datsun_620_VQ35DE_S13_suspension (12) datsun_620_VQ35DE_S13_suspension (13) datsun_620_VQ35DE_S13_suspension (14) datsun_620_VQ35DE_S13_suspension (15) datsun_620_VQ35DE_S13_suspension (16) datsun_620_VQ35DE_S13_suspension (17) datsun_620_VQ35DE_S13_suspension (18) datsun_620_VQ35DE_S13_suspension (19) datsun_620_VQ35DE_S13_suspension (20) datsun_620_VQ35DE_S13_suspension (21) datsun_620_VQ35DE_S13_suspension (22) datsun_620_VQ35DE_S13_suspension (23) datsun_620_VQ35DE_S13_suspension (24) datsun_620_VQ35DE_S13_suspension (25) datsun_620_VQ35DE_S13_suspension (26) datsun_620_VQ35DE_S13_suspension (27) datsun_620_VQ35DE_S13_suspension (28) datsun_620_VQ35DE_S13_suspension (29) datsun_620_VQ35DE_S13_suspension (30) datsun_620_VQ35DE_S13_suspension (31) datsun_620_VQ35DE_S13_suspension (32) datsun_620_VQ35DE_S13_suspension (33) datsun_620_VQ35DE_S13_suspension (34) datsun_620_VQ35DE_S13_suspension (35) datsun_620_VQ35DE_S13_suspension (36) datsun_620_VQ35DE_S13_suspension (37) datsun_620_VQ35DE_S13_suspension (38) datsun_620_VQ35DE_S13_suspension (39) datsun_620_VQ35DE_S13_suspension (40) datsun_620_VQ35DE_S13_suspension (41) datsun_620_VQ35DE_S13_suspension (42) datsun_620_VQ35DE_S13_suspension (43) datsun_620_VQ35DE_S13_suspension (44) datsun_620_VQ35DE_S13_suspension (45) datsun_620_VQ35DE_S13_suspension (46) datsun_620_VQ35DE_S13_suspension (47) datsun_620_VQ35DE_S13_suspension (48) datsun_620_VQ35DE_S13_suspension (49) datsun_620_VQ35DE_S13_suspension (50) datsun_620_VQ35DE_S13_suspension (51) datsun_620_VQ35DE_S13_suspension (52) datsun_620_VQ35DE_S13_suspension (53) datsun_620_VQ35DE_S13_suspension (54) datsun_620_VQ35DE_S13_suspension (55) datsun_620_VQ35DE_S13_suspension (56) datsun_620_VQ35DE_S13_suspension (57) datsun_620_VQ35DE_S13_suspension (58) datsun_620_VQ35DE_S13_suspension (59) datsun_620_VQ35DE_S13_suspension (60) datsun_620_VQ35DE_S13_suspension (61) datsun_620_VQ35DE_S13_suspension (62) datsun_620_VQ35DE_S13_suspension (63) datsun_620_VQ35DE_S13_suspension (64) datsun_620_VQ35DE_S13_suspension (65) datsun_620_VQ35DE_S13_suspension (66) datsun_620_VQ35DE_S13_suspension (67) datsun_620_VQ35DE_S13_suspension (68) datsun_620_VQ35DE_S13_suspension (69) datsun_620_VQ35DE_S13_suspension (70) datsun_620_VQ35DE_S13_suspension (71) datsun_620_VQ35DE_S13_suspension (72) datsun_620_VQ35DE_S13_suspension (73) datsun_620_VQ35DE_S13_suspension (74) datsun_620_VQ35DE_S13_suspension (75) datsun_620_VQ35DE_S13_suspension (76) datsun_620_VQ35DE_S13_suspension (77) datsun_620_VQ35DE_S13_suspension (78) datsun_620_VQ35DE_S13_suspension (79) datsun_620_VQ35DE_S13_suspension (80) datsun_620_VQ35DE_S13_suspension (81) datsun_620_VQ35DE_S13_suspension (82) datsun_620_VQ35DE_S13_suspension (83) datsun_620_VQ35DE_S13_suspension (84) datsun_620_VQ35DE_S13_suspension (85) datsun_620_VQ35DE_S13_suspension (86) datsun_620_VQ35DE_S13_suspension (87) datsun_620_VQ35DE_S13_suspension (88) datsun_620_VQ35DE_S13_suspension (89) datsun_620_VQ35DE_S13_suspension (90) datsun_620_VQ35DE_S13_suspension (91) datsun_620_VQ35DE_S13_suspension (92)

Filed Under: 620 Trucks

76 Datsun 280Z Widebody Build – “Banzai Runner” – Part 17

April 24, 2014 by Greg

Although it’s been a love/hate relationship with this project, I still plan to stay on the path to building it the way I want it. I have loved the idea of building a car that could be enjoyed on the track and on the street. I never plan to win any trophies with it, but love the fact I can drive the car down to the local track, spend the day there, and then drive it back home. The car has never been fully restored as you saw, but it’s got patina and soul. It’s a car that’s been used and a car that’s been driven – and driven hard, enjoyed to the fullest.

I’ve logged just over a thousand miles so far, being driven up to Flagstaff, through the canyons in Sedona, and back through Globe. I have a few loops in town I’ll take and storm back down into the valley over the course of a few hours. This was never fully developed as an outright race car, because I like the idea of being able to drive wherever I want. When I haven’t driven it in a while and start it up, I get the biggest smile and feel a bit giddy. No drivers aids or electronics to help out, just the raw output of the straight-six. It still scares me sometimes when I have my foot down on the pedal. Its really fun to play with, a source of freedom, a total personal satisfaction listening to the sounds, and knowing all the mechanical parts doing their job. The triple Webers have a very unique sound – it’s very exotic and you can feel the instant power behind them. It pulls all the way up to 7000 rpms without giving up and probably would continue if it wasn’t for the cast pistons…. I do get some exhaust fumes into the car, which is inherent in these models when you have the windows down, but it just adds to the overall experience.

So here we are today… with lots still to do. Plenty of lessons learned from just going out and doing it, rather than planning it out. Overspent on parts I didn’t need, just because I thought they would work and they didn’t. It happens, but trying to minimize the cost was still a goal which unfortunately didn’t happen exactly the way I wanted it. When you have to buy two engines within a year, that’s not good at all for anyone’s budget.
widebody 280z build (120)
For the near future, the plans are to get the body prepped and find someone who can paint it or do a wrap… Get some turn signals back onto the car and get the interior put back together. Seam seal the rear inner fenders, and put some sound deadening and insulation down in the rear of the car to help prevent some of the fumes from coming in to the car from the exhaust. Redo the body wiring on the car as well at some point and under the hood. Reroute a few plumbing items and clean up the engine bay… and finally figure out how I’m going to re-do the front hubs. The center bore on the HRE wheels is 58mm, and the center bore on the hubs are 73mm on the car. So they will need to be opened up a bit on the wheels. Maybe a spacer or two will help offset some of that bore on the hubs so they can fit. Time will tell… What does the future hold? Maybe a 3.2L with ITB’s… but that will be way down the road unless I win the lottery or something!
widebody 280z build (121)
A final lesson that was quickly learned was with these big tires… burnouts just dont happen anymore. Already broke a u-joint. Luckily I was right outside my house when it happened, and was easily able to fix it.

MOD LIST
Rebello P90 Head work Street Ported with supertech valvetrain
Rebello Camshaft (63DE) .487 lift 279 duration
Rebello 3.0L Stroker 297hp @ 6700RPM (Engine Dyno / Car Dyno 225hp)
Champion 3 Row Aluminum Radiator
Electromotive XDI Ignition with CAS
NGK Spark Plugs
Accel 7048 8.8mm 300+ Spark Plug Wires
Kameari 50mm Intake Manifold
Triple Weber DCOE45
MSA 2.5″ Coated Header 3-2-1
JDM Heatshield
Godspeed 10 Row Oil Cooler
Reduction Gear Starter
1983 ZX Alternator Mod
Energy Suspension Polyurethan Bushing Kit
Tokico Illumina Struts/Springs
5 Speed Close Ratio Transmission
Competition Clutch Stage 2
Competition Clutch Lightweight flywheel 10lb
Custom SS Exhaust
Magnaflow XL #12616 Straight through muffler
Toyota Front Caliper Mod with Cross drilled rotors
Maxima Rear Caliper Mod with Cross drilled rotors
Earls Stainless Brake lines and fittings
Vintage 3 Piece Hayashi Racing HRE 505 wheels 17×10.5 Front and 17×14 in Rear (-63.5 offset)
KUHMO 275/40/17 up front and 335/35/17 in rear
Ebay GT Fender Mirrors
JDM Tail lights
Datsun Competition Hood Scoop
MSA Victory Spoiler
Ztrix Street IMSA Body kit
Custom Upholstered

DCOE 45 jet settings:
38 choke
145 main
160 air
65f7 idle
f11 tube
00 Pump Bleeds
45 pump jet

Lastly, here’s my spreadsheet for the build, including costs and details:
widebody 280z build (123)

Questions about this build? Comments? Discussion here: Widebody 280Z discussion

Stay tuned – I’ll be updating this build article as the project progresses. I hope you’ve enjoyed it so far, and I’m looking forward to seeing you all at an event soon.
-Stuart

Filed Under: Performance, Restoration, Z cars

76 Datsun 280Z Widebody Build – “Banzai Runner” – Part 16

April 24, 2014 by Greg

Sunday morning at 7 am, I was headed back to John’s shop in Scottsdale, this time to get the front fenders and the IMSA G-nose installed. Again, lots of trimming, sanding, and fitting for a good fitment. The fiberglass parts aren’t perfect, as they’re made for race cars who don’t care about fitment. We just cut away enough to get it close, and I will need to do all the detail work on my own at home now.
widebody 280z build (115)
The biggest challenge we had was getting the headlights mounted. John had never mounted these pieces before, because he had never had a request for it. So this was all new territory. The issue was to make sure the headlight was mounted in the center of the fender as well as on the headlight bucket on the G-nose. It took several hours to get this down right with lots of measuring and fitment testing again. As you can see, the stock hinges were converted to work with a G-nose front end. The stock 280Z turn signal lights also had to be removed.
widebody 280z build (114) widebody 280z build (113)
Finally… everything came together, and we bolted it all up.
widebody 280z build (112) widebody 280z build (117)
The front lip measures 5.5″ off the ground. We would need to do some more testing with the front wheels now, and this is where we ran into another issue. That spacer is causing problems again, pushing the wheel out too far. I was not able to turn the wheel very far without it hitting the fenders. We thought about trimming the fenders, but I’ll just have to get the front hubs converted like I did on the rears. So I made a call to my wife, who brought me out my old 16×8 XXRs and they were put on instead. I was able to drive home on those without any issues.
widebody 280z build (118)
At this point, there is still a lot to be done: Front hubs with 5 lug conversion, more body work, paint, and I have to put the interior all back together again. We took everything out of the interior during the welding so we could watch for fires. It’s not done by a long shot, but it’s close enough to where I can drive it again, and have some fun with it in the meantime.
widebody 280z build (110) widebody 280z build (119) widebody 280z build (116)
Planning ahead was definitely not optimal, especially with the wheels. I spent a lot, but learned a lot along the way. Such is life when you start hot rodding and going outside the boundaries of what’s considered “normal” off-the-shelf parts. The flares were sold as well as the front air dam to help pay down some of the added cost. The $400 hub adapters might wind up as expensive paperweights, unless someone wants to buy them down the line.

In the next episode, we’ll pause and assess where the car stands now, and plan for the rest of the restoration / modification.

Questions about this build? Comments? Discussion here: Widebody 280Z discussion

Filed Under: Performance, Restoration, Z cars

76 Datsun 280Z Widebody Build – “Banzai Runner” – Part 15

April 23, 2014 by Greg

Once the roughed-in fenders were sent off, three weeks passed when John texted me, and said to start thinking about getting another date ready to come over and get the new rear panels mounted. Along with that text, was a picture of the final product test-mounted on his parts testing/fitting Z.
widebody 280z build (109)
One of the things I did do while I was waiting was to get the rear tires replaced. They don’t make 335/35/18 anymore. I found another Z owner running 345/45/18s on a hot rod open-wheeled Z just like I had done. So I went with the 345s. Ordered them from TireRack.com and had them drop shipped to Firestone to have them mounted. The Firestone guys were all intrigued as to what kind of car these were going on. When I told them a 76 280Z Datsun, no one believed me. That’s when I took out the pictures and they were all shocked and giddy at the same time!

Checking out the tires before mounting – they’re insanely large! This was possibly a bad idea on my part to change tires. We had measured everything around 335/35, and now I have 345/40. After discussing with John, he was pretty confident there wouldn’t be any issues. Pretty meaty tires – if you’re a vegetarian, I suggest you look away!
widebody 280z build (106)
With the new rubber on the wheels, the car looked quite ridiculous. I had to cut out the inner fender just to make them fit. The inner fender was spaced out in 1″ strips, and cut deep into the fender. There would be no more trailering the car around at this point. I would be driving it over there early on a Saturday morning. Got the car over there, and onto his lift. We worked the tabs a bit, and got them welded up to the body, and then trimmed and rounded a bit – just in case someone was under in the fender, they wouldn’t slice open an artery. Doesn’t need to be too pretty, as no one is going to see this stuff anyways. If anyone has done this before, there is quite a large cable bundle that runs through this fender. We tied a string to the end of the cable that plugs into a harness under the passenger seat. When we pulled it out through the hatch, we could easily pull it back through into the car without any issues. The antenna is on the driver’s side, but I’m not running a radio – No need when you got triple Webers! So I removed it off the car altogether.
widebody 280z build (105) widebody 280z build (107) widebody 280z build (108)
Now the fun could finally start with the fenders. We used a SEM epoxy product, About $35 per 7oz bottle. We drew a line around the fender on the car, and then cleaned up with a grinder to get down to metal. This ensures the epoxy had a strong point on the car to bond to, and not just paint or filler.

The fender was then mounted with drywall screws on the car to hold it into place.
widebody 280z build (110)
Both sides were done, and tires were remounted. We lowered the car, and checked for any rubbing or clearance issues. A solid drive was necessary to make sure it was going to be ok on the road, so I took it for a quick spin around the block, and made sure to hit some bumpy stuff, as well as making it squat. More trimming was needed, and eventually everything was perfect. The fenders added an additional 8 inches from the original stock fender lip location, widening the Z by a full 16 inches!

With no headlights, I had to be home before dark. So we finished up and called it a day. I made it home with plenty of daylight to spare for another picture. I got plenty of thumbs up, honks, and looks while I drove home on the freeway. “Breaking necks” is what I was told this was called…
widebody 280z build (111)
Up next, we tackle the front – Will it be as radical as the rear? Join us to find out!
Questions about this build? Comments? Discussion here: Widebody 280Z discussion

Filed Under: Performance, Restoration, Z cars

76 Datsun 280Z Widebody Build – “Banzai Runner” – Part 14

April 22, 2014 by Greg

I sent John an email and after a lot of measuring and pictures, and more measuring, he was pretty sure he had something that would work. So we set up a date to meet. Got my car all tied down on a trailer and headed over to his place on a Thursday morning out in Scottsdale, AZ. I had to strip the car down as much as possible for the work we were going to be doing. I took off the front fenders and airdam. (I kinda dig the open wheel look!) Did some body prep work, clean up and sanding with the fenders removed as well as some light repair work.
widebody 280z build (102) widebody 280z build (94)
Met up with John, and we went to his fiberglass shop to get the panels and got the small tour. Eventually we found the parts we were looking for, as well as some ‘extra’ stuff as just in case that he had made, and I was introduced to the new addition with the front fenders and airdam. We grabbed all the parts and headed back to his shop and did some light mockup work.
widebody 280z build (95) widebody 280z build (93) widebody 280z build (103)
But it wasnt all high fives… the fenders in the rear, were clearly not wide enough.
widebody 280z build (100)
So John hatched a plan. We could use two of his fenders, and overlay them on top of each other. We could see how well they matched up, and then we could work the shape after that to come up with something new, and custom. Wide wheels have always been “in” and it was a trend that clearly wasnt going to go away. So this would help him, as much as it would help me. So we set down the road with both of us having some interest in this.

We mounted up the two panels and began to work out the shape. This took us 4 DAYS of grueling work to come up with a shape that we were all happy with just for the rears. These would become the ‘plugs’ for which molds could be made from. I later learned that this is just all prep work for the molds. Once you get the molds done from the plug, you pretty much toss it.

Panels screwed to panels screwed to car.
widebody 280z build (99)
widebody 280z build (101) widebody 280z build (96) widebody 280z build (104)
With one side completed in a very rough form, now we had to do the other side. We had to create an identical side now that would need perfect symmetry. Lots and lots of measuring, and about 11pm we finished. widebody 280z build (97)
It came out awesome. It just looked right, like it was meant to be. Strangely it started to also look a bit “Porsche-like” as well with the wide hips. At this point they would need to come off, and be sent over to his fiberglass shop, where they would be fine tuned so that the mold could be made. We unscrewed the panels from the car, and it was the last time I would see these panels.
widebody 280z build (98)

Next episode: With the Banzai Runner at the point of no return, would it stay on track?

Questions about this build? Comments? Discussion here: Widebody 280Z discussion

Filed Under: Performance, Restoration, Z cars

76 Datsun 280Z Widebody Build – “Banzai Runner” – Part 13

April 22, 2014 by Greg

Eventually the cheap XXR wheels were getting to me, and I wanted something with a little more pizzazz. Everyone seems to do Panasports, CCW’s, TE37’s/Volks/Rays Wheels type of setup. I agree they look fantastic on the car, but I was trying to be somewhat different, remain somewhat period-correct, and go against the grain.

That’s when I found a craigslist ad in December of 2014 that was a game changer. Vintage pre-90’s Hyashi Racing Equipment (HRE) 3 piece 505’s. 17×13 in the rear, and 17×10.5 up front.
widebody 280z build (84)
I became so excited when I found these wheels. I had been searching for HRE-505’s for a while, and got extremely lucky finding these. A couple weeks of greyhound bus shipping, and here they are. I didn’t put much thought into this, other than I would ‘make it work’. Somehow, some way, these were going on the Z. That’s what hot rodding is all about, isn’t it?

So the first thing was I searched far and wide on getting the lug pattern changed. No one was willing to redrill these wheels to make a 4×114.3 fit. So I found a company on the internet, and $400 later I had a set of hubcentric wheel adapters. Unfortunately the smallest size they came in was 2″ wide. One side bolted to the hub, the other side bolted to the other half of the adapter.
widebody 280z build (83) widebody 280z build (85)
I got them mounted on the car, and I wasn’t too sure about this… this looked like it was going to be a problem.
widebody 280z build (86)
Next I went looking for the biggest flares I could find. BAMF, ZG, none were big enough. I eventually found the Marugen Shokai Works flares out of Japan. I heard they were some of the biggest flares you could get. I paid a pretty penny to get them, $650 to get them over here from Japan. The flares themselves only ran about $320 if I remember right – the rest was fees and shipping. No one knew the exact width, but they were what I had to go with. Needless to say… they were not big enough.
widebody 280z build (88)

The next month or so January to February of 2015 I spent all my time and energy to rebarrel the wheels. They were 3-piece wheels after all, so that meant I could get new barrels and have the offset changed a bit to make it work under this flare. Nobody, and I mean nobody could do it. Even HRE didn’t have the tooling anymore to do these wheels – too old. That was a pretty common thing I got back from everyone, was they don’t make 3 piece wheels like this anymore (sandwich style).
widebody 280z build (91) widebody 280z build (87)
Defeated, I kept looking for a way to make this happen… I got in contact with Silvermine motors, and got their 5 lug conversion stub axles. This would eliminate the 2″ of extra room taken up by the wheel adapters. Someone also mentioned doing “flares on flares” but I just wasn’t down with that. It seemed a bit ridiculous to me in theory. Lots of work later, and another $200 spent, I had new new 5-lug stub axles in place… But still not enough.
widebody 280z build (92)
It helped, but still, I had 2″ sticking out past the flare. I was OK with this, I guess. It was extra wide, I told myself… [EDITOR’S NOTE: Thank God it didn’t stay this way.]
widebody 280z build (90)
But then I got a break. Through a local high-end tire and wheel company in Tempe, AZ (Wheel Specialists) they mentioned a name. “John Washington” who might be able to help me. Eventually I found ztrix.com and gave John a call…

Up next – Banzai Runner goes to a whole new level.

Questions about this build? Comments? Discussion here: Widebody 280Z discussion

Filed Under: Performance, Restoration, Z cars

76 Datsun 280Z Widebody Build – “Banzai Runner” – Part 12

April 21, 2014 by Greg

With the engine gremlins defeated, and a potent, functional powerplant under the hood, it was time to make the car all one color. What we budgeted quickly dried up, so primer white it was going to have to be for a while. I didn’t want to do primer grey so I went with white instead. Kind of a mistake because EVERYTHING sticks to it, and doesn’t come off… but that’s the purpose of primer!

Masked off everything with painters tape and newspaper. I didn’t take very many pictures of this process, and started taking things off when I realized I hadn’t taken a single picture yet.
widebody 280z build (78) widebody 280z build (80) widebody 280z build (82)
Eventually fender mirrors were added to further that foreign look several months down the road. The are indeed functional. However, they take some getting used to. Once you get used to them, it’s pretty easy to navigate with them down the road. They are not authentic but, a GT mirror knock off out of Taiwan on ebay – about $80-ish which is a far better deal than the $300 or so for the real things.

A “broadway” mirror was added as well to allow a broader field of vision to the rear. It’s a 270mm convex mirror, and works really well to get both corners of the car. However, in the middle it looks like everyone is tailgating, since the mirror is curved.

I got tired with the rear of the car, and started looking for a duck tail spoiler for it. I wasn’t sure if I wanted a three-piece, a 432 replica, a BRE, a Victory or what. Eventually from looking at pictures online, I went with the Victory from MSA. It was a very easy install, and really went towards the look of what I was trying to accomplish.
widebody 280z build (81) widebody 280z build (79)
At this point I was pretty satisfied with the car and how it looked. It ran great now, and had the sporty Japanese look I was after. Only about 1000 miles were put on the car just driving on special days to work, and club drives/meet ups. With AZ heat, you don’t really get to drive a car without AC much, so it sits in the garage for several months during the summer months.

It sat about this way for about a year before I was finally able to have some fun in it.

Datsun 280Z – Fly-by

Banzai Runner startup and exhaust sound

Dyno tuning the carbs, and timing in at UMS Tuning in Mesa. It was EXTREMELY loud. The recording doesn’t even come close to replicating how loud this car was screaming! I need to get back out there again, now that I think about it.

Up next – The Banzai Runner gets some PROPER wheels and tires – and another setback.

Questions about this build? Comments? Discussion here: Widebody 280Z discussion

Filed Under: Performance, Restoration, Z cars

76 Datsun 280Z Widebody Build – “Banzai Runner” – Part 11

April 20, 2014 by Greg

Eleven episodes into the build series, and you’re still here? Well, that’s awesome – if you can stick around to read, I can stick around to finish the project.

Another couple months passed, and after a few payments to Dave at Rebello I had my engine back! 89mm bore, with cast pistons and a pin height of 35.5mm, L20 rods, and a machined 280z crank to create a 3.0L engine. Compression ratio is around 10:1 because of the shaved P90 head, if not a bit higher I believe. It has his 63DI-9 cam in the head with a .480/280 lift and duration.
widebody 280z build (69)widebody 280z build (70)
I’m sure you noticed the electric water pump is gone as well. I found out the water pump wasn’t shielded. When the car turned on, the EMF screwed up with the crank angle sensor pickup, causing it to read incorrectly. If I pulled the fuse on the water pump it would start up immediately (when there weren’t other issues). The generic fans were not cutting it either in the Arizona heat during a few small drives. So I opted to go back to old standby. The alternator was upgraded to an 80 amp as well – not that I needed it, but I wanted the external voltage regulator gone. It basically became a 2 wire setup, ground and battery.
widebody 280z build (68)
widebody 280z build (71)
So while the engine was out, I came across a smoking deal I couldn’t pass up. A brand new Kameari intake manifold. I absolutely loathed the Cannon intake linkage setup, but I love the return spring at the end of the throttle bar. It’s adjustable and very heavy duty. It can be cable driven or use the stock pedal linkage. I opted to go with a cable, which is a lot more sensitive than the stock linkage. The body has all the same modifications Dave did on the Cannon, and it has shorter runners. The Kameari intake had to be modified slightly to fit around the MSA header flange. I bought an aluminum bit for my drill and massaged out the areas on the intake to make it play nice with the MSA header.
widebody 280z build (72)
The orange hard plastic/rubber things you see are phenolic thermal insulating spacers. They stop the heat transfer of the engine through the metal to the carbs. You can literally touch the carbs after driving without burning your hand, while you can barely touch one of the throttle arms because it’s so hot. They work EXTREMELY well! Unfortunately I have found no one in the US that sells them. They are relatively cheap, about $5 each with gaskets.
widebody 280z build (74)
widebody 280z build (73)
The throttle arm turnbuckle is spring loaded where it connects to the arms on the rod and carbs. Makes it very easy to take on and off. Everything was already adjusted, I didn’t have to make any changes on the arms as they already the same length. The throttle cable setup was a hodgepodge of parts. Lokar cable kit, custom bracket by Savage42, and some other bits.
widebody 280z build (76)widebody 280z build (75)
Unfortunately, I cant find any pictures of the heat shield by itself, but the new one I purchased was by far the best. It mounts to the front of the carbs, and has an adjustable tray underneath. Its a two-piece setup. It was imported from Japan off the yahoo auctions site. The flange up front keeps the hot blast from the radiator shielded away. I plan to run some ducting from under the car, and mount it to the front of the shield. It will then have a blast of cooler outside air coming across the carbs.
widebody 280z build (77)

Up next – Banzai Runner gets a preliminary coat of paint and finally gets to have some fun out on the road!

Questions about this build? Comments? Discussion here: Widebody 280Z discussion

Filed Under: Performance, Restoration, Z cars

  • « Previous Page
  • 1
  • …
  • 8
  • 9
  • 10
  • 11
  • 12
  • …
  • 14
  • Next Page »

Datsun_Z power steering Datsun_Z fiberglass fenders Japanese Classic Car Show

76 Datsun 280Z Widebody Build – “Banzai Runner” – Part 9

Stunning 1978 Datsun 280Z For Sale – Florida

Datsun Competition Parts Catalog 1976

The Scarab legend – The original hybrid Datsun Z.

The 1976 Datsun Lineup of Cars and Trucks

Datsun Electronic Fuel Injection – Air Flow

1972 Datsun emissions maintenance, adjustments and warranty

A 1976 Datsun F10 Graces Datsun Ranch for the Winter

© Copyright 2017 Datsun Forum · All Rights Reserved