• Datsun Forums
  • Datsun Heritage
  • Datsun Tech Articles
  • Datsun Service Manuals
  • Datsun Advertisements
    • 240Z, 260Z, 280Z, 280ZX
    • Roadster / Fairlady Sports
    • Pickups and Trucks
    • Datsun 310 / 312 & 410 / 411
    • Datsun 510 / Bluebird
    • Other Datsun Models
    • Datsun-branded Ads
  • About

Datsun Discussion Forum

A forum for restorers, collectors, drivers and enthusiasts!

76 Datsun 280Z Widebody Build – “Banzai Runner” – Part 5

April 4, 2014 by Greg

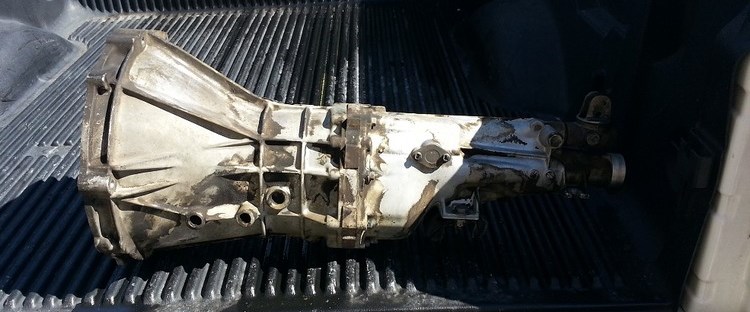
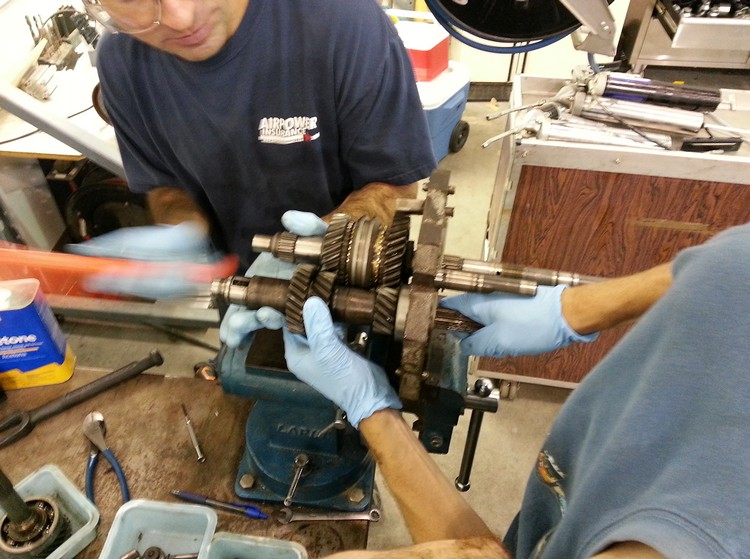
With the interior in nice condition, it was time to get back into the drivetrain. I sourced a close ratio 5 speed transmission to swap in place of the 4 speed. It was a Craigslist find for $120. Not knowing what the condition was like, I got “vanmansam” and “tjyak50” off Desert Datsuns (local Datsun club) to help with a rebuild. TJ was racing his Z, and had already rebuilt his a few times with some ‘secret sauce’ – which we would be including in my rebuild. I bought all new synchros and bearings from nissanpartszone.com. I think it was about another $300 in parts, plus beer and pizza to do the tear down and rebuild on the 5 speed. Even though a lot of the parts didn’t need to be replaced, I opted to have it done.
widebody 280z build (36)

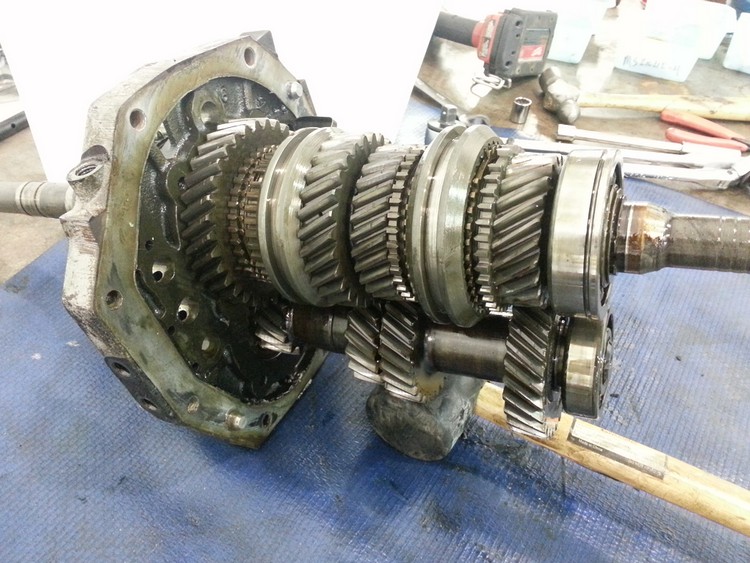
I can’t even begin to tell you what all we did here, except for the complete tear down of the transmission.
widebody 280z build (35) widebody 280z build (31) widebody 280z build (32) widebody 280z build (33)

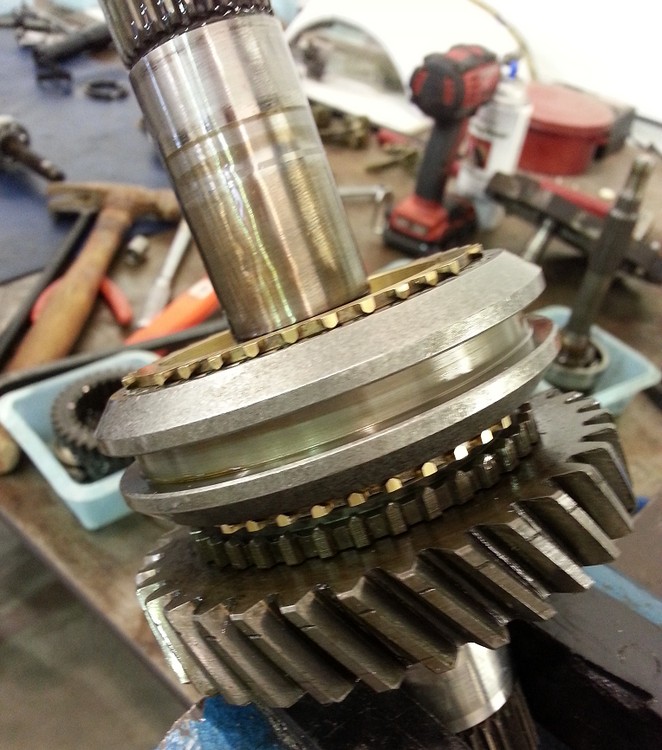
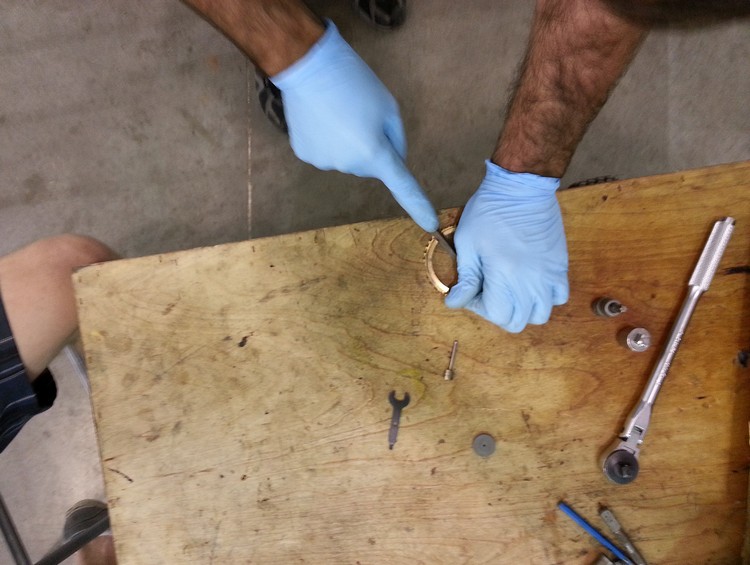
This is part of the ‘secret sauce.’ New synchros ground down a couple thousandths. TJ has it well documented as solving his ‘crunching’ when shifting at 7000 RPM, or even popping out of gear. The tricks he learned at the time (which have since grown) were applied to my transmission.
widebody 280z build (34) widebody 280z build (37)

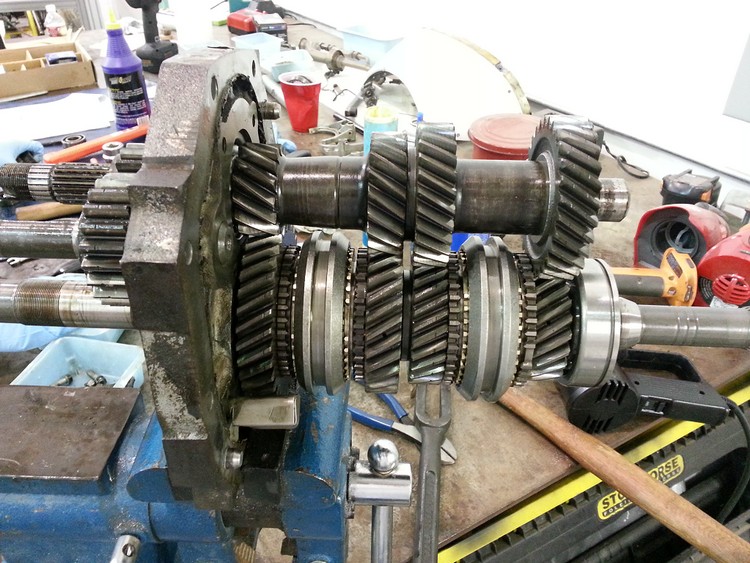
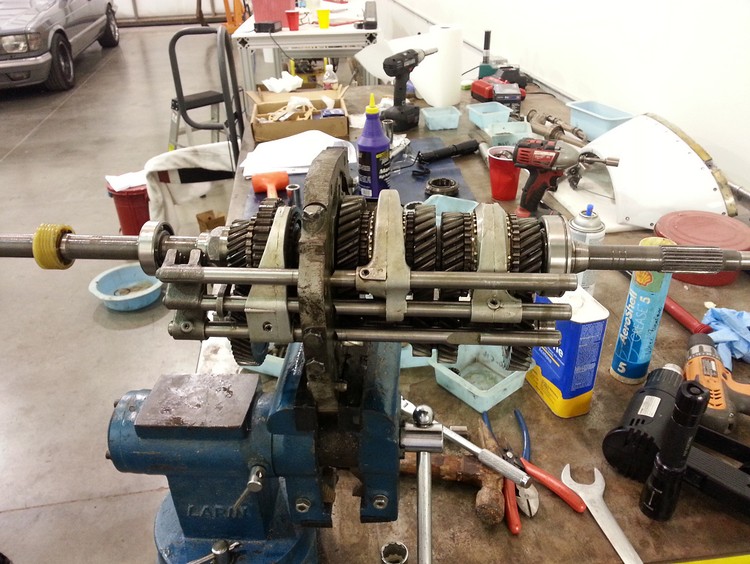
All back together. The rods move the collars. You can see the brass synchros between the gears.
widebody 280z build (38)

In Part 6, we’ll get back to the engine installation!

Questions about this build? Comments? Discussion here: Widebody 280Z discussion

Filed Under: Performance, Restoration, Z cars

76 Datsun 280Z Widebody Build – “Banzai Runner” – Part 4

April 3, 2014 by Greg

With all the effort in the mechanical components of late, we needed to take a break and address some of the interior needs. The original interior doors were cut up pretty badly from the previous owner. From the looks of it, they had a 6×9 speaker of some sort in the door, with tweeters high up on the door. I opted to go out and find new door cards, and with a kit from zcarsource, I was able to recover the new interior panels to like new status.
widebody 280z build (22)

There was a problem however… My 280Z wasnt just a 280Z, it was an extremely early model. This was a hard lesson for me to learn as I was trying not to spend money twice. The door card would not fit because of the lock placement. Do I drill a hole, or preserve this work and sell it? I opted for the second option.
widebody 280z build (23) widebody 280z build (24)

I sourced new door cards, and bought another kit to redo the door cards after selling the others. However, they were in pretty good condition. Due to so many things going on, I just put those door cards on, and haven’t recovered them yet. This would become the first of many small issues leading to some major headaches in some other areas of this build.

The seats turned out awesome in my opinion. I bought a leather kit from one of our sponsors here, Interior Innovations. The deal included free embroidery, as well as any color stitching you wanted. I bought 240Z foam inserts from the z store, and wrangled with the seats until I gave up. I decided to have the pros handle it and went to a shop to have them do it. I don’t think I could have done it any better.
widebody 280z build (25)

As you can see the passenger side rocker panel was totally destroyed. A new one would need to be put into place no doubt about it.
widebody 280z build (26)

This is one part of the project I hope to never do again. But I learned so much during this experience, it’s invaluable now. I never knew how these cars were pieced together. It was interesting seeing how this car all goes together with the various pieces. Basically there are spot welds about every inch or so. You use a special drill bit that drills out around the weld. You do this all the way around, and then beat the panel until it comes off. You then grind down all the existing spot welds, and punch the new part every inch or so. Fit it into place, and then spot weld it back in. I followed up with seam sealer and hammered down the edges around it to create a clean fresh look. The seam sealer filled in any gaps between the metal and created a sealed finish on the part. It was then sprayed with a chemical to protect it from future rust, as well as painted. Interesting enough, when this was put in, it also fixed the passenger side door which had some fitment issues no one could fix.
widebody 280z build (27)

Based off the passenger side damage from rust, I patched a few holes in the floor pan rather than replacing both sides. Thinking about it now, I should have, but it should be fine for a long time. Floors were prepped, treated and then I covered the entire floor and doors with sound deadening / heat-blocking insulation.
widebody 280z build (28)

The dash was freshened with a new full face dash cap. I wanted the vintage look, so I kept the original wood grain steering wheel. It is quite thin compared to normal steering wheels. A new center console was also sourced.
widebody 280z build (29) widebody 280z build (30)

With the bulk of the interior work completed for now, it was time to dig back into the mechanical bits…

Stay tuned – Up next, the Banzai Runner gets a 5-speed!

Questions about this build? Comments? Discussion here: Widebody 280Z discussion

Filed Under: Performance, Restoration, Z cars

76 Datsun 280Z Widebody Build – “Banzai Runner” – Part 3

April 2, 2014 by Greg

All new suspension components, bushings and bearings would be installed. Found a set of Tokico Adjustable Illuminas on Amazon before they went unavailable.
widebody 280z build (10)

Got the rear diff pulled in about half a day. I definitely needed some help from my father in law on this one. We pulled it out all in one piece.
widebody 280z build (11) widebody 280z build (11a) widebody 280z build (12)

One thing I knew for sure I wanted to do was get rid of the drums on the rear. So I went with getting a brake conversion kit using the maxima calipers so I could retain the use of the parking brake. Getting the stub axles pulled apart was not an easy task even when it was out of the car. I should have just cut the brake dust shield, but I pulled it all apart. A hard lesson learned. I found my rear end ratio was 3.54 R200. I did some research and was able to source a 3.91 R200 differential from an 1982 automatic turbo Z here in town.

Knowing I wanted an LSD, I went on the search to find one. I read about several that are available, but some had me worried about reviews I read like the OBX, and others cost more than I wanted to spend like Quaife. I ended up finding a good compromise with a genuine NISMO 2 WAY 38420-RS660 for $350. I took the new LSD and R200 down to Differential Specialists here in town, and they put it together for me for 70$. They did the bushing conversion so it would fit. The ring gear was 10mm, while the nismo lsd was 12mm. It would need bushings to make it fit correctly. The shop used 4 bushings to keep the ring gear centered, and then the rest would not be, but would provide for clamping force as needed. It was filled up with Redline MT90 and Redline LSD modifier.
widebody 280z build (13) widebody 280z build (14)

At this point I knew I wanted to keep with the L28 engine, but have it beefed up a bit. I wanted ‘old school cool,’ so I opted to go the triple Weber route on some kind of modified L28. I found an Ebay seller selling a longblock for $3200. High compression, P90 head, and F54 block. Oversized pistons as well. Everything on paper looked great, so I did the buy it now and waited for it to come in. In the meantime, I was able to get the rest of the suspension put into the car along with the MSA Type 3 air dam. I opted for the big brake kit up front using the well-known toyota 4×4 calipers. I was a bit surprised how easily they went in compared to everything else. Slotted and drilled rotors on all four corners were another performance modification I wanted as I planned to track this car on occasion.
widebody 280z build (15) widebody 280z build (16) widebody 280z build (17) widebody 280z build (18)

More parts started arriving during the week… New ignition system – crank-fired. A more modern ignition system that would remove the need for a distributor, sourced from TopEnd Performance.
widebody 280z build (19)

New engine showed up:
widebody 280z build (20)

…as well as the triple Weber 45 DCOE carburetors from TopEnd Performance.
widebody 280z build (21)

Next up – We take a break from the mechanical upgrades and tackles some interior work.

Thanks for following along so far! Questions about this build? Comments? Discussion here: Widebody 280Z discussion

Filed Under: Performance, Restoration, Z cars

76 Datsun 280Z Widebody Build – “Banzai Runner” – Part 2

April 1, 2014 by Greg

I found this 1976 280Z from a place called Copart here in town in 2013. Oddly it was painted the exact same way as my ZX. Original light sky blue with dark blue on top and bottom. Part of me wondered if the same guy may have owned this car. Also I saw it as a sign that I needed to get this car! I have never seen this paint scheme before other than on the ’79 I had. This car was listed as a donation car, and that all proceeds went to a foundation for kids. I paid $800, sight unseen, just pictures on the internet. I got extremely lucky on this, as I’m sure lots of people are wondering about rust. It’s always been an Arizona car. Sure, for a 40 year old car, there is going to be some rust, but turns out it wasn’t bad at all. A little up front by the headlights as normal. But the passenger side rocker panel and door were completely rusted out which would be fairly easy to replace, and a little back behind the rear tires on both sides.

Pictures of the 280Z at the auction lot:
widebody-280z-build-1 widebody-280z-build-2 widebody-280z-build-3 widebody 280z build (4)

Pictures of the 280Z finally at my father in laws shop, and found some new wheels on craigslist that will help with moving the car around as the restoration progresses:
widebody 280z build (5) widebody 280z build (6)

So the first operation of business was to get the old engine out. Got it pulled out fairly quickly and realized the engine was done for. Coolant had sat in the engine, and rotted away the passages over the last 12yrs. It was brittle like paper, and crumbled without any effort.
widebody 280z build (7)

widebody 280z build (8)

A lot of the rust you see, is just surface rust. It all cleaned up very nicely with minimal effort. The battery tray had no problems whatsoever – always a good sign!
widebody 280z build (9)

The hard part was what to do as a replacement engine. So many choices to chose from… V8, L6, RB, SR, KA… lots of research was done at this point since I hadnt figured out what I wanted this car to become. Everyone was pushing me towards RB, but I wasn’t so sure just yet. Cost was a major factor in all of this as well. I tend to like to be different than everyone else. Something original, something my own creation… So while I was on that task of figuring out what to use as its heart, I continued to tear down the car.

Click here for Part 3 – We dig into the suspension and brakes!

Questions about this build? Comments? Discussion here: Widebody 280Z discussion

Filed Under: Performance, Restoration, Z cars

  • « Previous Page
  • 1
  • 2
  • 3

Datsun_Z power steering Datsun_Z fiberglass fenders Japanese Classic Car Show

More reviews of the legendary Scarab Z – 1976 and 1978

Datsun at Barrett-Jackson – Lot 949.1

Datsun Electronic Fuel Injection – Fuel Circuit

The 1976 Datsun Lineup of Cars and Trucks

Datsun at Barrett-Jackson 2018 – Lot #317

1976 Datsun 280Z sales brochure

Datsun SPL310 Road Test from March 1964 Motor Trend

Datsun at Barrett-Jackson 2018 – Lot #349

© Copyright 2017 Datsun Forum · All Rights Reserved